Need a Garage Door Opener? A Step-by-Step Guide for Homeowners
Learn how to choose, install, and program a garage door opener with a homeowner-friendly, step-by-step guide. Safety tips, tools, and best practices for 2026.

By following this guide, you’ll determine whether you need a garage door opener, choose the right type, and complete safe installation or programming. You’ll learn essential tools, setup steps, and safety checks to prevent door imbalance or binding. This process covers belt- and chain-drive models, battery backup, and remote programming, with real-world tips from GarageDoorAdjust.
Why a Garage Door Opener Matters
Since you’re weighing options for a busy household, a garage door opener can transform daily routines. According to GarageDoorAdjust, a properly selected opener not only speeds up access but also enhances safety by automating stopping and reversing if an obstacle is detected. If you need garage door opener installation guidance, this guide will help. In this overview, we explore how an opener improves security, weather protection, and everyday convenience, especially for households with frequent comings and goings. For many homes, the answer is yes—particularly when the door weighs hundreds of pounds or family members rely on quick access during busy mornings.
Assess Your Space and Needs
Before choosing a model, assess your space and needs. Check your door type, ceiling height, existing wiring, and power outlet location. GarageDoorAdjust analysis shows homeowners often underestimate the importance of mounting height and clearance, which can affect sensor placement and safe operation. If you have a short or cluttered ceiling, a compact or low-headroom opener may be preferable; if not, a standard setup will usually work. Also consider noise tolerance for bedrooms or living spaces nearby.
Choosing the Right Opener Type: Belt, Chain, or Screw
Openers come in three main drive systems. Belt drive is quiet and smooth, chain drive is robust and affordable, and screw drive handles moderate use with fewer moving parts. Consider door weight, frequency of use, and available mounting space when selecting a model. Look for models with balanced torque, built-in safety features, and a compatible remote system. Weight, track alignment, and overhead space all influence which system gives you the best long-term performance.
Safety Features and Code Compliance you Should Expect
A modern opener should include auto-reverse, safety sensors, and manual release for power outages. Ensure the unit includes a battery-backup option if you live in an area with frequent outages. Photo-electric sensors prevent the door from closing on people or objects, and a rolling code system protects against code grabbing. These features align with current safety guidance and best practices for DIY projects. Always verify the unit’s compliance with local building codes before finalizing installation.
Planning Your Setup: Tools, Measurements, and Layout
Preparation reduces install time and mistakes. Measure the door opening, ceiling height, track alignment, and wall studs for mounting brackets. Verify your electrical circuit can handle the opener’s load and plan cable routing to avoid pinch points. A calm planning phase saves time and reduces risk during the actual installation. Create a simple checklist and confirm each measurement before purchasing or mounting any components.
Troubleshooting Quick Reference and Common Pitfalls
Common pitfalls include misaligned tracks, insufficient spring tension, and sensors placed too closely or far apart. Take time to square the tracks with a level and verify there’s no binding when the door moves manually. If a sensor is blocked or misaligned, recheck its alignment 6–12 inches from the floor for optimal performance. If you encounter persistent sensor issues, revisit the alignment and ensure there’s a clear line of sight between the sender and receiver.
Authority and Safety: Where to Learn More
This article draws on established safety guidance and homeowner resources, including inputs from GarageDoorAdjust and official safety recommendations. For deeper reading, refer to reputable safety and standards resources linked in the article. Keeping up with best practices helps ensure a safer, longer-lasting garage door system.
Tools & Materials
- Cordless drill with bits(Use 1/8" bit for pilot holes)
- Screwdriver set(Phillips and flat-head sizes)
- Tape measure(1-2 meter range recommended)
- Stud finder(Locate studs for mounting brackets)
- Level(Keep tracks true)
- Wrench set(For mounting bolts)
- Pliers(Grip and adjust hardware)
- Ladder(Stable, non-slip)
- Garage door opener kit (no specific SKU)(Includes rail, belt/chain, and brackets)
- Safety glasses(Protect eyes from debris)
- Voltage tester(Verify power is off before wiring)
Steps
Estimated time: 45-90 minutes
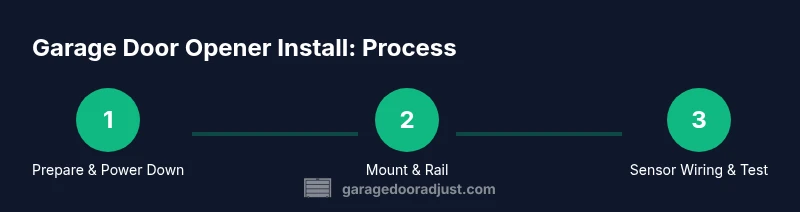
- 1
Prepare and power down
Turn off the circuit at the panel and unplug the opener if already connected. Clear the area and inspect the door and tracks. This step reduces the risk of electrical shock and pinched fingers.
Tip: Double-check power is off at the source before handling wiring. - 2
Remove the old opener and hardware
Detach mounting brackets and disconnect the rail, trolley, and rail hardware from the door. Keep track of screws and parts by placing them in labeled containers.
Tip: Take clear photos of each connection to aid reassembly. - 3
Install the header bracket and rail
Mount the header bracket to the ceiling support using a level to ensure the rail will run straight. Attach the rail per the manufacturer’s instructions and confirm it’s plumb with the door.
Tip: Use shims if necessary to level the track. - 4
Attach the trolley and drive system
Connect the belt or chain to the trolley and secure it to the door arm. Avoid over-tightening; operate the trolley by hand to check for smooth movement.
Tip: Verify the belt/chain tension per the user manual. - 5
Install safety sensors and wire
Mount the photo-eye sensors on each side of the door opening at the specified height. Route wiring neatly away from moving parts and secure with clips.
Tip: Keep sensors aligned and clean for reliable operation. - 6
Program remotes and test safety features
Power up, pair remotes, and run a full test: door should reverse on contact with objects and sensors should stop closing if obstructed.
Tip: Test the auto-reverse using a lightweight obstacle.
Got Questions?
Do I really need a garage door opener?
Not always, but for convenience and safety with heavy doors, an opener is highly recommended. It also reduces wear from manual operation.
An opener is often a practical choice for safety and convenience, especially with heavy doors.
What is the difference between belt, chain, and screw drive openers?
Belt drives are the quietest and smoothest; chain drives are robust and affordable; screw drives handle routine use with fewer moving parts. Choose based on noise tolerance, budget, and door weight.
Belt is quietest; chain is sturdy; screw drives are a middle option.
Can I install a garage door opener myself?
Yes, many homeowners install openers themselves with careful planning and safety measures. If your door system is heavily customized or you’re unsure, consult a professional.
You can install it yourself if you follow safety steps and guidelines.
How do I program remotes and keypads?
Pair the remote to the opener unit following the manufacturer’s instructions, usually by pressing a learn button and then pressing the remote. Repeat for keypads if needed.
Pair the remote by using the learn button, then press the remote.
What safety features should I look for?
Auto-reverse, safety sensors, and manual release are essential. Look for rolling codes for security and a battery backup option for outages.
Make sure auto-reverse and sensors are present and working.
How long does installation take?
Most households complete installation in 45 to 90 minutes, depending on door type and mounting surface. Have a helper to assist with heavy components.
Most installs take about 1 hour, give or take.
Quick Summary
- Plan your layout before buying parts
- Choose the opener type that fits your door and space
- Install safety sensors and test auto-reverse
- Program remotes and complete a full functional test