What Garage Door Opener Do I Need: A Practical Guide for Homeowners
Learn how to choose the right garage door opener for your home. Compare drive types, power, compatibility, safety features, and smart options with practical, step-by-step guidance from GarageDoorAdjust.

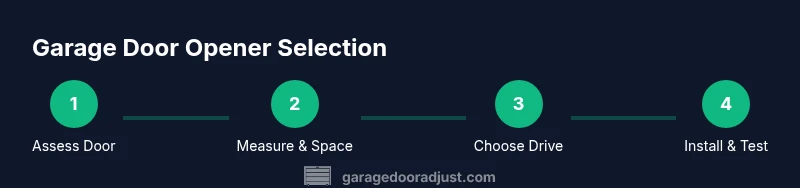
You’ll determine the right garage door opener by evaluating your door weight and size, the drive type you prefer, required horsepower, rail length, safety features, and backup power options. This guide walks you through a clear, step-by-step process to choose and size an opener that fits your setup and budget. Expect practical checks, common mistakes to avoid, and safety reminders.
Why the right garage door opener matters
Choosing the right opener affects daily convenience, energy use, and home safety. A misfit—or an underpowered motor—can strain the opener, shorten its life, and increase noise. The GarageDoorAdjust team emphasizes that the wrong choice often leads to frequent jams, slower cycles, and higher repair costs over time. By starting with door weight, height, track type, and whether you need battery backup or smart features, you set yourself up for reliable operation and fewer headaches.
Key reasons to get it right:
- Safety: The opener’s auto-reverse, photoelectric sensors, and emergency disconnect should function correctly.
- Compatibility: Door height, track radius, and rail length determine what opener fits without modification.
- Efficiency: A properly sized unit operates with less strain and lower energy use.
- Noise and aesthetics: The choice of drive and mounting determines how loud the system is and how visible it will be from living spaces.
- Future-proofing: If you plan to upgrade to a heavier door or add smart home controls, you’ll thank yourself for choosing a scalable system.
Next, we’ll lay out the core compatibility factors to check before you shop.
Core compatibility factors to check
Before selecting a garage door opener, assess several compatibility factors to prevent costly swaps later. Door weight, door height, track radius, ceiling height, and space in the garage all determine which model will fit and perform well. According to GarageDoorAdjust analysis, many homeowners pick an overpowered or underpowered unit because they skip measuring or misinterpret a rail length. Start by locating your door's weight rating, measuring the door height and width, and noting any extensions or curvatures in the track. Then check headroom (the space above the door inside the garage) to ensure the rail can clear when the door travels.
Other practical checks:
- Rail length and mounting height: Some garages have low ceilings; you may need a short-rail option or a low-headroom kit.
- Existing electrical wiring: Verify a dedicated outlet is available near the opener location.
- Battery backup requirements: If you want operation during outages, ensure the model includes a built-in battery or can accommodate one.
- Compatibility with smartphone control and safety sensors: Confirm your preferred features will pair with the chosen model.
GarageDoorAdjust analysis shows that opting for modular, upgradable systems tends to save money in the long run because you can swap to higher capacity parts without replacing the entire unit. Keep your measurements handy and review the manufacturer's compatibility charts as you shop.
Drive types explained: belt, chain, and screw
Opener drives affect noise, cost, and smoothness of operation. Belt drives use a rubber belt for quiet operation and are popular in garages adjacent to living spaces. Chain drives are rugged and typically more affordable but louder, suitable for detached garages or spaces where noise isn't a concern. Screw drives offer fast operation with fewer moving parts, though they can be sensitive to extreme temperatures and need precise alignment. When deciding, balance your priorities: quiet operation for a linked or multi-use space, or cost efficiency for a detached setup. If you share your garage with a workshop or hobby area, a belt drive often provides a noticeable comfort difference. For taller or heavier doors, a higher-torque chain or screw option may be necessary to ensure reliable lifting.
Practical takeaway: pick a drive type that aligns with noise tolerance, budget, and door weight.
Tip: Always check the manufacturer’s charts for compatibility with the door height and track radius before committing to a drive.
Sizing: horsepower, torque, and rail length
The horsepower rating of a residential garage door opener is a primary factor in determining how smoothly it lifts your door. Heavier doors and wider panels require more torque, while lighter doors can perform adequately with a lower-power unit. In most homes, you’ll encounter models offering a balance between ½ horsepower and 1-1/4 horsepower, with higher ratings reserved for premium or oversized doors. Torque relates to the mechanism’s strength to lift resistance, and rail length must accommodate ceiling height and track geometry so the door can travel without rubbing or stalling. When evaluating options, compare the door weight (or manufacturer’s weight class) to the opener’s suggested range, and verify the rail length and mounting height fit your garage’s ceiling. This ensures full travel without bottoming out or hitting the door frame on operation.
Secret to success: If you’re unsure about door weight, start with a mid-range model and consult the chart. You can always upgrade later with compatible components rather than replacing the entire system.
Pro tip: Use a calculator or spec sheet from the manufacturer to map your door weight to a recommended horsepower class.
Measuring and clearance for installation
A precise measurement game reduces post-purchase surprises. Start by measuring the door height, door width, and the headroom (space above the door to the ceiling). Also assess backroom clearance for the rail extension and mounting brackets. If your ceiling is particularly low, you’ll need a low-headroom kit or a compact rail. Check the track radius and ensure there’s room for the rail to bend safely as the door opens. Don’t forget to account for obstructions like lighting fixtures, ceiling storage, or HVAC ducts. Labeling the wiring and mounting points helps during installation and future maintenance.
To minimize alignment errors, mark the location of the ceiling studs and the mounting location for the opener’s brackets. Confirm there is a sturdy surface to anchor the unit and secure the mounting screws. If you must drill into masonry, have the proper masonry bits and anchors ready. Accurate measurements save time and prevent misalignment that can cause rubbing or binding during operation.
Safety features and smart tech
Modern garage door openers come with a suite of safety features designed to prevent accidents and protect belongings. Key elements include photocell safety beams that detect obstructions, auto-reverse when contact is made with an obstacle, and a secure manual disconnect. Battery backup is increasingly common, enabling operation during power outages. Smart features, such as app control, activity logs, and remote monitoring, add convenience but should be paired with a secure Wi-Fi network and strong passwords. If you have children or pets, verify the automatic reversal timing and test every 6 months. Smart features can connect to home assistants, creating automation routines that improve energy use and security.
Safety note: Do not disable auto-reverse or sensors, even during a busy DIY project. The GarageDoorAdjust team recommends annual inspections to ensure all safety components function correctly.
Cost considerations and warranties
Cost is a major consideration, but it’s not the only one. Higher upfront costs often bring quieter operation, longer parts life, and better warranties. When budgeting, consider the opener price, professional installation (if applicable), rail and track kits, and potential future upgrades such as smart controls or extra security devices. Warranties vary by model and installation type; a typical protection window covers the motor and drive components for several years, with wear items like belts or springs addressed separately. Since pricing can vary by region and retailer, it’s best to request a formal quote after confirming compatibility and desired features. Reading the warranty terms and understanding what is covered under routine maintenance helps prevent post-purchase disappointment and hidden costs over time.
Budget-conscious shoppers should compare bundled installation offers with flat-rate service calls, ensuring there are no surprise fees for required add-ons or calibration. The goal is a trustworthy setup that lasts years without recurring repair bills.
DIY vs professional installation and next steps
Deciding whether to install a new opener yourself or hire a pro depends on your comfort with hardware, electrical work, and safety considerations. If you’re comfortable with basic electrical connections, mounting brackets, and rail alignment, a guided DIY install can save money and be very rewarding. However, many homeowners opt for professional installation to ensure precise rail alignment, opener calibration, sensor setup, and door balance checks—services typically included in installation packages. If you choose DIY, follow manufacturer instructions step-by-step, double-check safety sensor alignment, and perform a full test cycle. For most homeowners, especially with newer doors or complex tracks, professional installation minimizes risk and guarantees proper operation.
The GarageDoorAdjust team recommends obtaining a written installation agreement that includes a walk-through of the system, sensor calibration, and a post-installation safety test. After installation, schedule a routine maintenance check every 6–12 months to extend the life of your opener and maintain safety.
Tip: Keep a log of all measurements, part numbers, and settings so future upgrades or replacements are straightforward.
Authority sources
For safety standards and best practices, consult these authoritative resources:
- Energy.gov: Garage door opener safety and efficiency guidance
- OSHA.gov: General electrical safety and equipment handling
- nfpa.org: Standards and guidelines related to home installation and electrical safety
Tools & Materials
- Ladder or step stool(Stable, supports reaching ceiling without overreaching)
- Measuring tape(Minimum 25 ft is helpful; measure door, rail, and headroom)
- Stud finder(Helpful for locating mounting points on wood joists)
- Pencil or marker(Mark measurement points and anchor locations)
- Level(Ensure rails and brackets are perfectly horizontal)
- Drill with bits(For pilot holes and mounting screws)
- Screwdrivers (Phillips and flat-head)(Used to drive screws and adjust hardware)
- Wrenches/Socket set(Tighten mounting hardware securely)
- Safety glasses(Eye protection during installation)
- Pliers(Helpful for wire management and sensor alignment)
- Electrical tester (optional)(Check outlet power before connecting the opener)
Steps
Estimated time: 2-3 hours
- 1
Identify door type and estimate weight
Determine whether your door is a sectional panel, one-piece flush, or other design, and estimate weight using manufacturer data or panel count. This informs whether you need higher horsepower and a different drive type. A quick weight check helps prevent over- or under-sizing.
Tip: If weight data isn’t available, start with a mid-range opener and verify compatibility. - 2
Measure door dimensions and headroom
Measure door height and width, and assess headroom (space above the door to the ceiling). Note any obstructions such as ceiling fans or lighting. Record rail length requirements and any low-headroom constraints.
Tip: Use a level to verify the mounting surface is perfectly flat; small misalignment compounds as you install. - 3
Check space for rails and motor location
Ensure your garage ceiling can accommodate the rail length and the motor housing without interfering with storage or lighting. Consider ceiling height, wall obstruction, and clearance for sensor beams.
Tip: If space is tight, look for a short-rail or low-headroom kit designed for compact garages. - 4
Choose a drive type based on goals
Balance noise, cost, and maintenance needs. Belt drives are quiet and ideal for living spaces nearby; chain drives are affordable and robust; screw drives are fast but may be temperature sensitive. Pick the drive that matches your priorities.
Tip: If you value quiet operation, prioritize belt drives and proper mounting to dampen vibration. - 5
Select horsepower/torque appropriate to door weight
Match horsepower to door weight and height. Heavier doors generally require higher torque. Check the manufacturer’s charts for recommended ranges and confirm rail routing supports your door’s travel.
Tip: When in doubt, choose a slightly higher horsepower that fits the charts; you can’texchange a larger unit for a smaller one later as long as the rails and mounts align. - 6
Verify safety sensors and backup power
Confirm auto-reverse sensors and photoelectric beams are properly aligned. Decide whether you want battery backup for outages and ensure the opener supports it. Safety features reduce risk for family members and pets.
Tip: Test sensors after installation by placing a small object in the beam path to confirm immediate reversal. - 7
Prepare wiring and electrical supply
Ensure a dedicated outlet near the opener and verify the wiring meets local electrical codes. If you’re not comfortable with wiring, hire a pro to handle power connections and GFCI protection.
Tip: Turn off power at the breaker before starting any wiring tasks; label any wires you touch. - 8
Assemble, mount, and align the opener
Mount the header bracket, attach the rail, and align the opener with the door junction. Tighten fasteners to manufacturer-torque specs and ensure smooth travel without binding or rubbing.
Tip: Use a helper to lift the rail into position; misalignment here causes binding and premature wear. - 9
Test operation and calibrate limits
Run multiple cycles to verify opening height, closing distance, and auto-reverse function. Calibrate travel limits and force as recommended by the manufacturer.
Tip: Document your final settings; you’ll need them for future maintenance or upgrades.
Got Questions?
What is the most important factor when choosing a garage door opener?
The most important factor is compatibility with your door’s weight, height, and track layout, plus ensuring the system meets safety standards and fits your noise and smart-home needs.
The key factor is compatibility with your door and safety features.
Do I really need a specific horsepower for my door?
Yes, heavier doors generally require more horsepower or torque to lift smoothly. Use the manufacturer’s charts to match your door weight to the recommended horsepower range.
Yes, heavier doors typically need more horsepower to lift safely.
Are belt drives quieter than chain drives?
In most cases, belt drives are quieter and smoother than chain drives, which makes them a popular choice for garages adjacent to living spaces. Consider your noise tolerance when choosing.
Yes, belt drives tend to be quieter than chain drives.
Can I install a new opener myself?
If you’re comfortable with basic electrical work, mounting, and alignment, DIY installation is possible. For complex ceilings or heavier doors, professional installation is safer and can ensure proper calibration.
DIY is possible for simpler setups, but professional help is safer for complex installs.
What safety features should I verify?
Verify auto-reverse, photoelectric sensors, and manual disconnect. If you want power during outages, check for a battery backup option.
Make sure sensors work and auto-reverse is enabled.
Should I prefer smart features and app compatibility?
Smart features add convenience and security, but ensure the opener supports your home network and devices. Review compatibility with your phone, home assistant, and routines.
Smart features are convenient but ensure compatibility with your devices.
Watch Video
Quick Summary
- Assess door weight and dimensions before shopping.
- Choose a drive type that balances noise, cost, and durability.
- Ensure safety features and backup power are in place.
- Measure accurately and test operation thoroughly after install.
- Decide between DIY or professional installation based on risk and comfort.