Garage Door Remote Key Fob: Replacement, Programming, and Troubleshooting
A practical, step-by-step guide to replacing, programming, and troubleshooting your garage door remote key fob. Learn compatibility checks, learn-button programming, safety tips, and maintenance to keep your opener reliable.

You’ll learn how to replace and program a garage door remote key fob, verify compatibility, and troubleshoot common issues. By the end you’ll be able to pair a new fob with your opener, test it reliably, and avoid common setup mistakes. You’ll need a compatible remote, a fresh battery if needed, and access to the opener’s Learn button.
What is a garage door remote key fob and why it matters
A garage door remote key fob is a compact wireless transmitter that lets you operate your garage door from a distance without touching a wall switch. When paired correctly, it adds convenience, improves entry speed, and reduces wear on the door edge and opener hardware. According to GarageDoorAdjust, upgrading or replacing a malfunctioning fob can restore reliable access and improve safety by eliminating the need to fumble with keys or press a wall button in poor weather. This section explains what makes a fob work, common features, and how to identify the right model for your opener. Expect to encounter differences in frequency, button layout, and rolling code systems between brands. The goal is to have a fob that matches your opener’s learning protocol so you can open or close smoothly with a quick press.
Compatibility and common features
Remote key fobs come in variations by brand and model, but most share core elements: a battery-powered transmitter, a matching frequency, and a learning code that pairs with the opener receiver. When selecting a replacement, verify the frequency (MHz), the type of code (fixed code vs. rolling code), the number of buttons, and the compatibility notes for your specific opener. Some openers only work with branded remotes, while others accept universally coded devices with limitations. Your best bet is to check the opener model number and cross-check it with the remote’s compatibility guide. As a rule, a fob that uses the same learning method (Learn button or DIP switch) is easiest to pair. GarageDoorAdjust emphasizes matching hardware and code types to avoid pairing failures.
Programming basics and methods
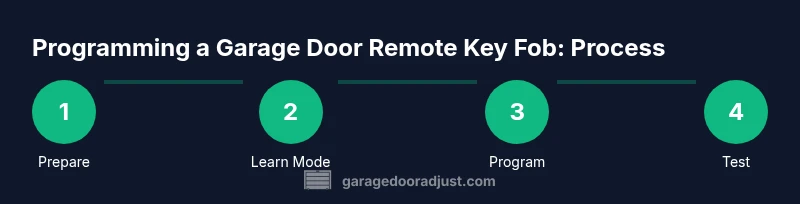
Programming methods vary by opener, but most modern systems use a Learn button on the motor head. Some older units use DIP switches or simple pairing steps inside the remote. The typical process involves: (1) putting the opener in Learn mode, (2) pressing a button on the new fob, and (3) testing the result. If your model supports rolling codes, you may need to perform a sequence that includes multiple button presses or a specific order. Always start with the instruction manual or the manufacturer’s site for model-specific steps. GarageDoorAdjust notes that following the exact sequence matters for reliability and security.
Troubleshooting common issues and safety tips
If a new fob won’t program, first verify battery freshness, correct orientation, and that you’re using the right model for your opener. Common issues include miss-matched codes, proximity problems (too far from the opener), and failed Learn mode entry due to power cycling. Safety is essential: keep hands clear of the door path during testing, never stand in the door’s path while programming, and avoid pressing buttons repeatedly in quick succession. If the door begins to move unexpectedly, stop and reset the process. When in doubt, revert to the manufacturer’s instructions or consult a professional.
Replacement strategy and maintenance
Plan for occasional key fob replacements as your needs change or if your current devices develop dead batteries or intermittent range. Store spare remotes in a known, dry location away from metal objects that could influence signal. Check battery compatibility before replacing, and consider labeling each fob with its designated opener to prevent cross-pairing. Regular maintenance also includes inspecting the opener’s weather seals and ensuring the remote’s case remains intact to protect the internal circuitry. GarageDoorAdjust advocates keeping a primary and one backup fob to avoid getting locked out in a rainstorm or power outage.
Tools & Materials
- Replacement garage door remote key fob(Ensure compatibility with your opener brand and model; check frequency and rolling code.)
- Battery (e.g., CR2032 if needed)(Most remotes use a coin cell; replace only with the correct size.)
- Small screwdriver or tool to open case(Phillips or flathead depending on case screws.)
- Opener manual or model number(Helpful for locating Learn button and exact steps.)
- Optional: Electrical tape(Used to seal the case after battery replacement if needed.)
Steps
Estimated time: 25-45 minutes
- 1
Identify compatibility and prepare
Locate your opener model number and confirm the replacement fob is compatible with frequency, code type, and button layout. Gather the new remote, any required batteries, and a small tool to open the case. This step saves time by preventing incompatible pairings.
Tip: Double-check the model number against the manufacturer’s compatibility list before purchase. - 2
Access the opener Learn button
Find the Learn or smart button on the garage door opener motor head. It is often behind a light cover or on the back of the unit. Have a flashlight handy and avoid touching moving parts.
Tip: If you’re unsure where it is, consult the user manual or the manufacturer’s site for a diagram. - 3
Put the opener into Learn mode
Press and release the Learn button to place the opener in pairing mode; the indicator light usually blinks or stays solid depending on model. Do not place the system into Learn mode for longer than recommended.
Tip: Some models require a hold of the Learn button for several seconds—don’t rush this step. - 4
Program the new remote
Within a few seconds of enabling Learn mode, press and hold a button on the new fob until the opener acknowledges (blinks, beeps, or motor movement). If your model uses multiple remotes, repeat for each button as needed.
Tip: If you miss the window, exit Learn mode and try again from the start. - 5
Test the new fob
Test the remote from the car or at the door to confirm it opens and closes reliably. Move to the device’s range gradually to verify signal strength.
Tip: Test both open and close actions to ensure full functionality. - 6
Secure and finish
If you opened the fob, reassemble the case securely and confirm the battery is seated correctly. Keep the new remote away from moisture and heat, then place it with other remotes.
Tip: Label the fob with its opener for easy identification later. - 7
Maintain and backup
Consider programming a backup fob and checking it periodically. Maintain a simple spare in a safe place to prevent lockouts during storms or power outages.
Tip: Recharge or replace batteries before cold seasons when remote range can drop.
Got Questions?
Do I need to reprogram all remotes when adding a new fob?
Not always. Some openers will accept a new fob without altering existing remotes. Others may require reprogramming to ensure the new and existing remotes work together without conflicts. Check your opener’s manual for model-specific guidance.
Most openers allow adding a new fob without reprogramming others, but consult your manual to be sure.
What if my remote won’t program?
First verify the battery is fresh and properly oriented. Confirm you’re using a compatible remote for your model and that you followed the exact Learn button sequence. If it still fails, retry after powering off the opener for a minute and then returning to Learn mode.
If it still won’t program, check the battery and compatibility, then retry with a fresh sequence.
Can I use a universal remote with my garage door opener?
Some universal remotes can work with certain openers, but compatibility is not universal. Always confirm frequency, code type, and pairing method with your specific model before purchase.
A universal remote might work for some models, but always verify compatibility first.
How long do batteries last in a garage door fob?
Battery life varies by usage and environment; modern coin cells generally last a long time but will need replacement eventually. Keep a spare battery and replace when the remote shows reduced range.
Batteries last for a long time but will eventually need replacement; keep a spare handy.
What safety steps should I follow during programming?
Always stand clear of the door path, ensure no one is underneath the door, and avoid pressing the remote when the door is moving. If anything feels off, stop and recheck the process.
Stay clear of the door path and never press the remote while the door moves.
I lost my old fob; can I erase its pairing from the opener?
Yes. After removing a lost fob, reprogram the remaining remotes to ensure security. Most openers offer a method to clear all remotes or re-pair from scratch.
You can erase a lost fob from the opener and re-pair others to maintain security.
Watch Video
Quick Summary
- Verify compatibility before buying a new fob.
- Follow the exact Learn button sequence for your model.
- Test range and reliability after programming.
- Maintain a spare fob and seal batteries properly.