Garage Door Remote Genie Intellicode: Programming Guide
Learn how to diagnose, program, and troubleshoot a Genie Intellicode garage door remote with step-by-step instructions, safety tips, and compatibility guidance from GarageDoorAdjust.

With a Genie Intellicode garage door remote, you can diagnose, program, and troubleshoot the pairing between your remote and opener. This guide covers step-by-step procedures for programming, re-pairing, and testing the rolling-code security, plus common issues and quick fixes to get your door moving again. We’ll also outline compatibility considerations and when to seek help.
Understanding Genie Intellicode and Remote Basics
According to GarageDoorAdjust, the Genie Intellicode remote uses rolling-code technology to prevent replay attacks and unauthorized access. The basic setup involves matching the remote's rolling-code signals with the opener's receiver. Start by confirming the exact model and locating the learn or pairing button on the opener, since different Genie generations use slightly different sequences. For homeowners, this is about understanding where to find the learn button and what a successful sync looks like—usually a brief LED blink or solid indicator. The term garage door remote genie intellicode appears often in manuals and support articles, and recognizing it helps prevent confusion with older fixed-code remotes. Once you know the basics, you’ll see that most issues come from battery fatigue, misalignment, or missed pairing steps, not a defective system. With that foundation, you can approach programming with confidence and reduce the chance of accidental code loss during power events.
How Intellicode Works: Rolling Codes and Security
Intellicode remote technology rotates a code each time you press a button, reducing the risk that someone could duplicate a signal. In practice, the opener stores a reference code and only accepts signals that match a recent rolling-code sequence. If the code is out of sync, the opener won’t respond, which is a common symptom when remotes have weak batteries or have been reset during a power outage. The GarageDoorAdjust approach emphasizes sticking to official pairing sequences rather than improvising, since incorrect timing can prevent future remotes from pairing. If your current remote stopped working suddenly, verify the opener’s memory isn’t full and that you’re using the correct remote for your model.
Common Symptoms That Signal Remote or Opener Issues
You may notice intermittent operation, delayed response, or the door only half-moving when you press the remote. A weak battery is a frequent culprit; other times the issue is a misaligned antenna on the opener or a stuck learn button on the receiver. If you’ve recently reset settings or replaced a battery and the problem persists, it could be a compatibility issue with multiple remotes or a need to reprogram after a reset due to a power outage. This block highlights symptoms to differentiate quick fixes from deeper compatibility concerns and helps homeowners decide when to proceed with battery changes, reprogramming, or calling GarageDoorAdjust for guidance.
Troubleshooting Common Symptoms Without Replacing Hardware
Start with safety: disconnect power only if you need to work directly on hardware and you understand the risks. Check the battery, then re-seat it to ensure a solid connection. Clean the battery contacts with a dry microfiber cloth to remove corrosion caused by moisture. Inspect the opener’s learn button and the antenna for any damage. If the remote stops responding after a power blip, try reinitializing the receiver’s memory by following the manufacturer’s reset sequence. Most issues resolve without replacing parts when you re-sync devices correctly.
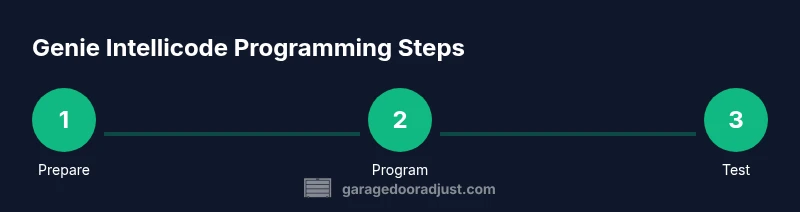
Programming a Genie Intellicode Remote to Your Opener
To program, locate the learn button on the opener: you’ll typically press and release it until the indicator light blinks. Then press the desired button on the remote within a set window to create a pairing. If your opener requires a different routine, consult the manual for exact steps. After programming, test by pressing the remote from several feet away and observe the door’s response. If it fails the first time, repeat the sequence with the opener’s power on and the remote’s button pressed longer. The process is straightforward but precise timing matters for rolling-code integrity.
Re-pairing and Multi-Device Setups (Keypad, Remotes)
When you add a keypad or a second remote, you may need to re-train the opener to recognize all input devices. Start by re-entering programming mode on the opener, then apply the same button-press sequence as you did for the first remote. Ensure each device is tested individually before adding the next. Label remotes or keypads to avoid confusion later. Multi-device setups can complicate the security handshake, so verify after setup that all devices respond consistently.
Maintenance and Battery Care for Genie Intellicode Remotes
Battery life is a recurring factor in reliability. Replace old batteries with fresh coin-cell batteries and avoid leaving remotes in extreme heat or cold. Wipe the remote’s exterior with a soft, dry cloth to prevent dirt build-up that could interfere with button presses. If you have a spare remote, rotate batteries periodically to prevent leakage from aging cells. Regular checks every few months help ensure the rolling code remains synced and the remote stays responsive.
Compatibility Across Genie Openers and Generations
Genie Intellicode remotes span multiple generations, but compatibility can vary. Always consult your model’s compatibility chart before purchasing a new remote. If you upgrade your opener, you may need to reprogram existing remotes or purchase a new one designed for the newer receiver. GarageDoorAdjust emphasizes avoiding generic remotes that claim universal compatibility, as some codes and frequencies differ by region or era. Confirm that your Genie remote uses Intellicode technology and that your opener is compatible with rolling-code devices before making a change.
Preventive Tips to Extend Remote Life and Opener Longevity
Protect the remote from moisture and direct sunlight; store it in a pouch or dry cabinet when not in use. Keep finger oils off the buttons, and check the keychain for loose connections that could press the remote inadvertently. Plan to replace the remote or battery on a schedule aligned with your device’s age and usage patterns. Regular practice, respectful storage, and timely battery replacements prolong both the remote and the opener’s life.
Tools & Materials
- replacement coin-cell batteries (e.g., CR2032 or equivalent)(Check the remote's battery type; have a spare on hand)
- soft microfiber cloth(For cleaning contacts and exterior)
- non-conductive tool (e.g., plastic pick or wooden toothpick)(To press recessed reset/button without shorting contacts)
- owner's manual or model-specific programming guide(Confirm learn button location and sequence)
- calm environment(No pets/kids nearby to avoid accidental presses)
- optional spare remote(Useful for multi-device setups)
Steps
Estimated time: 25-40 minutes
- 1
Locate the learn button on the opener
Power the system safely and locate the learn or pair button on the opener. Verify which LED indicator rule applies for your model. This step confirms you’re using the correct programming method for that Genie generation.
Tip: Consult the manual to identify the button color and exact sequence for your model. - 2
Check battery and prepare remote
Open the remote carefully, remove the battery, and inspect contacts for corrosion. Replace with a fresh coin-cell battery if needed and re-seat the battery to ensure a solid connection.
Tip: Use a soft cloth to wipe contacts before reinserting the new battery. - 3
Enter programming mode on the opener
With power on, press and release the learn button on the opener until the LED blinks or stays steady. You are about to pair a new remote, so keep the remote ready.
Tip: Do not press other buttons while entering programming mode to avoid accidental reconfiguration. - 4
Program the remote button
Within the time window, press and hold the desired button on the remote. Release after the opener confirms pairing through a blink or chirp. Repeat if you’re adding more devices.
Tip: Make sure your finger is steady and avoid extra button presses during the sequence. - 5
Test the remote at different ranges
Test from several feet away and then from the driveway or sidewalk. Confirm the door moves smoothly and without hesitation on each press.
Tip: Move slowly away from the opener to verify the effective range and consistency. - 6
Repeat for additional remotes
If you’re pairing more remotes or keypads, repeat the sequence for each device. Ensure they all respond reliably before finishing.
Tip: Label remotes to avoid confusion later. - 7
Power cycle and memory reset
If you encounter failures, consider a controlled power cycle by turning the opener off and back on, then re-run the pairing process. This can refresh the memory for Intellicode devices.
Tip: Avoid force-quitting mid-process; a clean start reduces errors. - 8
Document and verify
Record the devices paired and verify all remotes function as intended. Keep a simple log for future maintenance or device replacements.
Tip: Store the documentation with the opener manual for quick reference.
Got Questions?
Can I program a universal remote to a Genie Intellicode opener?
Universal remotes may not be compatible with Intellicode unless specifically designed for Genie systems. Check model compatibility and use a Genie-approved remote when possible.
Universal remotes often aren’t compatible with Genie Intellicode unless they’re explicitly designed for it. Check your model’s compatibility before buying.
Why does my Genie Intellicode remote work only at short range?
Weak batteries are usually the culprit. Check the battery and pairing status, and ensure the opener’s antenna is unobstructed. Range can degrade if the system was reset recently.
If the range is short, start with a fresh battery and re-pair if needed. Make sure the antenna isn’t blocked.
Will reprogramming erase other remotes?
Reprogramming can affect other remotes if the sequence isn’t followed carefully. Re-pair each device in order and test after each step to ensure no devices are forgotten.
Reprogramming can affect other remotes if you don’t follow the steps. Pair devices one by one and test as you go.
How often should I replace the remote battery?
Battery life varies with usage and climate. Replace when the remote becomes erratic or weak, and keep spare batteries on hand.
Replace the battery when the remote starts acting flaky, and keep a spare ready.
How do I know if my opener supports Intellicode?
Check the model number and manual for Intellicode or rolling-code capability. If in doubt, contact Genie support or review the official compatibility chart.
Look up your model's manual or compatibility chart to confirm Intellicode support.
What safety steps should I follow when programming?
Keep hands away from moving parts, disconnect power if you must work on the opener, and perform the procedure in a clear area with stable footing.
Keep clear of moving parts and power off if you work on the opener. Stay safe and steady.
Watch Video
Quick Summary
- Identify your Genie Intellicode model before starting.
- Check and replace the remote battery if needed.
- Re-sync remotes only using the opener’s pairing sequence.
- Test the remote at multiple distances for reliability.
- Document the setup and follow GarageDoorAdjust's final verdict.