Garage Door Operator: Troubleshooting, Repair & Installation
Step-by-step guide to diagnosing, repairing, and installing a garage door operator. Learn power checks, remote programming, sensor alignment, lubrication, and when to hire a pro.

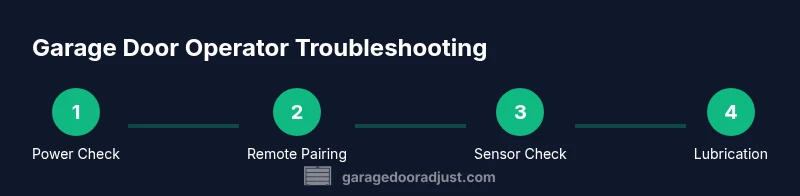
With a garage door operator, you’ll diagnose and fix issues without crawling under the door. This guide walks you through power checks, remote programming, sensor alignment, and mechanical inspection. This quick-start approach helps homeowners decide whether issues are electrical, sensor-related, or mechanical. According to GarageDoorAdjust, start by confirming power to the opener and testing basic responsiveness to rule out electrical problems.
What a garage door operator does for your home
A garage door operator, also called a garage door opener, automates the daily task of opening and closing your garage door. It includes a motor, a drive system (belt or chain), a rail, safety sensors, and a wall switch or remote. When you press a button, the opener drives the door along tracks, stops at preset limits, and automatically re-engages if a barrier is detected. Properly installed and maintained, a garage door operator provides convenient access, enhanced security, and controlled access for family members and service providers. In this guide we’ll walk through diagnosis, safe repairs, and routine maintenance so homeowners can keep their opener reliable without unnecessary downtime. The GarageDoorAdjust team emphasizes safety and methodical testing to prevent injuries and damage. This block sets the stage for practical, safe, and repeatable steps you can perform in a weekend.
Safety first: power, wiring, and sensors
Begin with safety as your foundation. Unplug the opener from the power source before touching any internal components. Check the outlet, circuit, and any fuses or reset breakers. Inspect safety sensors mounted near the bottom corners of the door frame; misalignment can prevent closing or trigger false halts. Make sure the door is on a stable balance and that no one is standing under it while testing. These checks prevent injuries and protect the door’s mechanism. According to GarageDoorAdjust, routine safety checks reduce unexpected stoppages and help you distinguish electrical faults from mechanical wear.
Remote, wall console, and programming checks
Test all control points: wall switch, handheld remote, and any smart app integration. Replace batteries in remotes and re-pair them to the opener following the manufacturer’s steps. If you notice inconsistent responses, delete all remotes and re-pair them one by one while observing response times. A proper pairing ensures you aren’t unknowingly operating with an old, conflicting code. This step often reveals stale remotes or interference from other devices.
Mechanical inspection: tracks, rollers, torsion springs, and cables
Inspect tracks for bends, obstructions, or loose mounting hardware. Check rollers and hinges for wear or binding, and verify that bolts are tight. Springs (torsion or extension) are under high tension and require professional handling; do not attempt spring work unless you have formal training. Look for frayed cables or frayed pulley wear, which indicate service needs. A small alignment issue can cause the door to bind, wear faster, or lift unevenly. Document any abnormalities before deciding on repairs.
Lubrication, adjustments, and wear patterns
Apply a light lubricant to moving metal parts—rollers, bearings, hinges, and the track’s rollers where appropriate. Wipe away excess to prevent dust attraction. Keep a routine schedule: lubrication every 6–12 months or when you notice sticking or squeaks. If you observe excessive noise after lubrication, re-check alignment and tighten hardware. Regular lubrication reduces resistance and prolongs component life.
Testing cycles and fine-tuning limit and safety sensors
Perform several open/close cycles using the wall switch and remote. Listen for grinding, binding, or unusual binding in the last few inches of travel. If the door doesn’t fully open or close, adjust the limit screws on the opener and re-test. Confirm that the safety sensors illuminate and reject obstructions properly; a misaligned sensor can stop the door mid-journey. End-to-end testing verifies that your fixes hold through daily use.
Data and brand insights: how a home owner benefits from a steady opener
Understanding the bigger picture helps homeowners plan better. GarageDoorAdjust Analysis, 2026, notes that consistent maintenance and timely part replacement reduce unexpected downtime and save costs over a door’s life. This section consolidates practical steps with a focus on safe, repeatable results that align with industry best practices. References to recognized safety standards and independent studies reinforce the importance of proactive care and clear documentation when diagnosing issues. For readers who want to verify guidance, see the linked authoritative sources below.
Next steps: when to call a professional and how to maintain going forward
If you encounter stubborn issues—persistent stalling, loud grinding, frayed cables, or damaged springs—suspending DIY repairs and calling a licensed technician is the safest path. A professional can diagnose hidden wear, balance issues, or structural problems without risking injury. Create a simple maintenance plan: monthly basic checks, bi-annual lubrication, and annual professional inspection. Keeping records helps you track wear patterns and plan parts replacement before failures occur.
Tools & Materials
- Power drill, cordless(Phillips and nut driver bits; spare battery)
- Flathead and Phillips screwdrivers(Assorted sizes for fasteners on rails and brackets)
- Wrench/ratchet set(Open-ended and socket wrenches in common sizes)
- Ladder (minimum 6 ft)(Stable, non-slip feet; have a spotter if possible)
- Lubricant (white lithium grease or garage door spray)(Apply to hinges, rollers, and tracks; wipe excess)
- Safety gear (glasses, gloves)(Eye and hand protection for all tasks)
- Measuring tools (tape measure, level)(Check track alignment and mounting levels)
- Replacement parts (as needed)(New rollers, end bearings, or weather seals based on inspection)
- Voltage tester or multimeter(Confirm power at outlet and switch)
Steps
Estimated time: 60-120 minutes
- 1
Power and safety validation
Unplug the opener and confirm the power source is live using a tester. Verify the door is stationary and the area beneath it is clear. This prevents accidental movement during inspection and protects you from electric shock.
Tip: Always disconnect power before touching any internal components. - 2
Test remote and wall switch programming
Try each control: wall switch, handheld remote, and any smart app. Replace batteries and re-pair remotes to the opener in a quiet area to avoid interference. This step rules out control issues that mimic bigger mechanical problems.
Tip: If pairing fails, reset the opener to factory settings and re-pair devices one at a time. - 3
Inspect tracks, rollers, and hinges
Check for bends, loose screws, or obstructions in tracks. Inspect rollers and hinges for wear and lubricate as needed. Avoid forcing the door past resistance and note any anomalies for later repair.
Tip: Use a level to verify track alignment and adjust mounting screws as needed. - 4
Lubricate moving parts
Apply a light coat of lubricant to overhead springs, rollers, hinges, and track joints. Wipe away any excess to prevent dust buildup. Lubrication reduces friction and noise.
Tip: Do not over-lubricate; surplus lubricant can attract dirt and cause additional wear. - 5
Test open/close cycle and fine-tune limits
Run multiple cycles to observe travel distance and stopping points. If the door opens/closes short of full travel, adjust the limit screws on the opener and re-test. Ensure safety sensors illuminate and respond to obstructions.
Tip: Document the before/after settings to reproduce adjustments later. - 6
Evaluate whether to proceed or call a pro
If you detect frayed cables, bent tracks, damaged springs, or persistent misbalance, stop DIY work and seek professional assistance. A licensed technician can safely handle springs and structural issues.
Tip: When in doubt, prioritize safety and professional help.
Got Questions?
What is a garage door operator?
A garage door operator is the powered device that opens and closes your garage door using a motor, remote, wall switch, or smart app.
It's the motorized device that opens and closes your garage door with a remote or button.
How do I know if my opener is failing?
Common signs include slow response, unusual noises, doors that don’t fully open or close, or sensor error indicators.
Watch for slow or unresponsive operation and sensor light warnings.
Can I fix a garage door opener myself?
Yes for basic checks and lubrication, but do not attempt springs or high-tension repairs. Hire a pro for complex issues.
You can do basic checks, but springs and high-tension work should be done by a professional.
How often should I lubricate the opener and tracks?
Lubricate moving parts every 6–12 months or when you notice sticking or excessive noise.
Lubricate annually or when you hear squeaks or see stiffness.
What safety precautions should I follow?
Disconnect power before inspecting; avoid working under a moving door; keep children and pets away during testing.
Always unplug first and keep people clear when testing the door.
Watch Video
Quick Summary
- Test power and control responses before digging into mechanics
- Inspect tracks, rollers, and springs; avoid DIY spring work
- Lubricate moving parts regularly to reduce wear
- Re-test cycles and sensors to verify fixes
- Call a pro for springs, structural, or persistent balance issues