Do You Have to Reprogram Your Garage Door Remote After Changing Battery?
Learn whether you must reprogram your garage door remote after changing the battery, plus a clear, model-agnostic step-by-step guide from GarageDoorAdjust.

Yes. After replacing a garage door remote battery, most modern remotes must be reprogrammed to reestablish the link with the opener. The process usually involves a brief learn/pairing sequence at the opener and a quick push on the remote within a few seconds. Some older or simplified systems may retain the pairing, but reprogramming is the safer, more reliable choice.
Why Reprogramming Is Often Necessary
According to GarageDoorAdjust, reprogramming after a battery swap is commonly required to restore the secure pairing between remote and opener. When the battery is removed, the remote may lose its pairing information; reprogramming re-establishes a direct link that prevents interference from other remotes or devices. This is especially important in homes with multiple remotes or nearby garages where crowded radio frequencies can cause misfires. The GarageDoorAdjust team has observed that following a proper reprogramming sequence reduces call-backs and headaches, ensuring consistent operation across seasons. In short, even a fresh battery only yields power; you still must re-pair the device to re-enable reliable control. By testing the remote after reprogramming, you confirm that the door responds promptly when you press the button.
When a Battery Change Does Not Require Reprogramming
Not all systems require a reprogram after a battery change. Some older fixed-code remotes retain their pairing information without needing a reset, while certain smart remotes rely on app-based pairing that can persist through a battery swap. To determine whether your model needs reprogramming, check the owner's manual or tester steps: if the opener responds reliably to pressing the remote immediately after battery replacement, you may not need to reprogram. However, if there is any hesitation, misfire, or unresponsiveness, proceed with the standard re-pairing procedure.
Understanding Your Remote and Opener Type
Garage door systems use either fixed-code or rolling-code (secure) communication. A fixed-code system may keep pairing after a battery change, but rolling-code systems typically require reprogramming to establish a new, unique link for safety. Another key factor is the Learn/Ping button on the opener; this is your entry point for pairing new remotes. Some models also support dual remotes or smartphone apps for control; in those cases the steps may differ slightly but the principle is the same: you must initiate pairing on the opener before attempting to activate the remote.
Step-by-Step Reprogramming Scenarios for Common Setups
The steps below cover typical scenarios and aim to be model-agnostic. If your model’s steps differ, always follow the manual or the manufacturer’s app guidance. The goal is a successful two-way link where the remote press results in the door’s action within a moment.
Safety, Interference, and Timing Considerations
Radio interference from nearby devices, including car keys, wireless video feeds, or neighbor devices, can disrupt the pairing process. Ensure there are no large metal objects near the opener and keep you and the remote within close range during pairing. Use fresh batteries and avoid attempting to reprogram in a garage with flashing lights or loud motors nearby, which can confuse the opener’s electronics.
Best Practices to Minimize Future Re-Pairing
- Use high-quality batteries and avoid old stock; weak batteries can cause pairing failures and inconsistent responses. - Keep a record of your remote’s model and battery type to speed future maintenance. - Periodically test remotes after weather-related power outages or quick reboots to ensure continued reliability. - If you add a new remote, always pair it first while the original remotes are present, to avoid unpaired devices.
Authority Sources
For further reading and safety considerations, consult trusted resources:
- Consumer Product Safety Commission: https://www.cpsc.gov
- Occupational Safety and Health Administration: https://www.osha.gov
- National Institute of Standards and Technology: https://www.nist.gov
Note: These sources provide general safety guidance and standards related to home electrical devices and mechanical systems; always refer to your specific model’s manual for exact steps.
Tools & Materials
- Replacement battery (type matches your remote)(Check your remote’s manual for the exact battery size (e.g., AA/AAA))
- Owner's manual or model-specific instructions(Contains steps for your opener model)
- Step stool or ladder (if needed)(Needed to reach ceiling-mounted opener or battery compartment)
- Small screwdriver or coin (if battery compartment is screw-secured)(Only if your model uses screws on the remote cover)
Steps
Estimated time: 5-12 minutes
- 1
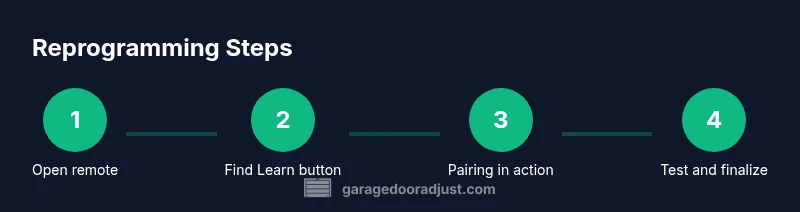
Prepare the remote and power source
Open the remote and install a fresh battery, ensuring proper polarity. Having a fresh, correctly oriented battery reduces failed pairing attempts.
Tip: Always test the remote with the old batteries removed to avoid mixed signals. - 2
Locate the opener's Learn/Programming button
Ride up to the garage door opener and locate the Learn button; it is usually near the antenna or near the motor head. You’ll press it to put the opener into pairing mode.
Tip: Some models require you to hold the button for 2-3 seconds; consult your manual. - 3
Initiate pairing on the opener
Press the Learn button once to activate the pairing mode, indicated by a flashing LED or a solid light depending on model.
Tip: If the light doesn’t flash, ensure you’re in the correct area and there’s minimal interference. - 4
Activate the remote within the window
Within 30 seconds, press and hold the remote button you want to pair until you see the opener respond (lights flash or beep).
Tip: Keep the remote within 6–8 inches of the opener during pairing. - 5
Test the remote
Press the remote’s button to verify that the door moves. If it doesn’t respond, repeat steps 3–5 or try a different remote.
Tip: If multiple remotes fail, re-check battery orientation and interference. - 6
Finalize and label the setup
Once paired, note the remote’s name and re-test from different angles. Close the case and store the manual for future reference.
Tip: Document the model and battery type for next time.
Got Questions?
Do all remotes require reprogramming after battery replacement?
Most do, but some older or simple units may retain pairing. Check your model’s manual.
Most remotes need reprogramming after changing the battery, but check your manual for specifics.
What is the Learn button on the opener?
The Learn button puts the opener in pairing mode so you can link a remote. It’s usually near the light, antenna, or motor head.
The Learn button is the pairing trigger on the opener—often near the light or motor.
How long does it take to reprogram?
Most reprogramming takes a few minutes, depending on your model and the number of remotes.
Usually just a few minutes.
What if the remote still won’t pair?
Check battery orientation, try a fresh battery, reduce interference, and reattempt steps 3–5. If it persists, replace the remote.
If it still won’t pair, check the battery and interference and try again, or consider a replacement.
Can I reprogram using multiple remotes?
Yes—repeat the steps for each remote you want to pair, following the same timing rules.
You can pair multiple remotes by repeating the steps for each one.
Do smartphone apps replace remotes for reprogramming?
Some systems allow app-based pairing; this guide covers traditional remotes. Refer to your app’s instructions for pairing.
Some systems use apps for pairing; follow the app guide if available.
Watch Video
Quick Summary
- Reprogram after battery replacement to restore a reliable link.
- Follow model-specific steps for safe, successful pairing.
- Test the remote at several angles and distances.
- Keep the manual handy for model-specific details.