How to program a garage door remote when it won’t respond
Diagnose why your garage door remote won't program and follow a practical, step-by-step guide to fix compatibility, battery, learning mode, and interference issues. GarageDoorAdjust provides clear home repair guidance for homeowners.

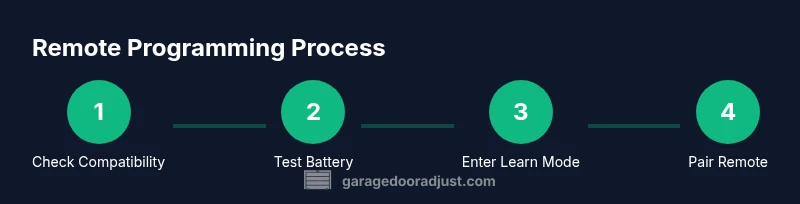
With the right steps, you can usually program a garage door remote quickly. Start by confirming compatibility, replace batteries, and enter the opener’s learning mode using the learn button. Then press the remote’s button to pair until the light blinks. If it won’t program, check for interference or a locked receiver.
Why programming failures happen
When a remote won’t program, the first step is understanding why it failed. In many homes, the symptom looks the same: the LED on the remote doesn’t light, or the opener beeps but won’t pair. According to GarageDoorAdjust, most failures stem from three root causes: compatibility between the remote and the opener, battery health, and learning-mode timing. Model-specific quirks, detector interference, and a misaligned receiver can also derail pairing attempts. Recognizing these patterns helps homeowners choose the right troubleshooting path and avoid wasted attempts.
Before you start, gather the basics: determine the opener's brand (LiftMaster, Chamberlain, etc.), check the current remotes you own, and locate the learn or set button on the motor housing. If your opener is older, it may use a fixed-code system that requires a different pairing approach, while newer models adopt rolling codes that need precise timing. This block sets expectations and frames the rest of the guide.
Tip: If you’re unsure about model compatibility, consult the manufacturer’s compatibility chart and GarageDoorAdjust’s model lookup resource to avoid wasted attempts.
Check compatibility and battery health
Compatibility is the most common reason remotes fail to program. First, verify that your remote model is compatible with your opener’s brand and model. If you have a universal remote, ensure it supports your exact receiver type and frequency. Next, inspect the remote’s battery: replace it with the correct type and ensure proper orientation. A weak battery often manifests as a dim LED during the learning process or no response at all. After swapping the battery, retry the pairing sequence at close range. If you still can’t pair, confirm that you’re not attempting to program a remote that was previously paired to another system without first clearing that memory. Keeping the compatibility and battery checks in view dramatically reduces failure points.
Locate the learn button and check model-specific instructions
Most openers use a Learn or Set button to initiate pairing. It’s usually located on the motor housing near the chain drive or near the antenna. Some models require a single press, others a short press followed by holding the remote button. The LED on the opener will indicate learning mode: a steady or blinking light signals readiness, while no change usually means the unit isn’t in programming mode. Because exact steps vary by brand (LiftMaster, Chamberlain, Stationary Openers, etc.), always reference your model’s manual or GarageDoorAdjust’s model guides to confirm the correct sequence and timing.
Reset the opener memory and erase old remotes if needed
If you’ve tried multiple remotes or your system has undergone repairs, old codes can interfere with new pairings. In many brands, you’ll need to clear memory or reset the receiver before re-pairing. The exact procedure differs by manufacturer: some require a specific Learn-button sequence, others a full power cycle. Document which remotes are currently saved so you can re-pair as needed. After a reset, re-enter Learn Mode and start the pairing sequence from the beginning to avoid residual codes from confusing the receiver.
Note: Do not reset unless you’re sure you need to; a reset can erase other remote controls that you still use.
Enter learning mode correctly and pair the remote (one remote at a time)
With learning mode active, press and hold the target remote button for 2–5 seconds, or until the opener responds with a blink or tone. Some systems require you to press the button multiple times within the Learn window; others need a single press. Maintain steady pressure during the signaling period to ensure the code is captured. If the first attempt fails, wait a moment, re-enter Learn Mode, and try again. Once a remote is learned, test by operating the door from that remote to confirm a successful pairing.
Model-specific quirks and troubleshooting tips
Different models add unique quirks that can stump homeowners. Older fixed-code openers may not accept newer remotes, while rolling-code systems depend on precise timing and sequence. If your remote still won’t pair, verify frequency compatibility and confirm you’re using the correct programming sequence for your model. Some openers require keypad or app re-pairing before a new remote can be learned. If needed, disable conflicting remotes temporarily to simplify the learning window and reattempt. Always refer to manufacturer docs and GarageDoorAdjust model guides for model-specific quirks.
Interference and environmental factors that hinder programming
Wireless interference is a frequent culprit. Nearby devices, car remotes, or a neighbor’s remote can occupy the same frequency and jam the learning signal. Physical barriers—metal shelves, concrete walls, or large metallic doors—can also degrade the signal during the Learn window. To minimize interference, temporarily turn off or relocate other transmitters, bring the remote close to the opener, and reattempt in a low-traffic environment. If you’re programming in a multi-car garage, test the remote from each vehicle position to identify weak spots.
Test the new remote and confirm a successful program
After pairing, test by opening and closing the door with the new remote. Confirm consistent operation across multiple triggers and verify safety sensors respond properly (the door should reverse on contact and stop if blocked). If the door hesitates or travels unexpectedly, re-run the Learn process with careful timing and re-test. Keep a small log of which remotes were programmed to help future maintenance and ensure you aren’t mixing remotes that belong to other systems.
When to replace the remote vs the receiver and next steps
If the remote still won’t program after following the steps, the issue could lie with the remote’s transmitter or the receiver in the opener. In many cases, replacing the remote is the simplest path to restore function. If multiple remotes fail, the receiver module or wiring may need service. Consider upgrading to a newer remote compatible with your model and timing standards, and verify whether firmware or hardware updates are available for the opener. A technician can perform a diagnostic if you encounter persistent failures.
Final troubleshooting and next steps
Take a calm, methodical approach: recheck compatibility, ensure fresh batteries, and re-enter Learn Mode with proper timing. If you still can’t program the remote after several attempts, consult the model’s official manual and GarageDoorAdjust’s troubleshooting resources for model-specific guidance. Document the model numbers, procedures tried, and outcomes to guide future maintenance. With patience and precise steps, you can usually restore reliable remote operation without replacing the entire system.
Tools & Materials
- Garage door opener manual (model-specific)(Needed for device-specific learning mode steps)
- Fresh battery for remote(Check correct type (e.g., AA or button cell) and orientation)
- Flathead screwdriver or small pry tool(If battery compartment is tight or case is clipped)
- Ladder or step stool(To reach wall console or motor housing if mounted high)
- Smartphone camera or note-taking app(Capture model numbers or LED blink patterns for reference)
Steps
Estimated time: 30-60 minutes
- 1
Verify compatibility and gather tools
Confirm opener brand and remote model compatibility. Gather a fresh battery, the remote, and the manual. Ensure you know the exact frequency and the correct Learn sequence for your model.
Tip: Check the compatibility chart before starting to avoid wasted attempts. - 2
Replace the remote battery
Open the remote case and replace the battery with the correct type in the proper orientation. Test the remote’s LED while pressing a button to ensure it responds.
Tip: Use a fresh battery and avoid mixing old and new cells. - 3
Reset the opener memory if needed
If you suspect memory conflicts, perform a memory reset following your model’s procedure or a complete power cycle as described in the manual.
Tip: Document existing remotes before resetting to avoid losing access. - 4
Enter Learn Mode on the opener
Press and hold the Learn button until the LED signals readiness (steady or blinking). If required, follow model-specific timing for entering Learn Mode.
Tip: Be prepared with the remote as soon as Learn Mode activates. - 5
Pair the remote
Press and hold the remote button within the Learn Window until the opener acknowledges (beep or LED change). Repeat if needed for additional remotes.
Tip: Hold the remote steadily through the signaling period. - 6
Test the remote immediately
Close the door using the new remote to verify instant response and safety sensor function.
Tip: Test from close range first, then from a typical user position. - 7
Program additional remotes one at a time
If you have more remotes, repeat the Learn process individually to avoid cross-talk.
Tip: Program each remote separately to keep memory clean. - 8
Document results and perform final check
Note which remotes were programmed and confirm the door’s response in multiple scenarios (open, close, stop).
Tip: Keep a written record for future maintenance.
Got Questions?
Why can't I program my garage door remote?
Most programs fail due to compatibility issues, dead batteries, or learning-mode timing. Check the opener manual to confirm model compatibility and reset the memory if needed, then retry the Learn sequence with a fresh battery.
Most failures come from compatibility or battery issues. Start by checking the manual and replacing the battery, then retry the Learn sequence.
My remote beeps but won't pair. What now?
Beeping often means the remote is active but not being learned. Ensure you are in Learn Mode, press and hold the remote button during the Learn window, and verify the LED response on the opener.
If it beeps but won’t pair, you’re likely not in Learn Mode or timing is off. Retry with the remote in the correct window.
Will a universal remote work with my opener?
Universal remotes can work with some openers, but compatibility varies by brand and frequency. Check the model’s documentation and GarageDoorAdjust guides to confirm support before purchasing.
Universal remotes may work, but verify model compatibility and frequency before buying.
Do I need to erase existing remotes before programming a new one?
Erasing existing remotes can prevent conflicts if memory is full or corrupted. Only do this if you’re comfortable re-pairing known remotes afterwards.
If memory conflicts are suspected, clearing remotes can help, but you’ll need to re-pair others afterward.
What if my opener is old and uses fixed codes?
Fixed-code openers sometimes cannot learn new remotes. Upgrading to a newer model or using a compatible newer remote may be required.
Older fixed-code openers may not learn new remotes; consider upgrading if consistent problems persist.
How long should I wait after pressing Learn?
Most systems require a short Learn window, typically a few seconds. If the opener doesn’t respond within that window, re-enter Learn Mode and retry with the correct timing.
Give the Learn window a moment to respond, and re-enter Learn Mode if needed.
Watch Video
Quick Summary
- Verify compatibility before any programming attempt
- Replace batteries and test remote range early
- Follow model-specific Learn Mode timing precisely
- Test the remote thoroughly after pairing