Replacement for Garage Door Remote: A Step-by-Step Guide
Discover how to find a compatible replacement for your garage door remote, choose the right model, and program it with a clear step-by-step process. Learn safety tips and troubleshooting from GarageDoorAdjust.

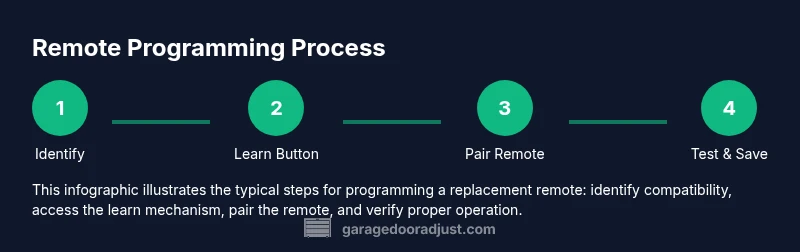
Replace a garage door remote by first confirming your opener’s frequency and code type, then selecting a compatible remote, and finally programming it to pair with your system. According to GarageDoorAdjust, prioritize matching frequency and code type and follow the manufacturer’s pairing steps exactly. With the right toolset and a calm approach, most remotes can be swapped in under 40 minutes.
Understanding remote compatibility and common terms
When you’re shopping for a replacement for garage door remote, the most important factors are frequency (the radio channel the opener listens to) and code type (how it recognizes a paired remote). Many older openers use fixed codes, while newer models rely on rolling codes for improved security. The remote you buy must match the frequency printed on your current remote or on the opener’s label, and it must use the same code technology (fixed or rolling) that your opener accepts. This means you may encounter remotes labeled for 315 MHz versus 390 MHz, or options described as “rolling code compatible.” If you’re unsure, take a photo of the label on the existing remote or locate the model number on the opener’s exterior housing. GarageDoorAdjust emphasizes that compatibility is the foundation for a successful replacement, and attempting to pair the wrong frequency or code type is the most common reason a replacement fails. Also, check whether your opener uses a learn button or DIP switches on the receiver; this dictates which pairing method you’ll use.
Before you buy, write down the exact model and frequency information and plan which pairing method your opener requires. If you’re dealing with a multi-car garage and multiple remotes, note which remote belongs to which vehicle so you can keep your setup organized. Finally, consider security features: rolling codes are generally more secure, and some newer remotes offer better range or a brighter LED indicator to help with nightly use. By starting with a clear compatibility check, you’ll save time and avoid returns.
From a practical standpoint, you’ll also want a working spare battery and a reliable surface to work on. If your garage is dim, set up a bright lamp so you can read tiny labels on the remote and the opener. If you’re anxious about the process, ask a friend to watch your steps or read the manufacturer’s instructions aloud as you follow along. The goal is to reduce guesswork and confirm each step before moving forward.
How to pick a replacement remote
Choosing the right replacement remote involves matching the frequency and code type exactly, evaluating compatibility with your specific opener brand, and considering additional features that improve everyday use. Start by identifying your opener’s brand and model number, which can be found on the opener housing, in the manual, or on a label inside the wall control panel. Then compare that information with the remote options offered by retailers. If you own a newer garage door opener, you’ll likely want a rolling-code remote with a modern design and a reliable range. For older openers, look for fixed-code remotes that explicitly state compatibility with your model. If you plan to manage multiple doors or prefer a universal option, read the compatibility lists carefully; universal remotes can work in some cases but may require more complex setup or may not support every brand. Always choose a remote that clearly notes compatibility with your opener’s frequency and code type; avoid generic remotes that only advertise “works with most openers.”
Security is another consideration. Rolling-code remotes “learn” with the opener to prevent code reuse, reducing the risk of someone else gaining access. If you’re unsure about the technical specs, consult the manufacturer’s site or a trusted retailer’s compatibility chart. Finally, consider the remote’s user experience: a bright LED, a tactile button, a reasonable range for your vehicle’s location, and included batteries. A well-chosen replacement will feel natural to use and will reduce the chance of repeated replacements.
If you’ve recently replaced a vehicle or moved to a new home, consider keeping the manual or model number handy for future reference. GarageDoorAdjust’s guidance is simple: verify frequency, verify code type, and verify compatibility before purchasing. This approach minimizes frustration and returns and ensures you can operate your door securely and reliably.
Step-by-step: Program a replacement remote
Programming a new remote to your garage door opener is usually a quick process, but it varies by brand and model. The most common methods are the Learn button on the opener (button on the back or side of the unit) or the DIP-switch method used on older receivers. The steps below cover both approaches in a generalized way so you can adapt to your specific model. Before you begin, ensure you have a fresh battery installed in the new remote if required by the design.
-
Locate the Learn button or access the DIP-switch area on the opener. This is typically near the back or side of the unit and may be behind the light cover. Pressing the Learn button or setting the DIP switches returns the opener to a discoverable state.
-
Initiate pairing on the remote. For Learn-button openers, press and hold the button on the remote until the indicator LED begins to flash slowly, then release. For DIP-switch setups, set the same code pattern on the DIP switches as shown in the manual.
-
Complete the pairing. After the remote is ready, press the remote button once (or hold briefly) to send a signal to the opener. The opener should respond with a short motor cycle, LEDs flashing, or a chime indicating success.
-
Test distance and environment. Stand in your usual driving position and press the remote; confirm that you can open the door from typical ranges. If it fails, repeat steps 1–3, ensuring you’re using the correct combination of learn/pattern and that the door’s sensors are unobstructed.
-
Add additional remotes. If you have more remotes, repeat steps 2–4 for each device, using the same pairing sequence. Do not confuse codes between remotes to maintain security.
-
Confirm safety sensor operation. After pairing, test the door’s safety sensors by placing an object near the closing path. The door should stop and reverse if something blocks it. This verification ensures your new remote won’t cause unexpected door movement.
-
Document the setup. Record the remote model, frequency, and pairing method in a notebook or your phone so future replacements are quick and accurate.
If you encounter trouble, consult the opener’s manual or the manufacturer’s website for brand-specific instructions. Some openers require a separate “pair code” or a multi-step process that is not covered here. Always follow the exact steps for your model.
Estimated total time: 25–40 minutes depending on model and familiarity.
Troubleshooting common issues during replacement
Despite careful preparation, you might run into issues during replacement. The most frequent problems are a remote that fails to pair, a remote that won’t trigger the opener from a distance, or a remote that only works sporadically. If pairing fails, double-check the frequency and code type on both the remote and the opener. Ensure you’re using the correct Learn button or DIP-switch configuration and that you’re within range of the opener during pairing. Referring to the manual’s compatibility section can reveal model-specific steps, including whether you need to reset the opener’s memory first.
If the remote won’t trigger the door after pairing, recheck the battery in the remote, confirm that you did not accidentally pair a remote to another receiver inside the same system, and ensure that the opener’s sensors are unobstructed. For older models, the problem may be a worn-out receiver; in this case, replacing the receiver or using a dedicated replacement remote from the same brand may be necessary. Finally, if you’re still stuck, record the exact error signals (LED flash pattern) and consult the manufacturer’s troubleshooting guide or a professional technician.
Safety note: never attempt to bypass the learning process by reprogramming other devices or altering the opener’s electronics. This can compromise security and void warranties. When in doubt, contact a qualified technician.
GarageDoorAdjust reminds homeowners that systematic testing and careful documentation dramatically reduce mis-pairings and future remotes failures.
Safety considerations and maintenance after replacement
Replacing a garage door remote is a relatively safe, low-risk maintenance task when you follow manufacturer instructions and keep safety basics in mind. Always ensure the opener is unplugged if you’re accessing internal components or changing batteries in the remote. Do not touch the wiring inside the opener or attempt to rewire the receiver unless you have formal training. Keep the area clean and dry to prevent corrosion on terminals and buttons.
Routine maintenance after replacement includes:
- Checking the door’s travel up and down at slow speeds to verify smooth operation.
- Ensuring the safety sensors are correctly aligned and unobstructed.
- Keeping remotes and batteries away from children and pets to prevent damage or swallowing.
- Replacing worn or loose buttons on the remote to avoid missed or accidental triggers.
If you have a multi-door setup, label each remote clearly with its intended door. This practice reduces cross-frequency confusion and ensures you don’t accidentally trigger the wrong door. The key to long-term reliability is to test the system regularly and keep records up to date.
From a security perspective, consider updating the set of paired remotes if a worker leaves, or when you suspect a potential breach. Recalling and re-pairing remotes helps maintain control over access. GarageDoorAdjust supports ongoing maintenance and recommends periodic checks for all components to keep your system dependable.
What to do if you can't locate a compatible remote or your opener is older
If your opener is particularly old or the frequency is no longer supported by modern remotes, options include contacting the manufacturer for a legacy-compatible remote or upgrading to a newer opener with compatible remotes. Before replacing, verify whether the device supports legacy fixed codes or rolling codes, as this will determine which remote is compatible. If you must upgrade, plan for the total cost, including the opener unit, receiver, and installation if you hire a technician.
In some cases, a compatible replacement remote can be obtained through a third-party that offers brand-matched products; however, ensure the seller provides clear compatibility information and a return policy. If you decide to work with a professional, request a brief assessment of your door’s overall condition, including the torsion springs, tracks, and safety sensors, to avoid supplying a remote that becomes obsolete soon after purchase.
Remember to document your model, frequency, and pairing method for future replacements. The GarageDoorAdjust team recommends prioritizing compatibility and safety above all, and not forcing a remote that won’t pair or operate reliably. If you’re unsure, opting for a certified replacement remote from the opener’s brand is usually the most straightforward solution.
Tools & Materials
- Replacement garage door remote (verified compatible with your opener)(Check the frequency (e.g., 315 MHz or 390 MHz) and code type (fixed vs rolling).)
- Battery: CR2032 coin cell(Many remotes include a battery; ensure the remote uses replaceable cells if needed.)
- Screwdriver set (Phillips and flathead)(Needed to access remote or opener housing if required.)
- DIP-switch tool or small screwdriver(For older receivers that use DIP switches to set codes.)
- Opener model number or manual(Helps confirm compatibility and the correct programming method.)
- Notepad or digital device(Record pairing steps, codes, and remote assignments for future use.)
Steps
Estimated time: 25-40 minutes
- 1
Verify compatibility and gather model information
Locate the opener model number and check your current remote’s frequency and code type. This ensures you pick a replacement that will pair successfully and avoid wasted purchases. If you’re unsure, consult the manual or manufacturer website and cross-check the compatibility list.
Tip: Take a photo of the opener label and current remote for quick reference. - 2
Purchase the correct remote
Choose a replacement remote that explicitly lists compatibility with your opener’s brand and model. If you use a universal remote, verify it supports your frequency and code type. Avoid remotes that only claim broad compatibility without stating exact matches.
Tip: Prefer a model with a safety LED indicator for easier troubleshooting. - 3
Prepare the remote and opener
Install fresh batteries in the new remote if required by its design. Clear any prior pairing records on the opener if the manual instructs you to do so before attempting a new pairing.
Tip: Work in a well-lit area and keep the remote at hand during testing. - 4
Enter pairing mode on the opener
Activate the learn button on the opener or access the DIP-switch area. The exact method varies by model; ensure the opener is ready to accept a new remote.
Tip: If the learn button is recessed, use a paperclip or small tool as directed by the manual. - 5
Program the remote
For Learn-button openers, press and hold the remote button until the light on the opener responds. For DIP-switch models, align the code on the remote with the switch positions and close the cover.
Tip: Do not repeat the process too quickly; allow the opener to register the signal. - 6
Test the new remote
Test both short-range and longer-range operation. Verify that the door opens and closes as expected, and check that the sensors reverse the door when obstructed.
Tip: Test from the driver’s seat and from outside the garage to confirm range is sufficient. - 7
Document and store
Record the remote model, frequency, and pairing method. Store this information in a safe location for future replacements.
Tip: Keep your notes with the instruction manual in a labeled folder.
Got Questions?
What frequency should my replacement remote support?
Your replacement remote must support the same frequency as your opener (commonly 315 MHz or 390 MHz). Check the label on the current remote or the opener’s manual to confirm. If the frequency doesn’t match, the remote will not pair or operate reliably.
The replacement remote must match your opener’s frequency, usually 315 or 390 megahertz. Check the label or manual to confirm before buying.
Can I reuse the old remote’s battery?
If the new remote uses a replaceable battery, install a fresh CR2032 coin cell. Do not reuse the old battery if it’s been stored for a long time, as it may have reduced capacity. Always test after replacement.
Use a fresh battery in the new remote and test to ensure reliable operation.
What if the remote won’t pair with my opener?
Double-check the learn/DIP-switch method, ensure you’re in range, and confirm compatibility. Some openers require resetting memory or performing a sequence in a specific order. If it still fails, consult the manual or contact a professional.
Recheck the pairing method and proximity; sometimes a reset with the manual steps is needed.
Is it safe to program a replacement remote myself?
Yes. Replacing and programming a remote is a common DIY task when you follow the manufacturer’s instructions and use compatible hardware. Avoid tampering with the opener’s wiring or sensors.
Yes, it’s usually safe to do yourself as long as you follow the manual and use a compatible remote.
How do I know if a remote is compatible with my opener brand?
Check the compatibility list provided by the remote manufacturer for your opener brand and model. If you’re unsure, contact customer support or a professional for a quick confirmation.
Look for brand-specific compatibility lists or ask support to confirm before buying.
Do universal remotes work with all openers?
Universal remotes can work with some openers but not all. They may require more complex programming and aren’t guaranteed to support your exact frequency or code type. Always verify compatibility first.
Universal remotes may not work with every opener; verify compatibility.
Watch Video
Quick Summary
- Verify compatibility before buying a replacement remote.
- Follow manufacturer pairing steps precisely to avoid failures.
- Test the remote at typical distances and verify safety sensors.
- Document model, frequency, and pairing method for future maintenance.