Overhead Garage Door Remote Programming: Step-by-Step Guide
Learn how to program or re-pair an overhead garage door remote with your opener. This comprehensive guide covers Learn button basics, safety, and troubleshooting for common brands.

This guide will show you how to program or re-pair an overhead garage door remote with your opener. You’ll find the Learn/Program button on the opener, put the door into learning mode, then press the remote’s button to complete the pairing. Most steps are quick and safe, but follow brand-specific notes in the steps.
Why Programming Your Overhead Garage Door Remote Matters
Programming your overhead garage door remote is a small, high-impact task that keeps your system secure and convenient. When remotes are not properly programmed, you may experience intermittent door operation, delayed responses, or security concerns if an unpaired remote can still trigger the opener. According to GarageDoorAdjust, incorrect or outdated remotes are the leading cause of nuisance openings and missed commands in many homes. A correctly programmed remote ensures the door responds reliably to your commands and prevents unwanted access. The process is usually quick and can be completed without professional help, but you should follow brand-specific steps to avoid mis-pairings. Understanding the basics of the Learn or Program button, the pairing sequence, and the possible codes prevents frustration and protects your family. Additionally, a properly configured system makes future maintenance easier: you can add spare remotes, reassign an existing remote after a battery change, or remove lost remotes from memory. In this guide, we’ll walk through terminology, common variations across brands, safety considerations, and practical steps you can perform with normal household tools. The goal is to empower you to handle overhead garage door remote programming confidently, so you can regain smooth operation in minutes rather than waiting for service calls."
Understanding Remote Learn Methods by Brand
Different garage door openers support different learning sequences. Some rely on a visible Learn button with an LED indicator; others use a specific sequence of button presses on the remote while the opener is in learn mode. Rolling-code remotes add an extra layer of security: the opener records a new code that changes each time you program a remote. Some newer models support smartphone apps that pair via Bluetooth or Wi‑Fi, enabling remote programming without a physical button. The key is to locate the exact button or app command described in your model's manual and follow the manufacturer’s sequence precisely. In general, you’ll see a short window of learn time, typically 15–60 seconds, during which the pairing must happen. If you miss the window, you’ll need to re-enter learning mode and try again. Keep track of how many remotes you’ve paired and which button on each remote triggers the door. This helps you avoid confusion if you own multiple remotes or replace a transmitter in the future."
What You'll See When You Start: Indicators and Codes
When you begin, your opener’s LED indicator and sounds will guide you. A blinking LED or a solid glow usually signals that the unit is ready to learn; a different pattern may indicate a successful pairing. Beeps can also confirm that the remote has been learned, while a still-unresponsive door points to either a weak remote battery, missed timing, or a model-specific requirement. Many brands use a cordless beep and LED pattern to communicate success, with longer beeps or a change in LED color when the pairing is complete. If you see no change after following the Learn sequence, you may need to erase existing remotes or re-enter learning mode. Read your manual for exact indicator meanings, as patterns differ by model and year. Recognizing these cues will save you trial-and-error attempts and speed up future programming tasks. Throughout the process, ensure the area around the opener and door is clear to avoid accidents or interference from nearby devices."
Preparation: What You Need Before You Start
Before tackling overhead garage door remote programming, gather essential items and prepare your space. Have the remote(s) you want to program, fresh batteries for each remote, and the model number or owner’s manual on hand. Clear the area beneath the door to ensure it won’t move unexpectedly during learning. Confirm that the garage is well lit and dry; avoid pairing if the opener or environment is wet or unstable. If you’re using a smartphone app, verify that the app is compatible with your opener and that your phone Bluetooth or Wi‑Fi is enabled. If you must modify the opener cover to access the Learn button, use a stable ladder and wear eye protection. Finally, set the door to a fully closed position to minimize movement during the programming process. Following these prep steps reduces errors and enhances safety during overhead garage door remote programming."
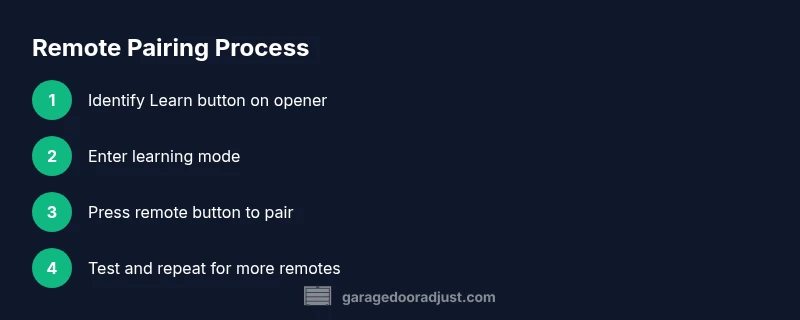
Step-by-Step Overview: The General Flow
Most remote programming flows share a common structure: locate the Learn/Program button, prepare your remote, trigger learning mode, press the remote button to pair, test the result, and repeat for additional remotes if needed. While brand specifics vary, the general flow remains consistent: you’ll put the opener in learning mode, then signal the remote to transmit a code that the opener stores. Expect a short window (often 15–60 seconds) for the remote to transmit. After a successful pair, test the remote by pressing the button to see whether the door responds reliably. If you’re adding multiple remotes, repeat the process for each unit. If the door doesn’t respond, re-enter learning mode and retrace the steps. Keeping a log of which remotes are paired can prevent future confusion, especially in households with several transmitters."
Common Troubleshooting: When Programming Fails
If programming doesn’t work on the first try, verify the following common culprits: weak remote battery, incorrect Learn button identification, insufficient time window, or interference from other devices nearby. Check the opener’s power supply and ensure the door is fully closed during learning. Some models require erasing all remotes before re-pairing; if you’ve lost a remote, be sure to remove it from memory to avoid accidental opens. For cars with built-in home linking features, ensure the vehicle’s learning process is initiated correctly and that you follow the vehicle’s specific prompts. If a remote pairs but then stops working after a few days, consider reprogramming and replacing the battery, then re-testing. In stubborn cases, consulting the manual or contacting a professional may be necessary, but most issues resolve through a careful re-run of the learning sequence and verification of the correct buttons being used."
Maintaining Your Remote After Programming
After successful programming, perform a quick maintenance routine to ensure long-term reliability. Check the remote’s battery quality and replace it if the LED indicator on the remote is dim or the range is reduced. Store remotes in a dry, cool place away from direct sunlight to preserve batteries. Periodically test each remote, especially after you’ve serviced or installed a new opener, to confirm continued compatibility. If you notice degraded range, consider replacing the remote with a newer model that supports your opener’s latest security features. Document the dates of programming sessions and battery changes to maintain a clear maintenance history. Regular checks prevent future programming surprises and extend the life of both the remote and the opener. As you expand your system (spare remotes or additional doors), repeat the steps with each new transmitter to preserve consistent performance across all devices."
Security Considerations and Best Practices
Security should guide every overhead garage door remote programming session. Always erase abandoned remotes from memory when you suspect a device is lost or stolen to prevent unauthorized access. Prefer rolling-code remotes and ensure your opener supports them; if not, at least maintain strong physical security and limit remote access to trusted devices. For households with vehicle-integrated openers, disable auto-pairing or ensure the car’s system confirms the pairing explicitly. After adding or removing remotes, test the door sensor’s anti-crush protection to ensure it responds properly when an obstacle is detected. If you have a smart opener, use the official app to monitor paired remotes and retire or reassign devices as needed. Keeping the system updated with the latest firmware reduces exposure to known vulnerabilities and maintains reliable pairing with your remotes. GarageDoorAdjust emphasizes documenting each paired remote and restricting access to door control to trusted users only."
Next Steps: After Programming, Like Adding a Spare or Re-Pairing
Once you’ve completed overhead garage door remote programming, consider expanding your setup with a spare remote or a keypad entry for added convenience. Add remotes gradually and test each one individually to confirm consistent performance. If you’ve replaced your opener or updated the system, re-check all paired remotes to ensure continued compatibility. For multi-door garages, plan a centralized programming session to avoid cross-pairing or interference between openers. Finally, store a small note with the model number and programming date in your tool cabinet; this makes future re-pairing faster if you ever need to adjust remotes again. By following these steps, you’ll maintain reliable operation and enhanced security for your garage access during overhead garage door remote programming.
Tools & Materials
- Ladder(Stable platform to reach the opener; ensure it is dry and secure)
- Remote controls to program(Include the primary remote and any spare remotes you plan to pair)
- Fresh batteries for remotes(Use the correct battery type for each remote (e.g., AA/AAA))
- Owner's manual or model number(Needed to confirm brand-specific Learn button sequence)
- Screwdriver (Phillips/flathead as needed)(Only if you need to remove a cover to access Learn button)
- Smartphone or tablet (optional)(For models with app-based pairing or monitoring)
Steps
Estimated time: 10-15 minutes
- 1
Locate Learn button on opener
Find the Learn or Program button on the garage door opener motor unit. It is usually near the light, power cord, or control panel. If the label is unclear, consult your model’s manual or the manufacturer’s website for the exact location.
Tip: If the button is hidden under a cover, remove the cover carefully using the appropriate screwdriver. - 2
Check remote batteries
Open the remote and verify that the batteries are fresh and properly seated. A weak battery can prevent successful pairing and reduce range.
Tip: Test with a known-good remote if you suspect battery issues. - 3
Put opener in learning mode
Press and release the Learn button until the indicator LED behaves as described in your manual (often blinking or glowing steadily). This puts the opener in a receptive state for a new remote.
Tip: Do not hold the Learn button for too long unless your manual specifies a long-press erase. - 4
Program the remote
Within the Learn window, press and hold the desired button on the remote. Continue until you hear a beep or see the LED respond, indicating a successful learn.
Tip: If no response, repeat steps 2–4 and ensure you are within the required time window. - 5
Test the remote
Close the loop by pressing the remote button to verify the door responds with no delay. If it does not, re-enter learning mode and retry.
Tip: Test from the farthest practical distance to confirm reliable range. - 6
Repeat for additional remotes
If you have more remotes, repeat steps 3–5 for each one. Some models allow multiple remotes per learning cycle; others require remembering each individually.
Tip: Keep a labeled list of which button controls which remote for future use.
Got Questions?
Do I need to reprogram all remotes if I replace the opener?
Yes, pairing new openers typically requires relearning each remote. If you want to prevent unauthorized access, erase all previously paired remotes and re-add only those you trust.
Yes—usually you’ll need to relearn every remote when you replace the opener; consider erasing old remotes first for security.
What if the Learn button won’t activate or the LED doesn’t respond?
Double-check power to the opener, ensure you’re within the learning window, and verify you’re using the correct Learn button. If needed, turn off power for a minute and retry.
If the Learn button isn’t responding, check the opener power and timing, then retry after a short reset.
Can I program remotes for multiple doors?
Yes, many systems support remotes for more than one door, but each opener has its own learning mode. You’ll need to repeat the process for each opener and its distinct remote set.
Yes, you can program remotes for multiple doors, but each opener requires its own learning sequence.
Is programming a safety risk?
Programming is generally safe when you follow the correct steps and keep people clear of the door. Always ensure the door is closed during learning and avoid standing under it.
Programming is safe if you follow steps carefully and keep the area clear of people and pets.
What should I do if the remote stops working after a few days?
Check the battery, repeat the learning sequence, and confirm you’re using the correct button on the intended remote. If problems persist, test a new remote to rule out a dead transmitter.
If a remote stops working, replace the battery and reprogram; if that fails, try a new remote to test the system.
How do I remove a lost remote from the opener’s memory?
Enter learning mode, then use the manual erase steps outlined in your model’s manual to delete the lost remote’s code from the opener’s memory.
If a remote is lost, erase it from the opener’s memory to prevent unauthorized usage.
Watch Video
Quick Summary
- Identify the Learn button and follow brand-specific steps.
- Test every remote after programming to confirm reliable operation.
- Erase or re-pair old remotes when a device is lost or compromised.
- Maintain batteries and keep a record of paired remotes.
- Use security features (rolling codes) where available to protect access.