87504 LiftMaster: Program, Pair, and Troubleshoot
Learn how to program and troubleshoot the 87504 liftmaster remote, verify compatibility, and maintain reliable garage door operation with step-by-step guidance.

Learn how to identify compatibility for 87504 liftmaster remotes, pair the remote with your garage door opener, and troubleshoot common issues. This quick guide covers confirming model compatibility, locating the Learn/Program button, performing the programming sequence, and testing the remote from different distances to ensure reliable operation. Follow these steps safely and avoid misprogramming.
87504 liftmaster compatibility basics
According to GarageDoorAdjust, the 87504 liftmaster remote is a popular option for homeowners who want a reliable, convenient pairing with many garage door openers. Understanding compatibility matters because not all openers respond to the same frequency or learning sequence. This section explains how to verify whether your opener supports the 87504 liftmaster remote, and what you can do to ensure a smooth programming experience. First, confirm your opener model and current remote code format (rolling code vs fixed code). If your opener is older and uses a DIP switch or fixed code, you may need a different remote or a compatibility adapter. Next, locate the Learn button on the opener—often labeled Learn, Set, or Program—and review the owner's manual for the exact sequence required by your model. The 87504 liftmaster remote uses a standard pairing flow, but some models require erasing existing remotes before adding a new one. Always test after programming and keep a spare battery on hand. By following these checks, you can reduce frustration and prevent misprogramming.
Tip: Keep a labeled spare remote handy in case you need to reprogram during a power outage or after service visits.
Tools & safety considerations for 87504 liftmaster programming
Before you start, collect your tools and review safety considerations. You will need a compatible opener with a Learn button, a 87504 liftmaster remote, spare batteries, a small screwdriver, and possibly a ladder or step stool to reach the control panel. Safety first: disconnect power only if you are removing the opener cover, and never place your hands near the door while testing. If you must adjust wiring or remove the cover, wear safety glasses and keep children and pets away from the workspace. Always perform programming with the door fully closed unless your model explicitly allows testing mid-cycle, and test the remote from a short distance before extending range. Document which remotes are programmed to the opener so you can avoid duplication and confusion later.
Note: If you are uncomfortable with opening the opener, skip disassembly and rely on the manufacturer’s instructions for the Learn button location.
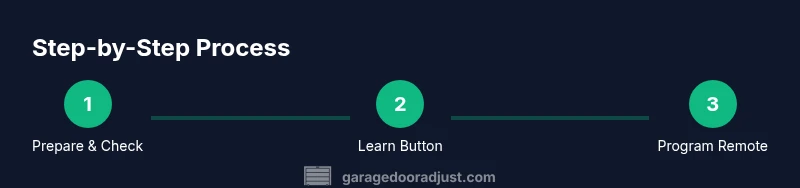
Step-by-step: programming the 87504 liftmaster remote
To program a 87504 liftmaster remote, prepare your tools and your opener, then follow the sequence provided by your model. Start by confirming compatibility via the manual or LiftMaster support site, then gather the remote and batteries. Open the opener cover if needed to access the Learn button, and identify the exact sequence required by your unit. Most openers require pressing and releasing the Learn button, then pressing the remote button within a short window. After the LED indicates learning is complete, remove power for a moment if required by your model and test the remote from close range before moving farther away. If the remote fails, retry with fresh batteries and within 3–6 feet of the opener. Always document which remotes are programmed to the device for future reference.
Estimated total time: 15-25 minutes.
Troubleshooting common issues with 87504 liftmaster
If the 87504 liftmaster remote fails to program, verify you are using the correct model for your opener and that the Learn button sequence is followed precisely. Ensure the opener has power and the remote battery is fresh. If the LED on the opener does not respond, check for interference from other wireless devices or move closer during initial programming. Some openers require erasing prior codes before adding a new remote; if you do this, reprogram any other remotes afterward. If range is short, replace the remote battery, re-check the placement relative to the antenna, or consider moving your opener to reduce interference. In rare cases, the receiver in the opener may be failing and require service or replacement.
Pro tip: keep a spare battery in your toolbox and label remotes by location to simplify future programming.
Maintenance and safety best practices for remotes and openers
Regular maintenance helps prevent programming headaches with the 87504 liftmaster remote. Inspect batteries every 6–12 months and replace them as needed to avoid mid-program failures. Clean the remote housing with a dry cloth and avoid moisture or solvents that could damage electronics. Keep the opener and remote free from dust, and protect wiring from moisture. When performing any service on the opener, disconnect power to avoid unexpected door movement. Store remotes in a dry, cool place away from children, and document which remotes are paired to each opener. Routine checks reduce misalignment between remote commands and door actions, extending the life of your system.
Authoritative sources and extra reading
For safety standards and best practices, consult authoritative sources to complement this guide. OSHA and CPSC provide safety guidance relevant to household garage doors, while UL publishes standards related to door hardware and electrical components. These sources help you understand the broader safety landscape while working with a 87504 liftmaster remote.
Tools & Materials
- 87504 liftmaster remote(New or freshly reset, with batteries installed)
- Compatible garage door opener with Learn button(Access to Learn/Program button)
- Spare batteries for remote(Format depends on remote (e.g., CR2032))
- Screwdriver set(Phillips or flathead for opener cover screws)
- Ladder or step stool(To reach the control panel safely)
- Marker or label(Label remotes for future reference)
Steps
Estimated time: 15-25 minutes
- 1
Verify compatibility
Confirm the opener model supports the 87504 liftmaster remote by checking the manual or LiftMaster support site. Ensure you have a Learn button and the correct code format (rolling vs fixed).
Tip: Have model numbers handy and a ladder nearby if you need to access the control panel. - 2
Open the opener cover to access Learn
Use a screwdriver to remove screws and gently lift the cover. Locate the Learn/Program button and note any model-specific sequence requirements.
Tip: Keep screws in a container to avoid loss; work slowly to avoid damaging wiring. - 3
Identify the Learn button sequence
Different models require slightly different sequences (press-and-hold, or a timed press). Check the manual for the exact steps specific to your unit.
Tip: If in doubt, perform a quick reference check on the manufacturer site. - 4
Erase prior codes if needed
If the opener is full or you want a clean slate, hold the Learn button until the LED blinks or goes off, then release. Then prepare to reprogram remotes.
Tip: Only erase if you intend to reprogram all remotes to avoid losing access. - 5
Program the 87504 remote
Within 30 seconds of initiating Learn, press and hold the programmed button on the remote until the opener responds (LED blink or click).
Tip: Stay within 3–6 feet of the opener for the strongest signal during learning. - 6
Test and finalize
Close the cover, remove tools, and test the remote at multiple distances. If needed, repeat with fresh batteries and re-check the alignment.
Tip: Label the remote to avoid future confusion and record which remotes are programmed.
Got Questions?
Can I program a 87504 liftmaster remote to any opener?
Most modern openers with a Learn button will support the 87504 liftmaster remote, but some older models use different codes and may require a different remote. Always check the opener’s manual for compatibility before starting.
Most openers with a Learn button work, but older models may need a different remote. Check the manual first.
Where is the Learn button located on LiftMaster openers?
The Learn button is usually on the back or side of the motor unit near the antenna. It may be labeled Learn, Set, or Program depending on the model.
Look on the back or side of the motor unit near the antenna for the Learn button.
How do I erase existing remotes from the opener?
If you want to reset codes, hold the Learn button until the LED blinks, then release. This clears previous remotes; you’ll need to reprogram any you still want to use.
Hold Learn until the LED blinks to erase and reprogram remotes.
Can I program multiple remotes at once?
Yes. After erasing or if you’re adding remotes, repeat the Learn process for each remote button you wish to program. Test each remote after programming.
You can program multiple remotes one by one and test each.
What should I do if programming fails?
Double-check that you’re using the correct 87504 model for your opener, ensure fresh batteries, and stay within the recommended distance during learning. If issues persist, consult the manual or call support.
If it fails, check model compatibility and batteries, then retry within the recommended distance.
Is it safe to program the remote at night?
Programming can be done safely at night, but ensure the area is well lit and keep hands clear of the door. Avoid distractions that could cause mistakes during the Learn sequence.
Yes, as long as the area is lit and you stay clear of moving parts.
Watch Video
Quick Summary
- Verify compatibility before programming.
- Use the Learn button to pair the remote correctly.
- Test range thoroughly after programming.
- Label and document remotes for future maintenance.