Wall Mount Garage Door Remote: Install & Troubleshoot
A comprehensive, step-by-step guide to installing and troubleshooting a wall mount garage door remote. Learn compatibility checks, mounting, pairing, safety, and maintenance to improve daily access and reduce lost remotes.

Goal: Install and configure a wall mount garage door remote that works with your opener. You'll learn how to confirm compatibility, choose the right model, mount securely, and pair the remote to your opener. This quick guide also covers safety tips, troubleshooting, and aftercare to reduce lost remotes and improve daily access.
Why a wall mount garage door remote is a smart upgrade
A wall mount garage door remote provides a fixed, easily reachable control point for your opener. This simple shift can reduce misplacement, speed up entry, and keep the garage area organized. According to GarageDoorAdjust, a fixed remote location improves daily usability and reduces wear on handheld remotes. The right wall mount also reduces fumbling when carrying groceries or kids' gear. In this guide, you’ll learn how a wall mount remote integrates with your existing opener and what to expect during installation. You’ll see why homeowners who switch to a wall mount remote often report a more seamless entrance to the home. This upgrade also supports accessibility goals by placing the button at a predictable height.
Throughout this article, we’ll walk you through compatibility, the selection process, mounting considerations, and a tested step-by-step installation. By the end, you should feel confident starting from a power-down safety check through a full test of the remote with your opener.
Safety and compatibility you should confirm before starting
Before you touch wires or drill, confirm that your opener supports a remote mounted control and that you’ll be within the legal and safety guidelines for door operation. Start by locating the receiver inside the opener housing and checking whether the unit uses a fixed-wall button or a learn/pairing method. Always unplug the opener when working near moving parts. If you’re not sure about compatibility, consult the manual or contact the manufacturer. The GarageDoorAdjust Team emphasizes safety first: improper mounting or wiring can create a binding door or a short circuit. Incompatible devices can trigger the wrong door action or fail to stop properly, so validating compatibility first saves time and protects your family.
Tools and materials you’ll need
Having the right tools on hand makes the project smoother and safer. Essential items include a compatible wall mount remote kit, a drill, screwdriver (Phillips and flat-head), level, stud finder, measuring tape, mounting screws, and spare batteries. If the model requires wired connections, you’ll need wire strippers and electrical tape. Always have safety gear on hand: eye protection and gloves. The exact tools may vary by model, so check the kit's instructions. Prepare a clean workspace, and protect the floor from dust and metal shavings by laying down a drop cloth.
How a wall mount remote works with your opener
Most modern wall mounts communicate with the opener’s built-in receiver either wirelessly via rolling code signals or through a fixed wiring and learned pairing method. When you press the wall button, the receiver sends a command to the motor to raise or lower the door. Some units use a “learn” or “pairing” sequence to sync the wall switch with your opener. If your setup uses a fixed-wall button, ensure the wall plate you choose can emulate that button’s momentary contact. Understanding your receiver type helps you select a mount with the correct interface and avoids buying a model that won’t pair.
Choosing the right wall mount remote
Key features to consider include compatibility with your opener model, the programming method (learn button vs. direct wiring), single vs. multiple buttons, code security (rolling codes are preferred), and battery type. A low-profile mount is nice for tight spaces, while a larger button can be easier to press. Look for clear LED indicators that confirm a successful press, as well as robust mounting hardware. If you have family members with limited dexterity, choose a model with a large, tactile button and accessible height. Finally, confirm the unit includes a quick-repair battery option and a straightforward reset procedure in case you need to re-pair.
Step-by-step installation overview
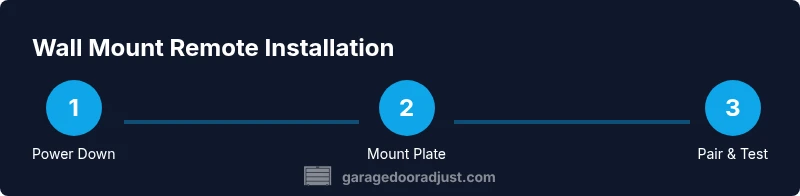
This overview covers the general flow you’ll follow, with detailed steps provided in the dedicated STEP-BY-STEP section. First, power down the opener and ensure no movement can occur during installation. Next, mount the wall plate at a comfortable height on a sturdy surface, making sure it is level. Finally, pair or wire the remote to the opener according to the model’s instructions and test the function from the door and from nearby rooms to verify range and reliability. After installing, perform a quick safety check that the door opens and reverses correctly when lightly pressed on the bottom edge.
Wiring and pairing basics
If your remote uses wired integration, route compliant low-voltage wiring from the wall plate to the opener’s receiver following the manufacturer’s instructions. For wireless models, locate the learn/pairing button on the opener, initiate pairing on the wall mount unit, and press the remote button until the LED confirms a successful link. Keep a copy of the pairing steps as a reference, and avoid mixing different code types that could cause interference with other devices in the home.
Troubleshooting common issues
If the door fails to respond consistently, start with a battery check in the wall mount remote. Replace weak batteries and re-test. Verify the distance and line-of-sight between the wall unit and the opener receiver, and confirm there’s no physical barrier or metal surface that could cause interference. If the LED on the remote blinks abnormally or refuses to pair, consult the manual for a reset procedure and retry the pairing sequence. Keep a non-wireless backup remote in case of failure.
Maintenance and battery care
Inspect the mounting hardware every few months to ensure screws remain tight and the plate hasn’t shifted. Clean the button surface with a soft, dry cloth to maintain a good tactile response. Replace batteries at the first sign of reduced performance, and store spare batteries with different expiry dates to avoid sudden outages. Regular checks help extend the life of the wall mount remote and prevent mid-use failures.
AUTHORITY SOURCES
For safety standards and best practices related to garage doors, refer to credible sources such as the Consumer Product Safety Commission (CPSC) and OSHA guidelines. These sources provide general safety considerations when working with garage doors and electrical components. See also manufacturer manuals for your specific opener model.
Daily use tips and safety reminders
Keep the wall mount remote in a consistent location to reduce searching time and avoid door misfires. Teach all household members how to use the remote safely, especially around children and pets. Never modify the wiring or bypass safety features. If the door does not reverse on contact, unplug the unit immediately and seek professional service.
Next steps and verification
After installation, re-check that the door operates smoothly from the wall mount, handheld remotes, and any smart devices connected to the opener. Confirm that the door reverses correctly at the bottom edge. Keep your documentation handy for future maintenance and consider scheduling a yearly safety check with a qualified technician.
Tools & Materials
- Wall mount remote kit (universal or model-specific)(Ensure compatibility with your opener's receiver.)
- Drill with appropriate bits(For mounting the plate to studs.)
- Screwdriver set (Phillips and flat-head)(For screws and any mounting hardware.)
- Level(To ensure a straight, comfortable install.)
- Stud finder(Locate solid mounting points.)
- Measuring tape(Position at comfortable height.)
- Spare batteries (as specified by the remote)(Keep ready for immediate replacement.)
- Non-contact voltage tester(Optional safety check for wired installs.)
- Safety gear (eye protection, gloves)(Protect yourself during drilling.)
- Cable ties or zip ties(Manage wiring neatly if needed.)
Steps
Estimated time: 30-45 minutes
- 1
Power down the opener
Unplug the garage door opener or switch off its circuit to prevent any movement while you install the wall mount remote. This eliminates the risk of the door moving unexpectedly during mounting and wiring. Confirm power is off with a quick test on the unit.
Tip: Double-check power at both the outlet and any separate control switch. - 2
Verify compatibility
Consult your opener’s manual or the manufacturer’s website to confirm support for a wall-mounted remote and determine the required pairing method. If available, locate the receiver and identify whether the unit uses a fixed wall button or a learn/pairing mode.
Tip: If in doubt, reach out to the manufacturer for model-specific guidance. - 3
Choose mounting location
Select a wall area near the door frame that is accessible, away from moisture, and within a comfortable reach height. Use a stud finder to locate solid studs and mark the mounting points.
Tip: Avoid placing the plate where it could block overhead tracks or impede the doorway. - 4
Mount the wall plate
Drill pilot holes, align the plate, and secure it with screws into the studs. Use a level to ensure the plate sits flat and presses evenly on the wall surface.
Tip: Start with two screws to hold the plate, then check alignment before tightening completely. - 5
Configure wiring or pairing
If wired, connect the wall plate leads to the opener's receiver as directed. If wireless, initiate pairing on the opener (learn button) and then trigger the remote until the status LED confirms a successful link.
Tip: Keep the opener within range during pairing and avoid other devices that might cause interference. - 6
Install the button and test
Attach the remote button to the plate, ensuring easy access and a stable press. First test close and then test open to verify the command is transmitted correctly.
Tip: Test from different room angles to confirm range and reliability. - 7
Pairing confirmation
If the LED blinks or stays solid after pressing the remote, repeat the pairing steps or reset the opener’s receiver and try again. Confirm a successful link before finalizing.
Tip: If you have trouble, consult the manual for a factory reset of the remote receiver. - 8
Final functional test
From multiple locations, press the wall unit and any existing handheld remotes to ensure the door responds consistently, including the safety reversal when contacting the door edge.
Tip: Keep a manual backup remote until you’re confident the wall mount is reliable. - 9
Maintenance and battery check
Inspect mounting hardware for tightness, check the remote battery, and replace if signals weaken. Clean the button surface to maintain a good tactile response, and replace batteries as needed.
Tip: Note the date of battery replacement for future reference.
Got Questions?
Is a wall mount garage door remote compatible with all openers?
Most standard openers support a wall mount remote, but you should verify compatibility with the model’s receiver and pairing method. If in doubt, consult the manufacturer’s manual or support resources.
Most openers work with wall mounts, but check your specific model's compatibility and follow the pairing instructions carefully.
Do I need to disconnect power during installation?
Yes. Power down the opener before mounting or wiring to prevent accidental movement and injury. Restore power only after all wiring and mounting steps are complete and secure.
Always power down the system before starting any installation.
Will this remote work with my smartphone app?
Wall mount remotes typically operate via the opener’s receiver and may not pair with a smartphone app unless your model supports it. Check your opener’s app compatibility and any required firmware updates.
Usually not, unless your specific opener supports app pairing.
What maintenance does a wall mount remote require?
Regular battery checks and button cleaning keep the remote reliable. Inspect mounting hardware for looseness and re-tighten as needed.
Check batteries and hardware regularly, and clean the button for good response.
How do I reset or re-pair after a battery change?
Use the opener’s learn/pairing button to re-sync the wall mount remote. If needed, perform a factory reset on the receiver and retry the pairing sequence according to the manual.
Re-pair by using the learn button and following the manual steps.
What if the remote doesn’t press properly due to the wall plate?
Ensure the plate is level and the button is not obstructed. Clean the surface and verify there is no debris under the button that could hamper operation.
Make sure the plate is flat, clean, and unobstructed for reliable presses.
Watch Video
Quick Summary
- Verify opener compatibility before purchase.
- Mount securely to studs for long-term stability.
- Follow exact pairing steps to avoid interference.
- Test range and safety functions after installation.
- Maintain the unit with regular battery checks.