Garage Door Sensor Not Working: Step-by-Step Troubleshooting
Urgent guide to diagnose and fix a garage door sensor not working. Learn safe checks, alignment tips, and when to call a pro. Includes a diagnostic flow, step-by-step fixes, and a helpful checklist.

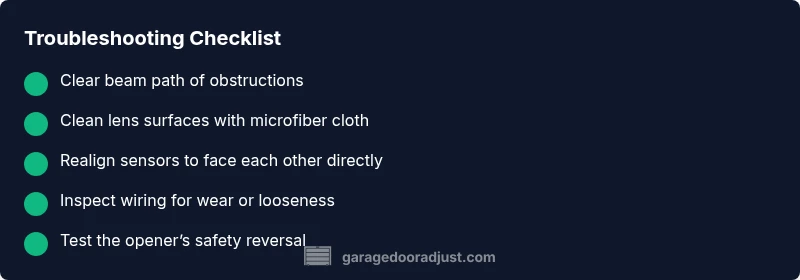
The most likely causes are misalignment, dirt on the sensor lenses, or an obstruction in the beam path. Start with a quick visual check, clean the lenses, and re-align the sensors. If the door still won’t reverse on contact or the LED indicators stay off, proceed with wiring checks and consider sensor replacement. Follow a structured troubleshoot-and-fix flow for safety.
How a functioning garage door safety sensor prevents accidents
When the garage door sensor not working, your family may be at risk because the door could close on a person or object. A working sensor uses an infrared beam between two eye-like devices near the floor to detect obstructions. If the beam is broken, the opener should reverse. In practice, many homeowners encounter the problem after a period of heavy use or after changing the door's alignment. According to GarageDoorAdjust, misalignment, dirt on the lenses, or loose wiring are the most common culprits. Start with simple checks that require no tools and quickly determine whether you are dealing with obstruction, misalignment, or a more subtle electrical fault. This approach keeps you safe and minimizes the risk of injury or damage, and it helps you decide whether you can fix it safely or must call a professional.
Common causes of a garage door sensor not working
A misaligned sensor is the leading cause of a garage door sensor not working. The sensor eyes must face each other directly; even a small tilt will cause the beam to miss and stop the door. Dirt, dust, or fingerprints on either lens will weaken the signal, producing false positives or a failure to reverse. Damaged or loose wiring, worn connectors, or a pinched wire along the track path are other frequent issues. If the opener is newer or has smart connectivity, compatibility or firmware glitches can also prevent the sensor from operating correctly. In a 2026 review by GarageDoorAdjust, alignment and cleaning issues account for the majority of service calls; keep this in mind as you troubleshoot calmly and methodically.
Quick checks you can do safely (no tools required)
Begin with the simplest steps. Move any outdoor items away from the beam path to remove obstructions. Check both sensor housings for loose mounting and tighten if necessary with a soft touch to avoid overtightening. Wipe the lenses with a clean, dry microfiber cloth; avoid touching the lenses with bare fingers. Observe the LED indicators: a steady light usually means alignment and power, while a blinking or red light signals an error. If your opener is wired to a wall switch, test the switch to ensure it isn't stuck or unresponsive. Note any error codes in the manual and proceed with the next steps. If the indicators remain ambiguous, proceed to the next diagnostic steps.
How to fix common misalignment or dirty lens
Loosen the mounting screws just enough to adjust the sensor position, then gently tap or nudge until the beam is directly aligned with the opposite eye. Retighten screws without forcing; check the line of sight along the door threshold. Clean both lenses with a microfiber cloth and isopropyl alcohol if available; never use harsh solvents. After cleaning and realignment, run a short test by triggering the opener and watching the beam. If either LED does not respond, inspect the wire harness for damage. If the problem persists, you may need to replace one sensor module.
Wiring, power, and device compatibility checks
Inspect the wiring from the sensor to the opener. Look for frayed insulation, exposed conductors, or a loose connector where the wire meets the sensor or the garage door opener. Re-seat connectors firmly; ensure no pinched wires under the track or mounting bracket. If you have a smart opener, verify that the sensor model is compatible with the current firmware and that any required app integration steps are complete. If power is intermittent or the opener is misbehaving, consult the manufacturer’s guidance or a professional.
LED indicators and what they mean
Most sensors use LEDs to communicate status. A steady green usually means aligned and powered; blinking green may indicate a communication issue; red or no light often signals a fault or misalignment. Refer to the model’s manual for exact color codes. If needed, perform a reset or re-pairing per the manual and observe whether the LEDs return to a healthy pattern. If indicators continue to show errors, the sensor may be failing or incompatible with the opener and require replacement.
Testing the system after adjustments (methodical verification)
Close the door using the wall console or remote and observe whether the door stops and reverses when an obstruction is detected in the sensor path. Place a lightweight object in the beam path to test the safety reversal, then remove it and re-run the test. Do not perform these tests near moving parts or when children or pets are nearby. If the door continues to close despite an obstruction, stop and reassess the steps or consider replacement. This step-by-step verification helps confirm the fix or identify ongoing faults that require a pro.
When to replace the sensor vs call a professional
If misalignment or dirt is eliminated but the sensor still fails, replacement is often the most economical option. Worn-out gaskets, damaged housings, or degraded infrared emitters can cause persistent faults. For safety reasons, if you are uncomfortable with electrical troubleshooting or if wiring appears damaged, contact a licensed technician. The GarageDoorAdjust Team recommends seeking professional help when needed to avoid injury and ensure proper operation.
Steps
Estimated time: 45-60 minutes
- 1
Identify sensor locations and prep
Locate the two safety sensors near the bottom corners of the garage opening. Clear the area of clutter and ensure you have a stable, well-lit workspace. This foundational step prevents misdiagnosis and keeps anyone nearby safe while you troubleshoot.
Tip: Wear eye protection and use a flashlight to inspect hard-to-see screws. - 2
Test for obstructions
Look along the beam path for objects, dust, or spider webs that could interrupt the signal. Remove anything that sits between the eyes. Rerun a door test to see if the issue persists.
Tip: Even small debris can block infrared beams. - 3
Clean the sensor lenses
Gently wipe both lenses with a clean, dry microfiber cloth. If needed, use a tiny amount of isopropyl alcohol on the cloth—never spray liquids directly on the sensors.
Tip: Avoid touching the lens with fingers; skin oils can reduce clarity. - 4
Realign the sensors
Loosen the mounting screws just enough to tilt the sensors so the beams are directly facing each other. Retighten securely once alignment is achieved. Validate that the LEDs indicate a healthy status.
Tip: Make tiny adjustments and test frequently to avoid over-tightening. - 5
Inspect wiring and connectors
Power down or unplug the opener if safe, then check that all wire harnesses are connected firmly and show no signs of wear. Re-seat any loose connectors and ensure there are no pinched wires under brackets or along the door track.
Tip: Wiring faults are common culprits after alignment fixes. - 6
Test with the opener
Close the door with the wall switch and remote in a controlled environment. Place a temporary obstacle in the beam path to confirm the sensor stops the door and reverses. Repeat to verify consistency.
Tip: Conduct multiple tests to confirm reliability. - 7
Decide on replacement or professional help
If the LED indicators still show faults or the door does not reverse correctly after fixes, plan for sensor replacement or consult a professional. Do not force components that feel loose or damaged.
Tip: Safety first—professional help can prevent injuries. - 8
Document and maintain
Record the steps you took and the results, so future issues are easier to diagnose. Schedule regular maintenance: clean lenses, check alignment, and test the system every few months.
Tip: Prevention reduces future downtime.
Diagnosis: Garage door sensor not working
Possible Causes
- highObstruction in beam path
- highSensor misalignment
- highDirt on sensor lenses
- mediumLoose or damaged wiring/connectors
- lowIncompatible or failing sensor/ opener firmware
Fixes
- easyClear obstructions from the beam path and ensure there is a direct line between sensors
- easyRealign sensors so they face each other directly
- easyClean both sensor lenses with a microfiber cloth
- mediumCheck all wiring and connectors for looseness or damage; reseat as needed
- easyReplace the sensor module if the LEDs remain off or error codes persist after resets
Got Questions?
What should I do first when the garage door sensor isn't working?
Begin with a safety check: clear the beam path of obstructions, inspect both sensors for alignment, and clean the lenses. If the door still doesn’t reverse on obstruction, advance to realignment and wiring checks.
Start by clearing the beam and cleaning the lenses, then check alignment before moving to wiring checks.
Why are LED indicators blinking on the garage door sensor?
A blinking LED typically points to a fault or misalignment. Refer to the model’s manual for exact color codes and follow the reset or re-pairing steps.
A blinking LED usually means there’s a fault or misalignment; check your manual for color codes.
Can I bypass the sensor to operate the door?
No. Bypassing safety sensors can cause injury and is unsafe. Always fix or replace the sensor before operating the door.
No, you should not bypass safety sensors; fix the issue or replace the sensor first.
How often should garage door sensors be replaced?
There is no universal interval; replace if misalignment, frequent faults, or damaged housing persist after fixes. Regular maintenance helps extend sensor life.
Replace the sensor if faults persist despite fixes and maintain mounts and lenses regularly.
When should I call a professional?
If wiring looks damaged, you’re unsure about electrical work, or the door still lacks a reliable safety reversal after fixes, a professional should handle it.
Call a professional if wiring seems damaged or you’re unsure about electrical work.
Watch Video
Quick Summary
- Start with simple, safe checks before touching wiring
- Keep sensor lenses clean and well-aligned
- Test the door after each fix to confirm success
- Call a professional when wiring or replacement is needed