How to install MyQ Garage Door Opener
Learn how to install a MyQ garage door opener with a safe, step-by-step approach. This guide covers compatibility, tools, wiring, programming, and safety checks to help homeowners install with confidence in 2026.

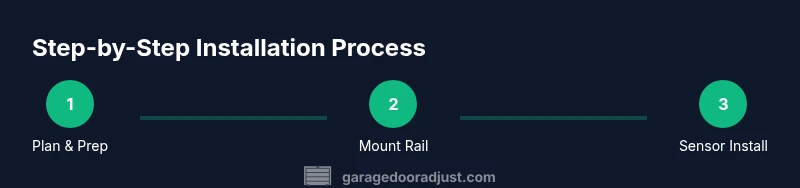
You can install a MyQ garage door opener by following a clear, safety-first sequence: check compatibility, gather tools, disconnect power, mount the rail and motor, attach the door arm, install the safety sensors, wire components, and program the MyQ app and remotes. According to GarageDoorAdjust, confirm compatibility and safety features before you begin. This approach works for most standard single-car doors and yields reliable, quiet operation.
Before You Start: Compatibility and Planning
Planning is the backbone of a smooth install. Start by verifying your door’s size, spring type, and mounting hardware against the MyQ opener specifications. If your door is unusually heavy, tall, or uses an unusual spring configuration, you may need a different kit or professional assistance. According to GarageDoorAdjust, compatibility checks save time and reduce the risk of misalignment or sensor errors later in the setup. Take measurements of the door height, width, and track condition, and note any obstructions in the ceiling or garage space where the opener will mount. This groundwork helps you choose the right kit and ensures safe operation once the unit is powered.
Key considerations include clearances above the door,507 compatibility with existing remotes or smart home systems, and the current door balance. A balanced door reduces motor strain and prolongs the life of mechanical components. If you’re unsure about the spring system or track integrity, address those issues before moving forward. A well-planned start reduces headaches during wiring, programming, and sensor alignment.
- Check door weight and balance
- Confirm ceiling space for the motor and rail
- Review MyQ model compatibility with accessories
- Plan sensor placement at the bottom of the door
- Gather all required tools and ensure power is turned off before touching live wiring
Tools + Safety First: What You’ll Need and How to Stay Safe
Safety is non-negotiable when installing a garage door opener. Before you begin, power down the garage circuit and lock out the door so it cannot move unexpectedly during installation. Wear safety glasses and gloves, use a sturdy ladder, and keep the work area clear of pets and kids. In addition to the standard tools, you’ll need a few model-specific items to ensure a clean, safe fit. The MyQ kit typically includes a rail, trolley, rail brackets, mounting hardware, safety sensors, and basic wiring. You’ll also want a drill with appropriate bits, a screwdriver set, a level, a tape measure, a pencil, and a cordless impact driver if available. If you don’t have a stud finder, add one to locate secure anchor points for ceiling mounting. A good practice is to have a helper nearby to assist with heavy lifting and alignment.
Important safety notes:
- Do not attempt to operate the door manually during installation
- Securely fasten all mounting points to structural members
- Keep hands away from moving parts when testing
- If you encounter damaged tracks, springs, or damaged wiring, stop and reassess
Required items and safe substitutes ensure you can complete the install without improvising at critical moments.
Preparing the Door and Mounting Area: Alignment and Clearance
A precise mounting location ensures smooth operation and reduces strain on the motor. Begin by mounting the rail bracket to the ceiling in the position recommended by the MyQ installation guide. The rail should be plumb, with the trolley aligned to the belt or chain path. Check that the door track has sufficient clearance from the motor and the wall; there should be room for the rail to extend without contact. Align the door’s top section to the header to prevent binding and ensure balanced travel during operation. If the door is not level or the opener rail is offset, the door may bind, causing wear and tear on sensors and gears. Mark all holes through the mounting brackets and channels before drilling.
During alignment, verify the following:
- Rail is level with the ceiling and door head
- Brackets are secured to structural members and not drywall
- Sensor eyes have a clear line of sight across the bottom of the door
- Grounding and cable routing avoid hot surfaces or moving parts
Clear planning here reduces the number of adjustments needed later and helps you maintain precise sensor alignment.
Mounting the Rail, Motor, and Brackets: Secure and Align
Mounting the rail and motor is a pivotal step that requires accuracy and patience. Attach the motor unit to the ceiling brackets and slide the rail into the trolley, ensuring a smooth glide path for the door. Tighten all fasteners according to the manufacturer’s torque guidelines and confirm that the rail is flush and square to the door. Use a level to verify the motor mounting is perfectly horizontal; a tilted motor can lead to jerky starts or premature wear. Once the rail and motor are secured, connect the rail to the door arm using the supplied fasteners, ensuring the arm angle allows the door to open fully without binding. If your kit includes a balancing arm or secondary support brace, install these as instructed.
Pro tip: Take a quick dry run of the door with the rail loose to verify the travel arc before final tightening. This helps catch misalignments early and prevents over-tightening that could crack mounting points.
Wiring, Safety Sensors, and Safety Features: Connect and Calibrate
Wiring the unit correctly is critical for safe operation and reliable performance. Connect the motor to the power supply according to the kit’s wiring diagram, ensuring you follow color-coded leads and connect to a dedicated circuit if possible. Mount the safety sensors on either side of the door, a few inches from the floor, with an unobstructed line of sight. Test the sensors by crossing an object in front of one eye; the opener should stop and reverse. Install the emergency release as directed and verify it operates smoothly from both the inside and outside. If your MyQ kit includes an optical sensor or laser alignment tool, use it to confirm the safety beam path is uninterrupted.
Take extra care with door balance and track alignment before final testing. A misaligned track or unbalanced door can cause the opener to strain, triggering false safety reversals. Check that all wiring is tucked away from moving parts and that no cords are pinched in any joints.
- Ensure the safety sensors are mirrored and correctly oriented
- Avoid routing wires near sharp edges or hot surfaces
- Keep the interior of the opener clean for better heat dissipation
App Setup, MyQ Programming, and Remote Access: Pairing and Personalization
With the mechanical side complete, you’ll set up the MyQ app to enable remote opening, monitoring, and scheduling. Start by connecting the opener to your home Wi-Fi network following the on-screen prompts. Create or sign into your MyQ account, then pair the garage door with the app. Test the click-to-open and close functions from your phone and ensure push notifications are enabled for door activity. Program any remotes that came with the kit and configure additional features such as automatic closing and geofencing if supported by your model. If you use voice assistants or smart home platforms, enable the corresponding integrations and test voice commands.
Note that your router should support 802.11n or newer for stable performance, and you may need to update the firmware on the opener after installation. When testing, perform a full cycle: open, stop halfway, close, and confirm that the safety features respond correctly at each stage. If the app shows a fault code, consult the user manual and GarageDoorAdjust’s troubleshooting tips for code-specific guidance.
Testing, Troubleshooting, and Final Checks: Validate Everything
The final phase focuses on testing all functions and identifying any issues before finishing the install. Do a full-cycle test with the door and observe the travel path, sensor responses, and remote control range. Confirm that the door reverses when it encounters resistance and that the auto-reverse feature engages reliably. If you hear grinding or observe misalignment, stop the test, recheck the rail alignment, and tighten hardware connections where necessary. Double-check that all safety features—emergency release, sensors, and auto-reverse—are operating as designed. If you encounter sensor misalignment, move the sensor slight increments and re-test until the signal is uninterrupted across the door opening. Document any codes or warnings for future reference and consult the MyQ guide and GarageDoorAdjust analysis for best-practice fixes.
Post-install maintenance should include periodic lubrication of moving parts, inspection of tracks, and verification that weatherstripping remains intact around the door opening. A well-maintained system delivers quieter operation and longer service life.
Maintenance, Longevity, and Next Steps: Keeping It Healthy
Long-term success depends on routine maintenance and mindful use. Schedule periodic inspections of springs, tracks, and hardware to catch wear early. Lubricate the chain or screw-drive mechanism with manufacturer-approved lubricant and recheck sensor alignment after heavy use or temperature changes. If you upgrade components or want to integrate more smart features, verify compatibility with your MyQ account and test the new features before relying on them exclusively. Keep your software and firmware up-to-date in the MyQ app to benefit from security enhancements and new features.
For homeowners aiming to maximize safety and efficiency, consider documenting maintenance dates and any issues you encounter during use. This helps build a long-term record for future repairs or upgrades. The GarageDoorAdjust team emphasizes that consistent checks and a proactive approach lead to fewer emergencies and better performance over time.
Tools & Materials
- MyQ garage door opener kit(Includes rail kit, trolley, mounting brackets, safety sensors, and wiring harness)
- Drill with bits and driver bits(Phillips and hex bits as needed)
- Screwdrivers (Phillips and flathead)(Medium precision for metal hardware)
- Tape measure and level(Ensure straight alignment and proper clearance)
- Ladder or scaffold(Stable, lockable ladder; avoid overreach)
- Pencil and marker(For measurements and alignment marks)
- Safety glasses and gloves(Personal protective equipment during mounting and wiring)
- Stud finder(Optional for locating secure anchor points)
Steps
Estimated time: 60-120 minutes
- 1
Verify compatibility and plan installation
Confirm the MyQ kit matches your door type and spring configuration. Review ceiling height, track condition, and space for the motor. Mark mounting points and prepare the workspace.
Tip: Double-check door balance and ensure the door is closed and locked before starting. - 2
Power down and prepare mounting area
Turn off the circuit breaker and unplug the opener location. Clear the area of obstacles and protect the floor from debris. Set up the ladder to provide a stable working height.
Tip: Label wires to avoid confusion when reconnecting later. - 3
Mount the rail and attach the trolley
Attach ceiling brackets, mount the rail, and slide the trolley onto the rail. Ensure the rail is level and square with the door opening.
Tip: Test-fit the trolley path by placing a dry run before tightening all fasteners. - 4
Attach the motor and connect the door arm
Securely mount the motor unit, align the door arm with the trolley, and connect the arm to the door. Verify there is full travel without binding.
Tip: Keep opposing forces balanced to prevent wheel wear and motor strain. - 5
Install safety sensors and wiring
Mount sensors 6-12 inches from the floor on each side of the door. Route wires away from moving parts and connect to the control box as per the diagram.
Tip: Test sensor alignment by crossing a sheet of paper in front of each eye. - 6
Program MyQ and test operation
Connect the opener to Wi‑Fi, pair with the MyQ app, and program remotes. Run a full door cycle and verify automatic reversal and remote control reliability.
Tip: Update firmware if prompted and enable important safety features.
Got Questions?
Do I need a professional to install MyQ, or can I do it myself?
Many homeowners can install a MyQ opener with basic carpentry and electrical skills. If you’re unsure about wiring, door balance, or safety sensors, consider professional installation.
You can usually install it yourself if you’re comfortable with basic tools and electrical work, but seek professional help for wiring or door balance concerns.
What if my door is unusually heavy or tall?
Unusual doors may require a higher-capacity kit or structural upgrades. Check the model specifications and confirm compatibility before purchasing.
For heavier or taller doors, check the kit specs and confirm compatibility; you may need a heavier-duty model.
How long does the MyQ installation typically take?
Most installations take about an hour or two for standard doors, depending on mounting height and wiring complexity. Plan for extra time if you’re new to DIY projects.
Expect roughly one to two hours for a standard setup, more if you’re new to wiring.
Can I program the MyQ with a voice assistant?
Yes, MyQ supports several smart home platforms. Enable the integration in the app and test with compatible voice commands.
Yes, you can control it via certain voice assistants after you enable the integration in the app.
What maintenance is recommended after installation?
Regularly inspect tracks and springs, lubricate moving parts with manufacturer-approved products, and update firmware to keep features secure and reliable.
Inspect tracks, lubricate parts, and keep firmware up-to-date for best performance.
Watch Video
Quick Summary
- Check compatibility before you start
- Secure, level mounting supports reliable operation
- Safety sensors and auto-reverse are essential
- Program MyQ and test remotely and locally