Garage Door 7ft: A Homeowner’s How-To Guide
Safely service a 7ft garage door with measurement, balance checks, lubrication, and safety testing. This educational how-to helps homeowners diagnose common issues and maintain a smooth, quiet 7-foot opening.

Goal: safely assess and service a garage door built for a 7ft opening, ensuring correct height clearance, opener compatibility, and balanced operation. This quick guide walks you through essential measurements, safety checks, lubrication, spring and track considerations, and a practical step-by-step plan to diagnose common problems and complete minor repairs with household tools.
Why the 7ft height matters for residential doors
For many homes, a 7ft garage door is the standard for a single-car or mid-size two-car configuration. Getting this height right matters because it affects how the door tracks fit inside the opening, how weather seals seal the top, and how the opener travels along the track. If the opening is mismeasured or the door was installed as a different height, you can experience rubbing, binding, or erratic stopping points. According to GarageDoorAdjust, precise height alignment reduces wear on rollers and minimizes motor strain over time. By understanding the 7ft standard, you’ll know which parts are most likely to wear and where to look first when symptoms appear. In this guide, we’ll cover measurement, compatibility, maintenance, and safe repair steps that homeowners can perform without specialized equipment. The goal is to keep your 7ft door operating smoothly, safely, and quietly, so you can protect your garage and its contents while avoiding unnecessary service calls.
Compatibility and safety: opening height, tracks, and opener compatibility
A 7ft door requires a compatible overhead track, spring system, and opener height. If any component is rated for a shorter opening, the door can rub against the header or bottom of the track, creating noise and slowing operation. Start by verifying the door’s height stamp, typically located on the bottom panel or in the installation manual, and compare it to your current opening clearance. Ensure the torsion spring assembly, track brackets, and rollers are sized for 7ft operation, and confirm the opener’s rail height and extension limits match the door’s travel. The GarageDoorAdjust team notes that many compatibility problems originate from mismatched opener docs and misaligned tracks. If you notice binding, excessive gap at the top, or unusual sensor readings, pause and reassess before attempting adjustments. This section focuses on identifying mismatches early so you don’t incur unnecessary parts replacements.
Measuring for a 7ft opening: a precise method
To measure accurately, start with the exterior opening: place a helper at the header to hold the door’s maximum height while you verify the top clearance. Use a tape measure to confirm the exact door height at multiple points along the opening and record the smallest clearance. Next, measure the vertical track height from the door’s bottom to the header to ensure it aligns with a 7ft system. Check the bottom clearance where the door rests on the floor; a high threshold or uneven floor can affect sealing and safe operation. Keeping a log of these measurements helps you quickly spot deviations if you replace hardware later. GarageDoorAdjust’s guidance emphasizes repeatable measurements to prevent misalignment and future binding. If your measurements differ from the door’s printed specs, investigate the mounting brackets or consider consulting a pro before proceeding.
Inspecting tracks, hinges, and rollers
Begin with a visual inspection of tracks for dents, kinks, or loose fasteners. Clean dust and debris from the rails using a dry cloth, then run a light inspection along the entire length. Check all rollers for flat spots or looseness in their housings, and verify hinges are secure without excessive looseness. If you notice a missing fastener, replace it with the same size and type. For metal doors, look for signs of rust that could indicate weakened sections. Misaligned tracks produce binding; alignment should be tested by gently guiding the door up to a closed position and watching for even contact along the rails. Tighten screws gradually and verify smooth operation after each adjustment. A well-aligned track reduces noise and prolongs the life of moving parts.
Lubrication and routine maintenance you can perform safely
Lubrication is a key maintenance step that many DIYers overlook. Use a silicone-based lubricant on the door’s rollers, hinges, and track surfaces to minimize friction and noise. Avoid oil-based sprays that can attract dust and gum up moving parts. Wipe away any excess lubricant to prevent drips on the floor. Regular lubrication should occur every 6–12 months, or sooner if you hear squeaks or see stiff movement. While lubricating, inspect weather seals at the door edges for cracks or wear; replace as needed to maintain energy efficiency. If you suspect dry bearings or rust, pause and consult a professional rather than replacing components hastily. This discipline improves the door’s efficiency and reduces the load on the opener over time. GarageDoorAdjust analysis shows that routine maintenance is a cost-effective way to extend life and prevent emergency repairs.
Balancing the door and understanding torsion springs
Balancing a garage door is critical to safe operation. The door should stay in a partially opened position if you raise it manually, and it should stay put if you release it with the opener disengaged. Do not attempt to adjust torsion springs yourself; these components store a dangerous amount of energy. Instead, focus on the balance by checking cable tension and spring guides for wear, and ensure the door travels smoothly without binding or slamming. If you notice irregular movement, a professional should assess spring tension, counterbalance components, and track alignment. Remember that torsion springs and cables are under high tension and require specialized tools and training to service safely. The GarageDoorAdjust team emphasizes safety first and recommends professional evaluation for any spring-related concerns.
Testing operation and safety features after maintenance
With the door balanced and tracks aligned, reconnect power to the opener and run a full test: open and close the door slowly, listen for unusual noises, and observe tracking. Check that safety sensors near the floor react when an object crosses the beam—if not, adjust or replace the sensor alignment. Test the auto-reverse function by placing a light obstacle on the ground and confirming that the door reverses on contact. Ensure the door stops smoothly and doesn’t require excessive force to operate. Keep children and pets away during testing, and never bypass safety features for convenience. If anything feels off during these tests, stop and reassess before continuing. The objective is reliable operation and maximum safety.
Troubleshooting common issues with a 7ft door
Common issues include binding due to misalignment, opener strain from an overloaded track, and sensor misalignment that prevents closing. Start by rechecking track alignment, door balance, and hinge attachments. If the opener strains, inspect the door’s weight distribution and ensure counterbalance components move freely. For sensor problems, clean the photo-eye lenses and re-align beams per the manufacturer’s instructions. If issues persist after these checks, consult a licensed technician. Remember that working near torsion springs without proper training is dangerous and should be avoided.
Authority sources and professional help
For further guidance, consult reputable sources and industry standards. This article references guidelines and best practices from government and educational resources to support safe DIY work. You should also consider professional help for any spring work, door replacement, or structural modifications. The combination of safe maintenance and informed decisions will keep your 7ft door operating reliably for years to come. The GarageDoorAdjust team emphasizes safety and professional consultation when in doubt.
Tools & Materials
- Stepladder(6-8 ft height; stable on level ground)
- Screwdrivers (Phillips & flat-head)(Assorted sizes for brackets and hardware)
- Wrench set (adjustable and fixed)(For mounting bolts and bracket screws)
- Socket set(Helpful for mounting hardware on tracks)
- Silicone-based lubricant(Apply to hinges, rollers, and tracks)
- Rags and solvent(Clean parts before lubrication)
- Safety glasses(Protect eyes from debris and spring tension)
- Cordless drill with bits(If you need to remove/stow brackets)
- Replacement fasteners(Match size and thread to existing hardware)
Steps
Estimated time: 60-90 minutes
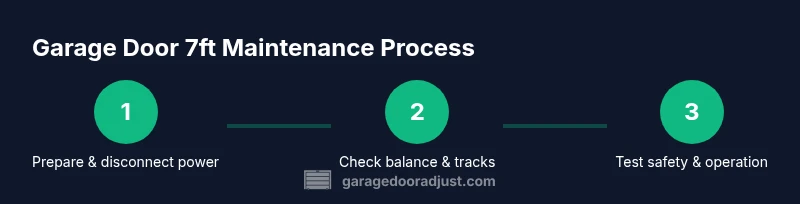
- 1
Disconnect power and secure the door
Power down the garage door opener and unplug or switch off the circuit to prevent accidental activation. Lower the door fully and ensure it is secured so it cannot drift. This reduces risk during subsequent inspections and adjustments.
Tip: Always verify power is off with a non-contact tester before touching components. - 2
Measure opening height and track clearance
Use a tape measure to verify the exact opening height at multiple points and note the smallest clearance. Check vertical track height and any header clearance to confirm compatibility with a 7ft system.
Tip: Record measurements in a notebook or phone note for quick reference during repairs. - 3
Test door balance by manual lift
With the opener disengaged, lift the door halfway and release. If it stays in place, balance is good; if it drifts, the balance or spring tension may be off and requires professional evaluation.
Tip: Have a second person hold the door for safety during this test. - 4
Inspect tracks, rollers, and hinges
Look for bends in tracks, loose screws, rust, or damaged rollers. Tighten brackets, replace worn rollers if you can do so safely, and ensure smooth contact along the entire track.
Tip: Do not force a bent track back into alignment; consult a pro if it seems distorted. - 5
Lubricate moving parts
Apply silicone-based lubricant to hinges, rollers, and both tracks. Wipe away any excess to prevent drips and dirt attraction. Lubrication reduces friction and extends lifespan.
Tip: Avoid oil-based lubricants that attract dust and grime. - 6
Check alignment and mounting hardware
Tighten mounting screws on brackets and ensure the door sits evenly in the tracks. Misalignment can cause binding and uneven wear across the door height.
Tip: Tull the door a few inches up and down to confirm stable movement after tightening. - 7
Test safety sensors and auto-reverse
With the door closed, place an obstacle near the floor and confirm the opener reverses on contact. Clean sensor lenses and re-align if needed to maintain safe operation.
Tip: Keep pets and children away during sensor tests. - 8
Reconnect power and perform final checks
Plug the opener back in and run a full open/close cycle. Observe for smooth travel, stable stopping points, and balanced motion across the entire track.
Tip: If any issue persists, halt testing and seek professional assistance.
Got Questions?
Can I replace torsion springs on a 7ft garage door myself?
No. Torsion springs are highly energized and dangerous. Replacing or adjusting them requires proper training and equipment. Seek a licensed technician.
Torsion springs are dangerous; do not attempt replacement yourself. Hire a licensed technician.
How do I verify my door is properly balanced?
With the door closed and the opener disengaged, lift the door halfway and release. If it stays put, balance is good; if it drifts, balance or spring tension needs professional assessment.
Balance is good if the door stays in place when you lift and release it halfway.
What safety features should I test after maintenance?
Test auto-reverse by placing an obstacle on the floor and ensuring the door reverses on contact. Clean and realign photo-eye sensors if needed.
Make sure the door reverses when it hits an obstacle and sensors read correctly.
What tools do I need before starting a repair?
Have a stepped ladder, screwdrivers, wrenches, silicone lubricant, rags, safety glasses, and basic hardware. Avoid power tools near moving parts unless you know what you’re doing.
Grab a ladder, screwdrivers, wrenches, silicone spray, rags, and safety glasses.
Is a 7ft door compatible with all openers?
Most modern openers are compatible with 7ft doors, but confirm rail height and travel limits match the door’s height and travel range to avoid rubbing.
Most openers fit, but check the rail height and limits to be sure.
What if my door is binding after a repair?
Recheck track alignment, balance, and hinge tightness. If binding persists, contact a professional to inspect for structural issues.
If it binds after adjustments, double-check alignment and seek professional help if needed.
Watch Video
Quick Summary
- Measure precisely before making changes
- Disengage power before inspections
- Balance and safe operation are priorities
- Avoid DIY spring work—call a pro
- Test sensors and tracks after maintenance