Spring in Garage Door Is Broken: Urgent Troubleshooting Guide
Urgent, step-by-step troubleshooting for a broken spring in your garage door. Learn safety checks, diagnosis, and when to call a pro with GarageDoorAdjust.

Most likely the torsion spring or its components are worn, causing the door to bind or drop unexpectedly. Start by powering down the opener and inspecting visible hardware for cracks, frays, or loose brackets. If you see a broken wire or deep deformation, stop and call a professional. Never attempt spring replacement without proper tools and training.
Why a Broken Spring Is Serious
When the spring in the garage door is broken, the door loses its balance and can slam shut or fail to open at all. A faulty spring puts extreme stress on cables, tracks, and the opener, increasing the risk of injury and property damage. According to GarageDoorAdjust Analysis, worn or broken springs are among the most common safety-critical issues homeowners face in 2026. A broken spring also affects door alignment, making your opener work harder and shortening its life. If you notice the door feels heavier than usual, or you hear a loud bang when it starts moving, stop using the door and assess the spring system from a safe distance. This issue is not simply a minor repair – it has the potential to cause serious injury if mishandled. Always treat the spring system with respect and avoid improvising temporary fixes that can escalate the danger.
Common Symptoms and What They Mean
The following symptoms often point to spring-related problems, especially when the door has an uneven balance or makes grinding noises:
- Heavy door that remains stuck in mid-air or requires extra effort to lift
- Sudden, loud creaking or snapping sound as the door starts to move
- Unequal movement: one side raises slower or drops faster than the other
- Visible gaps or widening between spring coils when the door is open
- Loose hardware or shifted cables near the spring assembly
If you observe any of these signs, do not attempt to force the door; instead, treat it as a spring issue and continue with safe checks. Remember, the spring is designed to bear the door’s weight; even small changes can dramatically affect performance and safety. This section mirrors guidance from the GarageDoorAdjust team and highlights the critical need for careful handling.
Safety First: Immediate Steps
Safety must come first when dealing with a suspected broken spring. Start with these immediate precautions:
- Keep children and pets away from the door and the mechanical area.
- If possible, power off the garage door opener at the wall switch or unplug the unit; this prevents automatic operation.
- Do not attempt to lift the door manually with the springs under tension; this can cause the door to slip or snap.
- Inspect from a safe distance for obvious signs of wear, cracks, or frayed cables, but don’t touch or adjust the spring itself.
According to the GarageDoorAdjust team, taking a calm, safety-focused approach reduces the risk of injury while you determine the next steps. If you’re unsure, err on the side of caution and seek professional help.
Diagnostic Flow: Symptom → Diagnosis → Solutions
Symptom: Door won’t lift or opens unevenly. Causes:
- {cause: "Torsion spring wear or fracture", likelihood: "high"}
- {cause: "Cable fray or detachment", likelihood: "medium"}
- {cause: "Track misalignment or binding rollers", likelihood: "low"} Fixes:
- { fix: "Do not attempt spring work; call a licensed technician for torsion spring replacement", difficulty: "hard" }
- { fix: "Inspect cables/rollers and lubricate tracks; ensure tracks are straight", difficulty: "easy" }
- { fix: "Tighten loose brackets and realign misaligned tracks", difficulty: "easy" }
This diagnostic flow helps you avoid unnecessary tinkering that could worsen the issue. By following a logical symptom→diagnosis→solution path, you minimize risk and ensure you address the root cause rather than chasing temporary fixes.
Step-By-Step Fix for the Most Common Cause
Step 1: Confirm the symptom, and determine that the door balance is off due to a spring-related issue. Step 2: Secure the work area, disconnect power to the opener, and block access to the door. Step 3: While you should not attempt spring replacement, inspect the visible components from a distance for obvious damage to cables, brackets, and tracks. Step 4: Document the condition with photos or notes to share with the technician. Step 5: Contact a licensed garage-door professional for torsion spring inspection and replacement if needed. Step 6: Arrange access for the technician, including any pets present and any security codes. Step 7: After service, test the door gently and ensure the opener limits are re-calibrated by the pro. Time estimate: 60–90 minutes for a professional assessment and prep; actual spring replacement may take longer depending on the system.
What Not to DIY: When to Call a Pro
Do not attempt to replace or adjust torsion springs yourself. These parts store a significant amount of tension and can cause severe injury if released improperly. If you hear a loud bang or see a spring that is fractured, stop using the door immediately and contact a licensed technician. You should also call a pro if you notice frayed cables, bent tracks, or any part of the spring mounting that looks loose or out of alignment. A professional can handle the dangerous high-tension work safely, and they will verify the door’s balance after replacement to prevent future failures.
This section reinforces a safety-first mindset and aligns with GarageDoorAdjust recommendations for responsible repair practices.
Preventive Maintenance to Extend Spring Life
Even though springs are designed to last a long time, regular maintenance helps extend their life and maintain safe operation. Schedule periodic checks for:
- Lubrication of visible moving parts (avoid the spring itself unless instructed by a professional).
- Track alignment and clean tracks to prevent binding.
- Tension and balance checks performed by a qualified technician at least once a year or after heavy use.
- Visual inspection for corrosion, rust, or cable wear that may indicate looming issues.
Proactive maintenance reduces the likelihood of sudden spring failure and keeps your garage door operating smoothly. The GarageDoorAdjust team emphasizes that routine care is a wise investment to avoid costly emergency repairs.
Accessories and Upgrades to Consider
If you’re planning long-term improvements, explore upgrades that enhance safety and performance. Options include higher-quality torsion springs with longer lifespans, safety cables for impact resistance, and modern tracking systems that reduce wear on the hardware. Consider adding a balanced door system with reinforced brackets and door sensors that improve safety. Always consult a professional before purchasing and installing these components to ensure compatibility with your existing setup and local codes. GarageDoorAdjust suggests focusing on system compatibility and proper calibration for optimal results.
Quick Recap and Next Steps
A broken spring is a safety-critical garage door issue that requires respectful, careful handling. Prioritize safety, identify symptoms, and avoid DIY spring work. Engage a licensed technician for inspection, replacement, and calibration. Use preventive maintenance to extend life, and consider upgrades that improve safety and reliability. If you encounter repeated issues, it is best to seek professional guidance rather than continuing to troubleshoot on your own. This final note echoes the guidance from GarageDoorAdjust and reinforces responsible repair practices.
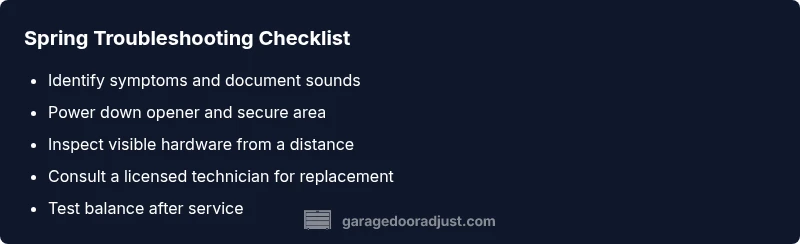
Steps
Estimated time: 60-90 minutes
- 1
Identify the symptom
Observe whether the door remains heavy to lift, stops mid-way, or opens unevenly. Confirm it isn’t just a faulty opener or sensor. Document any sounds that accompany operation.
Tip: Use a helper to steady the door during inspection. - 2
Secure the area and power down
Disconnect power to the opener and block access to the door to prevent accidental movement. Do not attempt to lift the door with the springs under tension.
Tip: Take photos of any obvious damage for the technician. - 3
Inspect visible components from safe distance
From a safe distance, look for frayed cables, misaligned tracks, or loose mounting brackets. Do not touch the spring itself.
Tip: Record the condition with a quick sketch or notes. - 4
Catalog and communicate with a pro
Note the symptoms, sounds, and visible damage. Share these details with the technician to help diagnose before arrival.
Tip: Ask about spring options, warranty, and expected repair time. - 5
Schedule professional service
Arrange a visit with a licensed garage-door technician. Ensure they confirm spring condition and perform a full balance test after replacement.
Tip: Verify credentials and insured status before work commences. - 6
Test after service
Have the technician test the door’s balance and the opener’s limits. Confirm smooth operation without sudden drops or jerks.
Tip: Keep a safe distance during the test and stand clear of the door path. - 7
Document and reset safety features
Ask the technician to confirm safety reverse sensors and limiting switches are properly calibrated.
Tip: Record the new specifications for future reference.
Diagnosis: Garage door won't lift or opens unevenly
Possible Causes
- highTorsion spring wear or fracture
- mediumCable fray or detachment
- lowTrack misalignment or binding rollers
Fixes
- hardDo not attempt spring work; call a licensed technician for torsion spring replacement
- easyInspect cables/rollers and lubricate tracks; ensure tracks are straight
- easyTighten loose brackets and realign misaligned tracks
Got Questions?
Can I replace a garage door torsion spring myself?
No. Replacing a torsion spring is dangerous due to high tension. It requires specialized tools and training. Always hire a licensed technician to perform spring replacement and calibration.
Replacing a torsion spring is dangerous and should be done by a licensed technician. Do not attempt it yourself.
What are the signs that the spring is breaking?
Common signs include loud bangs, the door dropping suddenly, uneven movement, and cables pulling away from the drum. If you notice any, stop using the door and call a pro immediately.
Look for loud noises, sudden drops, or uneven movement; these indicate a potential spring problem and require professional help.
How long do garage door springs typically last?
Spring life depends on usage, weight, and climate. Regular maintenance and professional checks help maximize lifespan, but exact longevity varies by system and conditions.
Spring lifespan varies with use and environment; regular checks help extend life.
What safety gear should I use if I’m inspecting the setup?
Wear eye protection and sturdy gloves. Keep hands away from the spring area and avoid any attempt to adjust tension without professional guidance.
Use eye protection and gloves, and avoid touching the spring area.
When should I call a professional?
Call a licensed garage-door technician if you observe any sign of spring damage, unusual noises, or loss of balance. Professional calibration ensures safe operation after repair.
If you see damage or unusual movement, call a licensed technician for repair and calibration.
Watch Video
Quick Summary
- Diagnose before you touch: ensure you’re dealing with a spring issue, not a sensor or opener fault.
- Safety first: avoid any DIY spring work and contact a licensed technician.
- Plan for professional repair and post-service calibration to restore balance.
- Regular maintenance lowers the risk of unexpected spring failure.