Fix Garage Door Spring: A Homeowner's Step-by-Step Guide
Comprehensive, safety-focused guidance for diagnosing, maintaining, and deciding when to call a pro for garage door spring issues. Learn safe inspections, lubrication tips, and how to distinguish spring types.

You're going to diagnose and safely maintain a garage door spring to protect your opener and door balance, while avoiding risky spring replacement. This guide covers safe inspection, lubrication, and decision points for when to hire a pro. According to GarageDoorAdjust, spring problems are a leading cause of door failures and injuries, so start with safety and non-destructive checks, then escalate only if needed.
Understanding why garage door springs wear out
Garage door springs bear the full weight of the door for thousands of cycles. Over time, metal fatigue, temperature swings, and lubrication gaps accelerate wear. A worn spring can cause the door to sag, feel heavy, or bind during operation. This not only stresses the opener but also creates pinch points that can injure fingers or hands. While some symptoms mimic normal wear, a visibly cracked coil, a gap, or unusual sounds are red flags. If you notice the door feels unbalanced or stops midway, the spring system is likely stressed. It's essential to approach these issues with caution: the spring is under high tension even when the door is closed. In this article you’ll learn how to diagnose common spring problems, distinguish torsion vs extension springs, and perform only safe maintenance tasks. For anything beyond lubrication and basic inspection, stop and seek professional help. The GarageDoorAdjust team emphasizes safety first: a failed or damaged spring can cause the door to crash down unexpectedly.
Tools & Materials
- Ladder or stable step stool(Must be tall enough to reach the spring area without overreaching)
- Safety glasses(Protect eyes from any debris or spring movement)
- Work gloves(Grip and protect hands during inspection)
- flashlight or headlamp(Inspect dark corners, track, and hardware clearly)
- Non-conductive lubricant (silicone spray)(Only if manufacturer allows; avoid oil-based lubricants on some springs)
- Basic hand tools (screwdrivers, adjustable wrench)(For removing covers or adjusting hardware not under high tension)
- Locking pliers or clamps(Useful to secure a door in a safe position when testing balance)
- Camera or notepad(Document wear or take photos for reference when consulting a pro)
- Owner’s manual or spring type markings(Identify spring type and any specific maintenance instructions)
Steps
Estimated time: 60-120 minutes
- 1
Disconnect power and secure the door
Turn off the garage door opener at the wall switch and unplug it from the outlet. If available, engage locking pliers or clamps on the track to prevent unexpected movement while you inspect. This step reduces the risk of the door moving while you’re near the spring area.
Tip: Never work under a door that could shift; secure the door first, then reassess before touching hardware. - 2
Visually inspect springs and related hardware
Look for visible wear such as cracks, corrosion, gaps in coils, or stretched cables. Check brackets, pulleys, and tracks for signs of wear or misalignment. Do not attempt to adjust tension—just document what you see.
Tip: Take clear photos to show a pro if you decide to consult one. - 3
Identify spring type and location
Determine whether your system uses torsion springs (mounted on a bar above the door) or extension springs (along the side tracks). Note any color codes, serial numbers, or manufacturer markings that help with identification.
Tip: Knowing the type helps you decide which safe maintenance tasks are allowed by the manufacturer. - 4
Lubricate non-tension areas and moving parts
Apply a silicone-based lubricant to moving metal parts that aren’t under tension—hinges, rollers, and guides. Avoid oil or grease on tracks and certain spring surfaces unless the manufacturer approves it.
Tip: Lubrication can reduce friction and wear, extending life without affecting spring tension. - 5
Test manual balance with the opener unplugged
With the door manually lifted to waist height, check if it stays put, slowly descends, or rises uncontrollably. A door that drifts indicates the balance system or tracks may be out of adjustment (not a safe DIY fix for the spring).
Tip: If the door moves, stop and call a professional; don’t attempt further risky adjustments. - 6
Check tracks, rollers, and hardware for alignment
Inspect rails for dents, debris, or misalignment. Clean tracks and ensure rollers move freely. Misalignment can mask spring wear and cause door binding.
Tip: Alignment issues can create symptoms similar to spring problems, leading to unsafe operation. - 7
Decide whether to repair or replace
If you observe obvious spring damage, cracks, or excessive wear, replacement is usually required—but this is a task best left to qualified technicians. For non-destructive maintenance like lubrication and minor alignment, proceed with caution.
Tip: Document findings and plan a pro consultation if you’re unsure at any point. - 8
Plan next steps and schedule professional help if needed
If professional service is necessary, gather model numbers, photos, and the identified issues to share with a technician. Schedule an inspection and avoid any DIY spring tension work.
Tip: Ask about safety practices, warranty coverage, and expected turnaround time.
Got Questions?
Is it safe to fix a garage door spring yourself?
In most cases, repairing or replacing torsion springs is dangerous without proper training and tools. Focus on safe inspections and non-destructive maintenance. If you notice damage or inconsistent balance, consult a licensed technician.
Spring repair is hazardous; best to consult a professional if damage is visible or the door is unbalanced.
What are common signs a spring needs replacement?
Visible wear such as cracks, gaps, corrosion, or excessive stiffness during manual movement are strong indicators that a spring may need replacement. List any unusual noises or unbalanced door behavior when seeking advice.
Look for cracks or gaps, and a door that doesn’t stay in place when you lift it.
Can I replace torsion springs safely?
Torsion spring replacement is a high-risk task that generally requires specialized tools and training. Most homeowners should avoid attempting it and instead hire a licensed professional.
Torsion spring replacement is risky; professionals typically handle this task.
How long do springs last, and what affects their life?
Spring life varies based on usage, quality, environment, and maintenance. Regular inspection and lubrication per manufacturer guidelines can help extend life, but there is no universal lifespan.
Springs last longer with proper maintenance and moderate use; heavy use wears them faster.
What should I do if the door drops suddenly?
If the door drops or descends rapidly, move away and avoid under-door space. Do not try to catch or prop it up—call a professional as soon as possible.
If the door starts to drop, get clear and call a pro right away.
Do I need a permit to work on my garage door springs?
Permit requirements vary by location. Check local building codes or your homeowner’s association guidelines if you’re unsure about permits for repairs.
Check local rules; permits vary by area.
Watch Video
Quick Summary
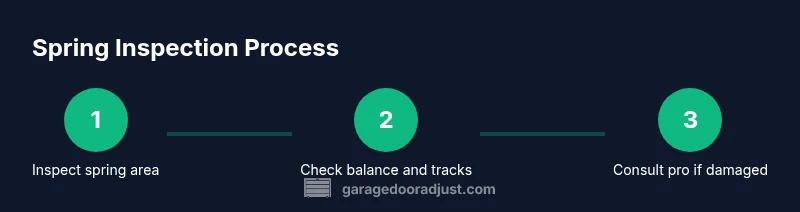
- Inspect springs safely before attempting any work
- Identify spring type to determine safe maintenance scope
- Lubricate non-tension parts only when allowed by manufacturer
- Do not attempt to adjust or replace tension springs yourself
- Call a professional if you notice obvious damage or the door is unbalanced