YoLink Garage Door Opener: A Homeowner's Step-by-Step Guide
A comprehensive, step-by-step guide for homeowners to install, diagnose, and maintain a yolink garage door opener, with safety tips, app setup, and troubleshooting.

Learn to diagnose, install, and maintain a yolink garage door opener with confidence. This guide covers compatibility checks with existing openers, wiring basics, network and app setup, battery status, safety features, and practical troubleshooting for common issues. By following these steps, you’ll improve reliability, convenience, and security in your smart garage.
Why yolink garage door opener matters
Smart garages integrate with home networks to improve security and convenience. A yolink garage door opener enables remote control, alerts, and automation when paired with the YoLink hub. According to GarageDoorAdjust, a reliable setup reduces common issues caused by power fluctuations and sensor misalignment. Start by verifying compatibility with your existing opener and the YoLink sensors.
In modern homes, a Yolink-enabled system provides real-time status, temperature and battery checks for sensors, and the ability to schedule routines that open or close based on arrival or time. For homeowners, this means fewer trips to the garage and more predictable door behavior, especially during power outages or internet outages. The yolink garage door opener integrates with mobile apps to provide push notifications when the door opens, closes, or is left ajar, which is valuable for households with multiple family members or where the door is used for deliveries. Remember to review your existing door’s safety features and ensure the yolink devices do not bypass safety limits; always follow safety protocols to avoid injuries.
Key Features to Look for in a yolink garage door opener
Look for compatibility with your current door type (sectional, tilting), battery-powered backup, and a robust network bridge. A yolink garage door opener should support app-based controls, real-time status, and event history. Check whether safety sensors, auto-reverse, and remote disablement are included. Consider a model that supports local control despite an internet outage, which improves reliability. The Yolink app should offer easy pairing, secure login, and straightforward firmware updates; repeat firmware updates are essential for long-term security and performance. Finally, verify that the device supports remote pairing with existing remotes or controllers you already own, so you can keep legacy access as a backup.
Compatibility and Safety Standards
Before purchasing, confirm the Yolink garage door opener is compatible with your door’s weight rating, track configuration, and opener model. Follow safety standards and UL guidelines for door openers and sensors. Never work under a door that is powered; disconnect power before mounting brackets or adjusting tracks. Keep children and pets away during installation. If you encounter unusual sounds, misaligned tracks, or inconsistent sensor readings, stop and troubleshoot before continuing. GarageDoorAdjust notes that following recommended safety steps reduces injuries and promotes longer-lasting operation.
Installation: Step-by-Step Overview
This overview outlines typical installation steps for a yolink garage door opener, and may vary by model. Prepare your workspace, gather tools, and review the included manual. Make sure power is off and that you have a stable ladder. The full step-by-step section later provides detailed actions with safety notes and times.
Wiring, Power, and Network Considerations
Most yolink door opener systems require a low-voltage sensor wiring and a standard 120V wall outlet for the opener motor. Use proper gauge wire and avoid pinched cables. Route wires away from moving parts and secure with cable clamps. The hub or bridge relies on your home Wi‑Fi network; ensure strong signal and update passwords. If you lose connectivity, you may lose remote control or scheduling features; ensure backup control is available.
Everyday Use: App Control, Scheduling, and Alerts
Pair the yolink garage door opener with the YoLink app following the included instructions. Use schedules to automate opening on arrival and alerts for door left open. Enable push notifications and set up geofencing if supported. Use the history log to monitor door activity and investigate unusual events. Regularly update firmware for both the hub and the opener to improve security and reliability.
Troubleshooting Common Issues
If the door doesn’t respond to app commands, verify the hub is online, your Wi‑Fi is working, and the device is correctly paired. Check the safety sensors for obstruction and clean the lens. Ensure proper alignment of tracks and connectors. If the door opens but the app won’t trigger it, re-pair the device and reset the hub if necessary. Listen for abnormal noises that may indicate worn rollers or misaligned torsion springs; if you suspect mechanical issues, contact a professional.
Maintenance and Longevity
Perform routine maintenance every 6–12 months: inspect all moving parts, lubricate rails and rollers with garage door-specific lubricant, verify spring tension, and test auto-reverse functionality. Keep sensors clean and free of dust; replace batteries on remotes and the YoLink hub as needed. Regular software updates for both the hub and the opener improve security and reliability.
Authority Sources
- U.S. Occupational Safety and Health Administration (OSHA): https://www.osha.gov
- U.S. Consumer Product Safety Commission (CPSC): https://www.cpsc.gov
- National Institute of Standards and Technology (NIST): https://www.nist.gov
Additional Safety and Setup Tips
- Always disconnect power when servicing the opener or sensors. - Keep the installation area clear of children and pets. - Document your steps so future maintenance or upgrades are straightforward.
Tools & Materials
- Screwdriver set (Phillips and flat-head)(Phillips #2 and flat-head for mounting brackets)
- Power drill(With bits suitable for wood and metal)
- Ladder (6-8 ft)(Sturdy, stable placement)
- Level(To align rails and brackets)
- Wrench set(For mounting hardware)
- Wire nuts and electrical tape(For sensor wiring and hub connections)
- YoLink hub and a smartphone(For app pairing and control)
- Safety glasses and gloves(Personal protection)
- Stud finder and marking tools(Helpful for mounting brackets)
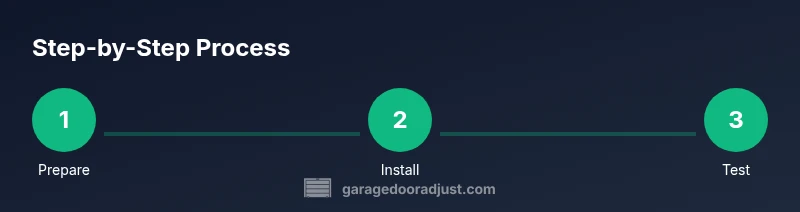
Steps
Estimated time: 2-3 hours
- 1
Gather tools and safety gear
Collect all required tools and safety gear before starting. Review the Yolink installation manual and set up a clean workspace. This ensures you can perform steps without interruptions and reduces the risk of mistakes.
Tip: Lay out tools in the order you’ll use them to save time. - 2
Power down and verify circuit
Turn off the circuit feeding the garage door opener at the main panel. Use a non-contact voltage tester to confirm there is no live power where you’ll be working. This step protects you from electric shock during wiring or mounting.
Tip: Double-check the power source with the tester even if you think it’s off. - 3
Mount the rail and bracket supports
Position the rail according to the door type and mark mounting points. Drill pilot holes, drive screws, and ensure brackets are level. Secure the rail firmly to support the weight of the door and opener.
Tip: Use a level on both ends of the rail to ensure true alignment. - 4
Route wiring and sensors
Run the low-voltage sensor wires to the safety sensors and attach them per the manual. Keep cables away from the door’s moving parts and use clamps to secure them. Check sensor alignment and clear lens dust for accurate readings.
Tip: Test sensors by placing an object in front of them and watching for an alert. - 5
Connect YoLink hub and pair with app
Install the YoLink hub in a central location with strong Wi‑Fi. Power the hub and follow the app’s pairing prompts. Create your account, connect the gateway, and ensure the hub shows online status.
Tip: Note the hub’s MAC address for future troubleshooting. - 6
Configure app settings and alerts
Launch the Yolink app, add the garage door opener, and configure push notifications, access permissions, and desired alerts. Set up schedules or geofencing if supported. Enable firmware updates to keep the system secure.
Tip: Limit app permissions to what you actually need to improve security. - 7
Test operation and safety features
Manually operate the door and verify the auto-reverse function with an obstacle. Ensure the app can trigger open/close and that sound or light indicators work as expected. Confirm backup controls still work physically.
Tip: Always test with a safe test object before regular use. - 8
Document maintenance and schedule future checks
Record the installation steps, hub settings, and maintenance dates. Schedule a follow-up check in 6–12 months to inspect tracks, springs, sensors, and battery life. This helps prevent future issues and preserves safety.
Tip: Set calendar reminders for maintenance intervals.
Got Questions?
What is Yolink garage door opener and how does it differ from traditional openers?
YoLink garage door opener refers to a smart integration that uses a YoLink hub and sensors to provide app-based control and automation. It adds remote monitoring and scheduling beyond traditional openers.
YoLink adds smart app control and automation to a standard garage door opener.
Is it safe to install a Yolink garage door opener myself?
DIY installation is safe if you follow the manual, use proper safety gear, and disconnect power during mounting and wiring. If unsure, consult a professional.
Yes, with proper safety and following instructions.
What tools are needed for a Yolink garage door opener setup?
Essential tools include a screwdriver set, a drill, a level, a ladder, wire nuts, and the YoLink hub for app pairing.
Gather the basic tools and the YoLink hub.
Can Yolink openers work with existing sensors and remotes?
Compatibility depends on the model. Check whether existing sensors can pair with the Yolink hub and whether remotes remain as backups.
Check model compatibility with your current sensors.
How do I troubleshoot if the door won’t respond to Yolink app?
Ensure the hub is online, Wi-Fi is working, and pairing is correct. Re-pair devices and restart the hub if needed.
Make sure the hub is online and the devices are paired.
What maintenance does a Yolink garage door opener require?
Regularly inspect sensors, lubricate moving parts, verify track alignment, and update the Yolink app and hub firmware.
Keep sensors clean and parts well-lubricated.
Watch Video
Quick Summary
- Verify compatibility before purchasing yolink garage door opener.
- Pair the hub and app for full remote control and alerts.
- Test safety features and auto-reverse before regular use.
- Update firmware regularly for security and reliability.