When to Replace Garage Door Seal: A Homeowner Guide
Learn how to tell when your garage door seal needs replacement, how to choose the right seal, and a step-by-step method to replace it safely. Insights from GarageDoorAdjust to improve insulation, curb drafts, and water intrusion.

Replace the garage door seal when you notice cracks, tears, or gaps that allow drafts or water entry, or when the seal no longer adheres evenly. Inspect the bottom rail, sides, and header for wear and measure the door width and seal thickness to ensure a proper match. A good seal improves energy efficiency and indoor comfort.
Signs the garage door seal is failing
According to GarageDoorAdjust, a failing seal often shows up as visible cracks, tears, or gaps around the bottom and sides, plus drafts and water intrusion. Inspect the entire perimeter, including the header and track areas, and note where air leaks occur. Regularly checking these signs helps homeowners decide when to replace the seal and prevent further energy loss.
Understanding seal types and materials
Seals come in bulb, T-shaped, or foam profiles, and materials include vinyl, neoprene, and rubber. Each profile has a role: bulb and vinyl sealers provide a snug contact with the door, while foam compresses to fill irregular gaps. When choosing a replacement, match the seal profile to your door’s bottom strip and weather exposure. Consider thermal insulation needs and climate when selecting materials.
How replacement affects insulation and safety
A healthy seal reduces drafts, keeps out moisture, and lowers heating and cooling costs. Properly installed seals also keep debris from entering the garage and reduce wind noise. Safety matters: ensure the door opens and closes smoothly after installation and there are no loose parts that could pinch fingers or snag clothing. GarageDoorAdjust analysis shows that when seals wear, energy loss and drafts increase.
Choosing the right seal for your door
Measure the door width and current seal thickness to obtain an exact replacement. Take photos of the seal profile and mounting surface to compare before buying. Look for seals rated for exterior use in your climate, with UV resistance and a good warranty. If your door is insulated, select an insulation‑grade seal to maximize energy savings.
Quick inspection method at home
Open the door about halfway and inspect the rubber at contact points with the jambs. Run a thin card (like a business card) along the seam to feel where air leaks; if you can slide the card easily, the seal is worn. Check for perished edges, cracking, or stiff sections that no longer compress. Document wear and take measurements for reference.
Step-by-step replacement approach (overview)
Before you start, gather tools and a suitable replacement seal. Remove the old seal without tearing the metal channel, clean the mounting surface, and dry it thoroughly. Align the new seal with the door contour, press firmly into the track, and ensure a continuous seal around the perimeter. Recheck door operation and adjust as needed.
Maintenance tips to extend seal life
Lubricate hardware sparingly with silicone-based product, not petroleum, to avoid seal degradation. Clean surfaces monthly to remove dirt and grit that abrade the seal. Replace worn weather-stripping annually or at the first sign of cracking, and store spare seals in a dry, cool area.
Troubleshooting after replacement
If the door rubs or leaks after replacement, recheck alignment and ensure the seal sits evenly across the bottom and sides. A seal that bunches or folds may need trimming or reshaping. Always test with the door opening and closing several times to verify full contact and no interference with hardware.
Tools & Materials
- Replacement garage door seal (bulb, foam, or vinyl)(Choose profile compatible with your door and weather conditions)
- Measuring tape(To match seal length to door width)
- Scissors or utility knife(For trimming seal ends)
- Caulk or weather-strip adhesive (if required)(Only for non-adhesive seals; verify compatibility)
- Rubbing alcohol or cleaner(To clean mounting surface before install)
- Shop rag or microfiber cloth
- Pry bar or flathead screwdriver(If removing stubborn old seal)
- Masking tape(To protect surfaces during adhesive application)
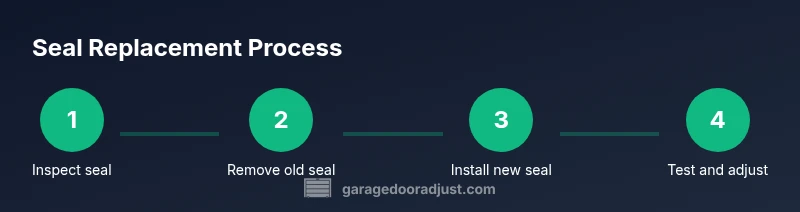
Steps
Estimated time: 60-90 minutes
- 1
Inspect current seal and door for wear
Open the door halfway and examine the seal for cracks, tears, and stiffness. Check mounting surfaces for signs of rust, corrosion, or debris that could affect adhesion. Take measurements of the seal profile and door width to ensure a match before purchasing replacement materials.
Tip: Document wear with photos for reference and ensure you choose the correct profile. - 2
Remove the old seal
Gently pry the old seal away from the bottom rail and side channels using a flathead screwdriver or pry bar. Do not force the seal; if it resists, work along the length to avoid deforming the track. Lift the seal completely away to reveal clean mounting surfaces.
Tip: Work slowly to avoid marring the track or mounting surfaces. - 3
Clean mounting surfaces
Wipe down the channel with rubbing alcohol to remove dirt, oils, and old adhesive residue. Let the surface dry fully before installing the new seal. Inspect for any nicks or burrs that could prevent a tight seal.
Tip: A clean surface ensures better adhesion and a snug fit. - 4
Test-fit the new seal
Before securing, lay the new seal along the bottom rail and sides to confirm a proper fit. Check that the seal touches the jambs all around with slight compression when the door is closed. Make any needed trimming at the ends.
Tip: Use a dry run to avoid wasting material. - 5
Install the new seal
Starting at one end, press the seal into the bottom rail first, then work it along the sides. Ensure even compression against the jambs and a continuous seal along the top edge. If adhesive is required, apply a thin, even bead and hold until set.
Tip: Secure the ends last to prevent gaps. - 6
Secure and test operation
Close and reopen the door slowly several times to verify the seal stays in place and doesn’t interfere with the tracks. Look for any high spots or folds and trim if necessary. Recheck for drafts using a simple card test or a breeze near the door.
Tip: If you notice binding, re-check alignment before completing. - 7
Final check and adjustments
Confirm the door seals evenly on all sides and there are no gaps at corners or edges. Clean up tools and store replacements securely. Schedule a maintenance check every 12 months to catch wear early.
Tip: Annual checks help prevent energy loss.
Got Questions?
How do I know when to replace my garage door seal?
Look for visible cracks, tears, or gaps that let drafts or water pass. If the seal no longer sits evenly or makes contact with the jambs, replacement is likely needed.
Look for cracks, tears, or gaps that let drafts in. If the seal doesn’t sit evenly, you probably need a replacement.
What types of seals are available for residential doors?
Common options include bulb, vinyl, and foam profiles. Choose based on door design, climate, and whether you need better insulation.
Bulb, vinyl, or foam seals are common. Pick based on your door and climate.
Can I replace the seal myself, or should I hire a pro?
Replacing a seal is a doable DIY task for many homeowners. If you encounter stubborn tracks, damaged panels, or tension in springs, consult a professional.
It’s a doable DIY, but call a pro if you see spring tension or track damage.
How long should a garage door seal last?
Most seals last several years, depending on climate and use. Inspect annually and replace when the profile hardens, cracks, or leaks arise.
Seals last a few years with climate conditions; inspect yearly and replace when they crack or leak.
Will a new seal improve energy efficiency?
Yes. A good seal reduces drafts and heat loss, contributing to a more comfortable garage and lower energy bills.
A good seal reduces drafts and heat loss, helping comfort and energy bills.
Do I need to remove the door to replace the seal?
In most cases, you can replace the seal with the door in place. Some designs may require partial lifting or guidance.
Usually you can replace it with the door in place; some doors may need a bit of lifting.
Watch Video
Quick Summary
- Inspect regularly for cracks or gaps
- Match seal profile before replacement
- Test door operation after installing
- Maintain with routine cleaning and checks