What to Do If Garage Door Spring Breaks: A Safe, Practical Guide
Learn immediate safety steps, repair options, costs, and prevention when a garage door spring breaks. A practical, safety-first guide from GarageDoorAdjust for homeowners troubleshooting garage door issues.

When a garage door spring breaks, the door can suddenly slam or become very hard to lift. Immediately stop using the opener, keep hands clear, and disconnect power to the opener. According to GarageDoorAdjust, the safest path is to avoid DIY spring work and call a licensed technician. In this guide you’ll learn safety steps, what to expect for costs, and how to prevent future failures.
Why a broken garage door spring is a safety risk
A garage door spring provides the force to lift the door with minimal effort. When a spring breaks, the door can drop suddenly or slam shut, posing serious crush injuries or property damage. Even if the door remains in a partially open position, the remaining springs and cables can snap or slip, sending sharp metal fragments and a heavy door toward anyone nearby. For homeowners, the immediate hazard is twofold: the weight of the door and the direction of any sudden movement. Do not try to catch or hold the door; never stand underneath the door or between the door and the ground. If you hear cracking or see the door sag or tilt, exit the garage calmly and keep children and pets away. In short, a break is a high-risk situation that typically requires professional service, not DIY fixes. GarageDoorAdjust emphasizes safety and proper repair as the top priorities.
Immediate steps you can take after a break (without touching moving parts)
First, keep people clear and power off to the opener by unplugging the garage door opener or turning off the circuit. Then, if possible, block access to the door with a temporary barrier like a heavy board or caution tape—do not wedge a tool between tracks, as that could shift weight unexpectedly. Do not attempt to disengage the spring or disengage any tension devices; doing so can cause a violent release. Next, assess if the door is still paired to the opener; if the door is dangerously unbalanced, do not operate it manually. Finally, contact a licensed technician for assessment and replacement. While you wait for service, plan to measure your door type (torsion or extension), door width, and approximate age to provide accurate information to the technician.
Assessing the situation without touching moving parts
Look for visible signs of tension on the tracks, frayed cables, or misaligned rollers. Note if the door sticks when you try to lift it manually (without putting hands near springs). Do not place hands near any exposed hardware, corners, or cables. Document the location of the break and any unusual noises. If a cable shows signs of wear or a plate is bent, call a pro immediately. Refrain from testing the balance by pressing on the door; springs adjust tension in a way that can snap suddenly.
DIY vs professional replacement: what homeowners can and can't do
Replacing torsion springs is specialized work with substantial risk. Most codes require a licensed pro for safety and warranty reasons. DIY kits exist, but attempting DIY replacement could void warranties and lead to severe injuries or property damage. For most homeowners, the recommended path is to contact a qualified technician, obtain multiple quotes, and verify licensing and insurance. If you still consider DIY, at a minimum you should postpone any replacement until you have professional supervision. The key is to prioritize safety.
How to choose a pro: questions to ask and costs to expect
Ask about licensing, insurance, and warranty on parts and labor. Request a written estimate that itemizes parts and labor costs. Inquire about the door's age, spring type (torsion vs extension), and whether the replacement includes testing and calibration of the opener. Costs vary by region and door type; typical ranges can include parts, labor, and service call; be sure to confirm whether the price includes hardware, bearings, and any necessary track work.
What to budget for a spring replacement
Expect a range depending on door type and local labor rates. A torsion-spring replacement typically costs more than an extension-spring repair due to the greater complexity and higher tension involved. Most homeowners report total costs, including parts and labor, in the mid- to high hundreds of dollars, with higher-end or emergency service at the upper end. Budget for possible hardware upgrades, lubrication, safety tests, and a basic warranty. If your door has two springs or a two-car setup, the price increases accordingly.
Safety gear and must-have tools for inspection
While you should not handle springs, you can inspect safely with protective gear and common tools: safety glasses, gloves, sturdy ladder, smartphone for photos, and a notepad to record observations. Tools that a technician may bring include specialized equipment for safe evaluation and calibration. The emphasis is on personal safety and documenting conditions for the service call.
Maintenance tips to extend spring life
Schedule a professional inspection at least once a year and after any hard weather event. Keep tracks clean and lubricated with a silicone-based lubricant recommended by your technician. Check balance occasionally by lowering the door 3–4 inches from the floor, then releasing; if it springs up or settles, contact a pro. Remember: routine maintenance reduces the risk of unexpected failures and extends the life of hardware components.
Signs your garage door needs professional service before spring breaks again
Watch for slow or uneven operation, unusual grinding noises, jerky starts, or visible wear on cables and rollers. A door that feels heavier to lift, even when the opener is engaged, is a red flag. If you notice any of these signs, contact a licensed technician promptly to prevent a dangerous failure. Proactive maintenance matters.
The GarageDoorAdjust approach and common pitfalls
GarageDoorAdjust teams prioritize safety, accurate diagnostics, and clear communication. We avoid risky DIY repairs and advocate for professional spring replacement when required. Common pitfalls include attempting to unwind tension, delaying service, or using temporary fixes that don’t address root causes. A professional will verify track alignment, balance, and opener calibration to prevent future breaks.
Tools & Materials
- Safety glasses(ANSI Z87.1 or equivalent)
- Work gloves(Heavy-duty, cut-resistant recommended)
- Sturdy ladder(Non-slip feet; stable placement)
- Socket/wrench set(Appropriate sizes for hardware)
- Locking pliers (Vise-Grips)(Temporary stabilization only)
- C-clamps(Secure tracks and components)
- Replacement torsion/extension spring kit(Match door type and size; consult pro)
- Drop cloth or old tarp(Protect floor from debris)
- Smartphone or notebook(Document measurements and photos)
- Lubricant (silicone-based)(Used during professional service for maintenance)
Steps
Estimated time: 60-180 minutes
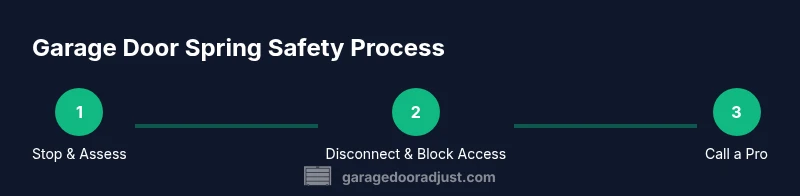
- 1
Stop and secure the door
Immediately stop attempting to operate the door and keep hands clear of moving parts. Do not try to catch or hold the door if it shifts or drops.
Tip: Move people and pets away and note any visible damage. - 2
Disconnect the opener power
Unplug the opener or switch off the circuit to prevent automatic operation.
Tip: This prevents unexpected door movement during the incident. - 3
Block access and stabilize the door
Place a sturdy barrier and use clamps to stabilize door tracks away from further movement.
Tip: Never place your hands near springs or cables. - 4
Assess from a safe distance
Check for frayed cables, bent track, or obvious structural damage without touching any spring hardware.
Tip: Document observations with photos for the technician. - 5
Decide on DIY vs pro
Understand that torsion and extension springs require specialized training. If unsure, pick a professional to ensure safety and warranty.
Tip: Prioritize safety over cost or speed. - 6
Gather information for the pro
Record door type (torsion or extension), door width, spring type, age, and any prior service notes.
Tip: Provide exact measurements to avoid delays. - 7
Contact a licensed technician
Request on-site evaluation and a written estimate before any work begins.
Tip: Ask about warranty on parts and labor and whether a calibration is included. - 8
Prepare for the replacement
Arrange access, ensure pets/children are out of the area, and confirm the technician's arrival window.
Tip: Avoid leaving tools or debris in the work zone. - 9
Post-repair testing and maintenance
Have the technician test open/close cycles and demonstrate safe operation, then schedule preventive maintenance.
Tip: Ask about routine lubrication and track alignment checks.
Got Questions?
Is it safe to operate the door after a spring breaks?
No. A broken spring makes the door unpredictable and dangerous. Stop using the opener and call a professional for assessment and replacement.
No, operating a door with a broken spring is dangerous. Stop and call a technician for replacement.
How long does a torsion spring replacement take?
Typical service takes about 1 to 3 hours depending on door type and accessibility. Emergency calls may take longer in busy periods.
Usually between one and three hours, depending on the door and your locale.
Will the repair include recalibrating the opener?
Yes. Most professional replacements include testing, calibration, and safety checks on the opener and tracks.
Most pros test and calibrate the opener after replacement.
What are early warning signs a spring might fail soon?
Unusual noises, door feels heavy, slow operation, or visible wear on cables or hardware indicate potential failure.
Look for noises, heaviness, and uneven operation.
Can I get an estimate over the phone?
Most technicians provide on-site estimates after inspecting the door. Some may offer estimates based on your provided photos, but on-site is more reliable.
Most estimates come after on-site evaluation, not just by phone.
Does insurance cover spring replacement?
Home insurers rarely cover routine spring replacement, but coverage may apply if damage from a failure caused other insured losses. Check your policy.
Insurance rarely covers it, but check your policy for specifics.
Watch Video
Quick Summary
- Stop and secure the door immediately after a break.
- Disconnect power to the opener before inspecting.
- Call a licensed garage door technician for replacement.
- Document the issue and schedule preventive maintenance.