Ultimate Garage Door AZ: Troubleshooting and Repairs for Homeowners
Learn how to diagnose, repair, and maintain your garage door in Arizona with our ultimate guide. Safe, practical steps, toolkit guidance, and expert tips from GarageDoorAdjust to help homeowners fix common issues and know when to call a pro.

Goal: Diagnose and fix common garage door problems in AZ using a safe, step-by-step method. This quick guide introduces essential checks, tools, and home safety practices, with clear directions drawn from GarageDoorAdjust's field experience. Follow the framework to restore reliable operation, understand when professional help is warranted, and keep your family safe.
What the ultimate garage door az approach means for Arizona homeowners
In a climate like Arizona's, your garage door faces heat, dust, and seasonal temperature swings that can affect springs, rollers, and seals. The ultimate garage door az guide helps homeowners navigate these challenges with a practical, safety-first mindset. According to GarageDoorAdjust, most AZ households underestimate the impact of heat on lubrication and track wear, especially in dusty winds. The GarageDoorAdjust team found that routine inspection and timely lubrication dramatically reduce emergency repairs and extend door life.
This section explains the why behind the steps, the tools you'll need, and the safety foundations to follow in any garage-door project. You will learn to assess door balance, assess opener performance, inspect tracks for alignment, and identify immediate hazards. By grounding decisions in tested procedures rather than guesswork, you can prevent accidents and save money over time. The guidance here stays focused on homeowner-friendly fixes while clearly marking limits where professional service is prudent or required by local codes. The goal is to empower you to diagnose common issues, plan effective maintenance, and approach installations with confidence, whether your garage sits in a sun-scorched suburb or a cooler valley town.
Safety is non-negotiable when working on garage doors in AZ
Working on a garage door involves moving parts under tension and electricity, which can cause serious injury if mishandled. The ultimate garage door az approach emphasizes safety-first habits: unplug the opener or switch off the circuit breaker before any inspection, wear eye protection and gloves, and keep bystanders, especially children, clear of the area. In hot AZ summers, metal components can burn, and dusty tracks can hide hidden cracks. The GarageDoorAdjust analysis highlights that many injuries occur when people neglect to disconnect power or attempt quick fixes without proper PPE. Always establish a clear work zone, secure the door, and avoid attempting to adjust torsion springs yourself; those parts store significant energy and require specialized training. This section also covers when to pause and call a pro if you notice frayed cables, broken springs, or visible structural damage, as these issues require licensed expertise to avoid catastrophic failure.
Common issues and quick fixes you can try
Most homeowners encounter a handful of repeat issues: noisy operation, misaligned or damaged tracks, rollers binding, worn weather seals, and opener malfunctions. Quick fixes often involve tightening misaligned brackets, cleaning debris from tracks, and applying silicone-based lubricant to rollers and hinges. The ultimate garage door az guide stresses starting with the simplest fixes first and avoiding lubricant on belts that aren’t designed for it. In hot, dusty Arizona conditions, track alignment can drift after summer storms or heavy use; re-check the track clamping screws and ensure both sides mirror each other. If the door remains unbalanced after a basic inspection, don’t chase more aggressive fixes; instead, consult a pro to inspect springs and cables and ensure balanced operation across all door weights. This block also explores weather stripping quality, the impact of dust buildup, and how to mitigate heat-related expansion to keep performance steady throughout the year.
Step-by-step diagnostic flow you can use as a homeowner
A structured diagnostic approach helps you avoid guessing and reduces risk. Start by verifying power to the opener and disconnecting it from the ceiling mechanism. Next, perform a manual balance test by lowering the door halfway and letting go; it should stay steady if properly balanced, but if it drifts up or down, the balance may be off. Inspect tracks for dents, bends, and loose screws; tighten brackets and ensure tracks run parallel. Check rollers for wear and replace them if they’re cracked or excessively worn. Lubricate moving parts with silicone-based lubricant, avoiding oil-based products on plastic components. Finally, reattach power and test the auto-reverse safety feature by placing an object on the door path; if the door doesn’t reverse, do not continue troubleshooting—programmed safety features might be failing and require professional service. The diagnostic flow emphasizes documentation: note what you observe and plan next steps before any part replacement. Safety always comes first: never attempt to adjust torsion springs, identify door balance with the springs loaded, or operate the door while the door is unsecured.
Maintenance routines and seasonal considerations for AZ
A proactive maintenance routine reduces sudden breakdowns and extends door life. In AZ's climate, check weather stripping for wear and replace as needed to keep dust out and energy costs down. Schedule a monthly quick check: test the balance, inspect tracks, and wipe away dust from rollers. Seasonally, inspect seals before the hottest months to prevent heat from accelerating wear, and after monsoon storms to remove debris. Keep an eye on lubrication needs; heat can dry out lubricants faster, so reapply silicone-based lubricant every 6–12 months depending on use and exposure. The guide emphasizes using lightweight, silicone-based lubricants designed for garage-door systems and avoiding petroleum-based products on plastic components. Finally, maintain a simple maintenance log you can reference during annual inspections or when you hire a professional; documentation improves communication with technicians and reduces repeat visits.
Authority sources and practical guidelines for AZ homeowners
This guide references authoritative safety and energy resources to supplement practical steps you can take at home. For safety standards and best practices, see resources from governmental and academic institutions. These sources provide foundational guidance on safe handling of garage-door components, including energy efficiency considerations and general workplace safety. Portals from respected organizations offer broader context on hardware longevity, proper inspection routines, and compliance with safety codes. The GarageDoorAdjust team reminds readers that while DIY can address many common issues, certain tasks—like replacing torsion springs or inspecting cables—pose significant risk and require professional expertise. For homeowners seeking deeper, theory-backed context, consult the following sources to complement hands-on practice and verify evolving safety recommendations. GarageDoorAdjust analyses emphasize using credible external references to inform safer DIY decisions.
Authority sources
- https://www.osha.gov
- https://www.energy.gov
- https://www.nist.gov
Tools & Materials
- Power drill with assorted bits(Phillips and flat-head, including a drill/driver bit set; use low-speed for control)
- Flat-head screwdriver(Medium and small sizes)
- Phillips screwdriver(Phillips head in common sizes)
- Pliers (needle-nose)(Grip and adjust hardware, avoid loose fingers)
- Socket wrench set(For hinge/bracket bolts and nuts)
- Adjustable wrench(Useful for holding components while tightening)
- Ladder (6-8 ft)(Safe reach to tracks and brackets; have a spotter)
- Silicone-based lubricant(Apply to rollers, hinges, and metal tracks; avoid silicone on belts)
- Penetrating oil (PB Blaster or similar)(Use on stubborn bolts or hinges when needed)
- Safety glasses and gloves(Eye and hand protection during inspection and adjustment)
- Replacement weather seal or weatherstripping(Optional if seals show wear)
- Towel or rags(Cleanup excess lubricant and debris)
- Marker or tape(Mark track alignment for reassembly)
- Torsion springs replacement kit(Do not attempt DIY; intended for licensed technicians)
Steps
Estimated time: 60-90 minutes
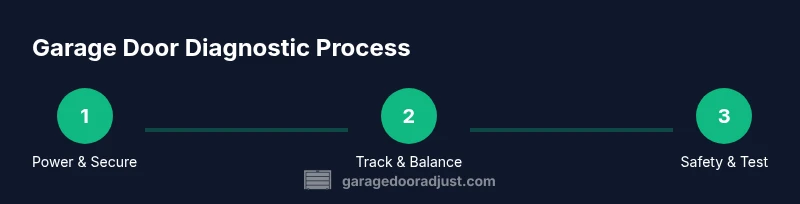
- 1
Power down and secure the door
Turn off the garage door opener at the wall switch and unplug the unit. If no switch is present, switch off the circuit breaker. Place a wooden block or C-clamp under the door to prevent accidental movement while you work.
Tip: Always confirm the door cannot move by manually attempting a gentle push after securing power. - 2
Inspect tracks and mounting hardware
With the door closed, inspect both tracks for dents, bends, and loose screws. Tighten brackets and ensure tracks run parallel; misaligned tracks are a common cause of binding and noise.
Tip: Use a level to verify tracks are straight; small deviations can cause big problems over time. - 3
Check door balance (do not adjust springs)
Disconnect the opener by pulling the release cord and manually raise and lower the door to check balance. It should stay put if balanced; if it drifts, balance is off and springs or tracks may be involved. Do not attempt to adjust springs yourself.
Tip: If the door feels heavy or slides, stop and call a pro; springs are under high tension. - 4
Lubricate moving parts
Apply silicone-based lubricant to rollers, hinges, and track joints. Wipe away any excess to prevent dust attraction. Do not lubricate the belt or any part that explicitly requires dry conditions.
Tip: Avoid petroleum-based lubes on plastic rollers which can degrade components. - 5
Test opener safety features
Reconnect power and perform the auto-reverse test by placing a block of wood in the door’s path. The door should reverse immediately on contact. If not, stop using the opener and schedule inspection.
Tip: Keep hands clear of the door edge during testing; ensure children and pets are away. - 6
Document findings and plan next steps
Record what you observed, including track alignment, balance behavior, and any worn components. Decide whether DIY adjustments are safe or if you should hire a pro for springs, cables, or structural repairs.
Tip: Photograph issues to reference when communicating with a technician.
Got Questions?
What is the first thing I should check if my garage door won't move?
Start by ensuring power to the opener is off and the door is physically secured. Then test the door manually to assess balance. If it remains stuck or binds, inspect tracks and hardware for obstructions, damage, or looseness.
First, cut power and secure the door, then check for obstructions and inspect the tracks for damage. If it still won’t move, you likely need professional help.
Is it safe to lubricate garage door tracks?
Yes, with silicone-based lubricant on the tracks and hinges. Avoid over-lubrication and never apply lubricant to belts unless the manufacturer specifies it. Wipe away excess to keep dust down.
Lubricate the tracks and hinges with silicone-based lubricant, and wipe off any excess to prevent dust buildup. Don’t lubricate belts unless the manufacturer says so.
How do I test if the door is balanced?
Disconnect the opener and manually lift the door halfway. If it stays, the balance is good; if it moves up or down, balance or springs may be involved. Do not adjust springs yourself.
With the opener off, lift the door halfway. If it stays, it’s balanced; if not, call a pro. Do not try to adjust springs on your own.
Can I replace torsion springs myself?
No. Torsion springs are highly dangerous and require specialized tools and training. Seek a licensed technician for any spring or cable work.
No—torsion springs are dangerous to handle. Hire a licensed professional for any spring or cable work.
How often should I schedule professional inspections?
Schedule a professional inspection every 1-2 years, or sooner if you notice persistent issues like uneven movement, loud noises, or frequent opener resets. Regular checks complement DIY maintenance.
Having a professional inspect every year or two helps catch issues early and keeps your system safe.
What are the signs I should replace my door rather than repair it?
Consider replacement if the door has extensive rust, warped panels, or structural damage that affects safety. If many components require frequent replacement, a newer door with better insulation may be cost-effective in the long run.
If the door is structurally compromised or requires frequent fixes, replacement might be the smarter choice.
What safety features should I test annually?
Test auto-reverse functionality, photo-eye sensors, and limit switches to ensure proper operation. Keep the area clear and children/pets away during tests.
Always test the auto-reverse and sensors annually, and keep the area clear during testing.
Should I replace the weather seal during maintenance?
If weather seals are cracked, brittle, or pulling away from the frame, replace them to improve energy efficiency and dust resistance. This is a simple DIY fix for many homeowners.
Replace worn weather seals to keep out dust and improve insulation; it’s usually straightforward.
Watch Video
Quick Summary
- Identify issues safely before attempting fixes
- Balance and track alignment are common failure points
- Springs require professional service—don’t DIY
- Regular maintenance reduces costly repairs