Surprise AZ Garage Door Repair: A Step-by-Step Guide
Learn to diagnose, repair, and safely fix common garage door issues in Surprise, AZ with a practical, step-by-step guide from GarageDoorAdjust. Tools, safety tips, and troubleshooting for homeowners.

By following this guide, Surprise homeowners will learn how to diagnose, safely repair, and restore reliable operation of their garage doors. You'll identify common symptoms, understand root causes, select the right tools, and follow a clear, step-by-step workflow that minimizes downtime and reduces the risk of injury. This is practical, home-safe repair guidance from GarageDoorAdjust.
Understanding the Surprise, AZ Context for Garage Door Repairs
Garage doors in Surprise, AZ face the same mechanical realities as anywhere else, but local climate, HOA rules, and service availability shape how you approach repairs. According to GarageDoorAdjust, the most important early step is to identify whether the issue is mechanical (springs, tracks, rollers) or electrical (opener, sensors). A door that suddenly stops moving or reverses is usually a balance or safety issue rather than a failed motor. Start by confirming power to the opener and testing the door on manual mode with the motor unplugged. This quick assessment lets you decide if a simple lubrication pass will work, or if more involved fixes are required.
Tools and Safety Essentials
Before you touch any moving parts, gather the right tools and set safety boundaries. Always unplug the garage door opener when inspecting or working on components connected to electricity. Wear safety glasses and work gloves, and use a sturdy ladder if you need to reach tracks or the header. Keep children and pets away while you troubleshoot. A well-lit, organized workspace makes diagnosing issues faster and safer.
Diagnostic and Troubleshooting Overview
A structured approach helps you distinguish between electrical and mechanical problems. Start with the opener: is the door responding to remote signals or wall switches? If the door moves when the opener is engaged but stalls or reverses, it may indicate sensor alignment or controller issues. If it remains heavy or unbalanced when manually opened or closed, the balance or track alignment might be at fault. A good rule is to test the door manually after unplugging the opener to confirm whether the issue is door hardware or the motor.
Common Failures and How to Fix Them
Common failures include track misalignment, worn rollers, and dry or sticky hinges. Misaligned tracks cause binding, unusual noises, and jerky movement. Worn rollers increase friction and reduce smoothness, while stiff hinges reduce swing. Lubrication and basic alignment can solve many symptoms, but structural problems like bent tracks or seriously worn torsion components require professional attention. Always address safety first; do not force parts that resist normal movement.
Maintenance to Prevent Surprises
Prevention is cheaper than emergency repairs. Regular lubrication of rollers, hinges, and the track—using a silicone-based lubricant—reduces friction and noise. Check balance and test the door monthly: a door that feels heavy or drifts downward is a sign something is off. Clean weather seals, wipe the tracks, and inspect springs and cables for visible wear. A simple quarterly inspection can dramatically reduce the risk of sudden failures and costly downtime.
Authority Sources
For safety standards and broader context, refer to official guidance from reputable sources:
- https://www.osha.gov
- https://extension.illinois.edu
- https://www.nfpa.org
These resources provide general safety and maintenance considerations that can help homeowners make informed decisions while avoiding unsafe DIY practices.
Before You Call a Pro in Surprise, AZ
If you notice broken springs, cables fraying, track damage, or persistent binding after lubrication and cleaning, it's time to consider professional service. Springs are under extreme tension and can cause severe injury if mishandled. An annual professional inspection is a good investment to extend the life of your system and ensure it operates safely.
Tools & Materials
- Safety glasses(Impact-resistant, when working near springs or moving parts)
- Work gloves(Grip and hand protection)
- Stepladder (4-6 ft)(Stable surface, use with a spotter if possible)
- Socket wrench set (1/4" - 3/8" tork)(For bolts on brackets and hardware)
- Combination screwdrivers (Phillips & flathead)(Assorted sizes)
- Needle-nose pliers(Use for grip and pin removal)
- Lubricant spray (silicone-based)(Avoid lithium on tracks)
- Penetrating oil(Loosen rusted fasteners)
- Replacement rollers or track brackets(Only if wear is evident)
- Voltage tester(Check electrical components safely)
Steps
Estimated time: 60-90 minutes
- 1
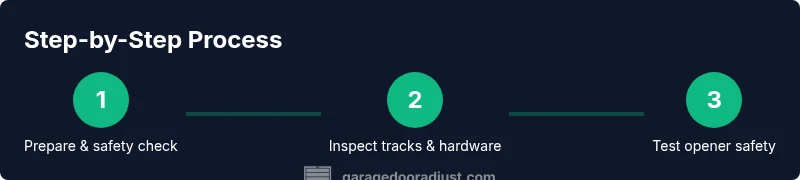
Prepare and safety-check
Identify whether the issue is electrical or mechanical. Unplug the opener, put on safety glasses and gloves, and ensure the area is clear of bystanders. This step prevents accidental activation while you inspect.
Tip: Always start with power disconnected to avoid electric shock or unexpected door movement. - 2
Inspect balance and tracks
Visually inspect tracks for dents, twists, or debris. Manually move the door about halfway to gauge whether it stays put or drifts. Realign any misaligned track slowly and evenly.
Tip: Use gentle taps with a rubber mallet to coax track alignment; avoid bending frames or brackets forcefully. - 3
Check hardware and rollers
Examine hinges, brackets, rollers, and cables for wear. Lubricate moving parts with silicone spray as needed, and tighten loose screws or bolts.
Tip: Replace worn rollers before testing the door again to reduce friction and improve balance. - 4
Test the opener and sensors
Reconnect power and test the gate with the opener. If the door reverses unexpectedly or sensors misbehave, re-align or clean the sensor eyes.
Tip: If the door moves smoothly when operated manually but not with the opener, the issue is likely electrical. - 5
Lubricate and re-test
Lubricate track hardware and moving joints, then operate door through a full cycle. Listen for grinding or binding and re-check for smooth motion.
Tip: Only apply a light coat; excessive lubrication can attract dust and create more resistance. - 6
Decide on next steps and document
If issues persist, document symptoms and severity. Determine whether immediate professional help is warranted, especially if springs or structural components show wear.
Tip: Keep a simple maintenance log to track parts replaced and service dates.
Got Questions?
What are the signs that a garage door needs professional repair?
Loud grinding, jerky movement, doors that won’t move, or unbalanced operation typically indicate a mechanical issue requiring professional assessment.
Look for loud grinding, jerky movement, or a door that won’t stay balanced.
Can I replace rollers myself?
Replacing rollers is possible for capable DIYers using proper clamps and safety precautions. If you suspect bent tracks or damaged springs, stop and seek professional help.
You can replace rollers if you're careful, but stop if tracks or springs look damaged.
How long does a typical DIY repair take?
Most uncomplicated fixes take 1-3 hours depending on your skill and the door’s condition; complex issues may require a pro.
Most simple repairs take 1-3 hours; bigger jobs take longer or need a pro.
How often should I lubricate garage door components?
Lubricate moving parts every 3-6 months, or more often in dusty or high-humidity climates; use silicone-based lubricant on metal parts.
Lubricate every 3-6 months; silicone lubricant is best for metal parts.
When should I replace a garage door?
Consider replacement if the door is bent, heavily corroded, or repeatedly requires costly repairs; modern doors offer better insulation and security.
Replace if the door is badly damaged or costly to repair.
Watch Video
Quick Summary
- Identify root cause before fixes
- Prioritize safety and power-off checks
- Avoid DIY springs; call a pro
- Schedule regular maintenance to prevent surprises