Garage Door Repair Glendale: A Practical Step-by-Step Guide
A homeowner-friendly guide to diagnosing, repairing, and safely servicing a garage door in Glendale. Learn common issues, safe DIY fixes, lubrication, tracking, and when to call a professional.

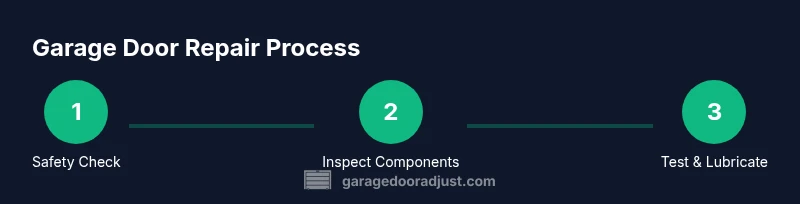
By following these steps you will diagnose and address common garage door issues in Glendale, focusing on safety and reliability. Begin with a routine safety check, then inspect tracks, rollers, sensors, and the opener. Apply lubrication, tighten hardware, and test operation. If you encounter worn springs or damaged cables, stop and call a pro.
Glendale-Specific Considerations and Safety First
According to GarageDoorAdjust, homeowners in Glendale benefit from starting any repair with a safety-first mentality. Local weather patterns—ranging from damp winters to dry, hot spells—can affect metal tracks, rollers, and seals. Before you touch anything, unplug the opener or switch off the circuit to prevent accidental operation. Wear safety glasses and gloves to protect eyes and hands from sharp edges, and keep curious children or pets well away from the work area. When you document your progress, note the door’s weight and the location of hardware screws to avoid reassembly confusion later. This preparation reduces risk and helps you identify issues more quickly rather than chasing symptoms.
A well-planned approach in Glendale also means acknowledging that some repairs require professional training. If you notice frayed cables, a snapped spring, or a warped track, these are not DIY-friendly and can cause serious injury. The GarageDoorAdjust team recommends building a basic plan: assess the door’s balance, test safety sensors, and confirm the opener’s settings before attempting further work.
In short, safety first, a clear plan second, and professional help for high-risk repairs third. This mindset minimizes injury risk and protects your investment in a reliable, secure garage door.
Tools, Materials, and Safety Gear You’ll Need
Before you pick up a tool, let’s set expectations. The right tools help you diagnose problems accurately and perform safe repairs without damaging the door. A proper toolkit includes a sturdy ladder, safety glasses, work gloves, and a set of screwdrivers (Phillips and flathead). You’ll also want a socket wrench or adjustable wrench, pliers, a utility knife, and a clean rag for wiping away dirt and lubricant.
Lubrication is essential for quiet operation and longer life. Use white lithium grease or a silicone-based lubricant designed for garage doors on tracks, rollers, hinges, and bearings (avoid graphite in exposed components). Have a spray bottle of mild detergent for cleaning grime along the tracks. If you plan to adjust hardware, ensure you have a torque wrench or a basic wrench set. A corded drill with a low drill-speed setting can help when tightening hardware, but avoid over-tightening to prevent stripping.
Finally, keep a flashlight handy to inspect seams and rollers in low-light areas and a marker to label screws or track sections. Having these tools prepared reduces delays and keeps the repair on track.
Diagnosing Common Issues in Your Garage Door
Garage doors are complex assemblies that depend on a balance of weight, balance, and precise alignment. One of the most common issues Glendale homeowners encounter is a door that won’t fully close or open, or one that closes with a loud grinding or scraping noise. Start your diagnosis by testing the door’s manual balance: disconnect the opener and lift the door halfway. If it stays put, the balance is reasonable; if it falls or rises, the springs or balance mechanism likely need adjustment or replacement by a professional.
Next, inspect the tracks. Look for dents, bends, or obstructions. Misaligned tracks can cause binding or derailment, particularly in humid climates where rust forms faster. Check rollers for wear; worn or broken rollers produce noise and rough movement. Safety sensors should have a clear path and be properly aligned. If the door drifts or reverses unexpectedly, test the safety reversing sensor with a blocked object on the ground—door should stop and reverse.
Finally, examine hardware such as hinges and mounting screws. Loose screws allow wobble that compounds misalignment and can cause further wear. If you see excessive gap at the door’s base, or if the door feels heavy when opening, note these symptoms as potential indicators of worn springs or faulty cables. A careful inspection helps you separate simple fixes from high-risk repairs that require a pro.
Lubrication, Tracks, and Balance Basics
A well-lubricated, clean track system reduces friction and noise. Clean tracks with a mild detergent and dry completely. Apply lubricant to the rollers (not on the track itself if it’s enclosed), hinges, and the door’s rollers’ bearings. Use just enough to lightly coat surfaces and avoid buildup that can attract dust.
Tracks should be clean and straight. If you notice a slight bend in the track, you can gently guide it back toward the door with a rubber mallet or pliers, but do not force it. Balance is critical: the door should feel nearly weightless when you lift it manually halfway. If it drifts, the springs or balance components may be out of tune. Springs should never be adjusted by untrained homeowners—the risk of injury is high. In Glendale’s climate, corrosion protection matters; consider applying a light coat of lubricant to metal components to slow rust formation.
Edge seals and weather-stripping also deserve attention. Worn seals can cause drafts, moisture ingress, and increased noise. Replacing weather stripping is typically straightforward and involves prying off the old piece and snapping a new seal into place. Healthy weather seals improve energy efficiency and protect the door mechanism from debris and moisture.
Safe Testing and Opener Maintenance
After you complete the diagnostic steps and lubrication, reconnect the opener and test the system. First, test the wall switch and remote control at a safe distance from the door to ensure the signal is functioning. Then, run the door through a full cycle on the automatic opener, paying attention to speed, stopping points, and any unusual noises. If the door hesitates or binds at certain points, stop the test and inspect those sections more closely.
Test safety features: place an object on the door’s path to verify that the reversing mechanism activates promptly. If the door does not reverse within a few seconds, switch off the power and inspect the safety sensor alignment. Ensure the photoelectric sensors have a clear line of sight and that their green indicator lights are steady. Regular opener maintenance also includes lubricating the chain or belt drive if applicable and checking battery backup if you have one. Regular checks reduce the likelihood of sudden failure.
Seasonal checks are wise in Glendale: inspect weather stripping before winter, tighten hardware after seasonal temperature changes, and verify that the door seals properly against the floor to minimize drafts and debris ingress. Routine maintenance reduces wear and helps avoid costly emergencies.
When to Hire a Pro in Glendale and What to Expect
Some tasks are beyond safe DIY repair, especially components that bear the door’s weight. If you notice a frayed or broken spring, damaged cables, a severely bent track, or persistent misalignment after initial fixes, contact a licensed garage door technician. The GarageDoorAdjust team recommends documenting symptoms, photos of the hardware, and any noises to accelerate the diagnostic process. A professional will typically perform a complete safety assessment, tighten or replace springs, and verify the door’s balance and sensor alignment. Expect a written estimate and a brief safety briefing before any work begins. For many Glendale homes, a professional repair can restore reliability quickly while ensuring compliance with local safety guidelines.
Tools & Materials
- Safety glasses(Protect eyes from debris and moving parts)
- Work gloves(Grip and protect hands during handling)
- Ladder(Stable, adjustable, with non-slip feet)
- Screwdriver set (Phillips + flathead)(For screws on hinges, brackets, and track ends)
- Socket/wrench set(Tighten/loosen mounting bolts and hardware)
- Lubricant (white lithium grease or silicone spray)(Apply to hinges, rollers, bearings (not on belt/chain if enclosed))
- Detergent and rag(Clean grime from tracks before lubrication)
- Marker or tape(Label screws/parts for easy reassembly)
- Safety blocking/wood chocks(Use when needed to secure the door during work)
Steps
Estimated time: 60-90 minutes
- 1
Power down and secure the door
Unplug the opener from the wall outlet or switch off the circuit breaker. Disengage the opener from the door if possible to manually operate it without the motor. This prevents accidental movement while you inspect components.
Tip: Lock out-tag out (LOTO) if you’re working at height or near electrical components. - 2
Test safety sensors and the push-button
Place an object in the door’s path and use the button to see if the door reverses when blocked. If the sensors don’t respond, realign them so they have a clear path and unobstructed signal between them.
Tip: Clean the sensor lenses with a soft cloth before re-testing. - 3
Inspect tracks and rollers
Check tracks for dents, bends, or obstructions. Look at wheels/rollers for flat spots or wear. If tracks are misaligned, gently loosen mounting screws and realign before retightening.
Tip: Don’t force a bent track back into place; seek professional help if it’s significantly misaligned. - 4
Check hardware for looseness
Tighten mounting brackets, hinge screws, and track end supports. Loose hardware causes wobble, misalignment, and excess strain on the opener.
Tip: Use a torque wrench or proper driver to avoid over-tightening. - 5
Assess door balance with the manual lift
Disconnect power, grab the door, and lift halfway. A properly balanced door should stay put. If it drifts, springs or balance components may need service by a pro.
Tip: If you notice heavy resistance, stop and avoid further handling of springs. - 6
Lubricate moving parts
Apply a thin layer of lubricant to hinges, rollers, and bearings. Wipe away excess to prevent dust buildup. Do not lubricate plastic parts if the manufacturer advises otherwise.
Tip: Only use lubricants designed for garage doors. - 7
Test operation with the opener
Reconnect power and test full cycle again. Observe start/stop points, speed, and any unusual noises. If issues persist, document symptoms for a pro.
Tip: Test from a safe distance and keep hands clear of moving parts. - 8
Document and plan next steps
Record what you found, what you fixed, and what remains. Decide whether you can complete the repair or if you should hire a pro for high-risk tasks like springs.
Tip: A quick photo log helps technicians understand the issue faster.
Got Questions?
What are the most common garage door problems in Glendale?
Most common problems include misaligned tracks, sensor misalignment, noisy hinges, and worn rollers. Start with safety checks, clean tracks, and lubrication before evaluating more complex issues.
Common issues are misaligned tracks, sensor problems, noisy hinges, and worn rollers. Start with safety checks and cleaning before tackling more complex problems.
Can I fix a garage door opener myself?
Basic opener maintenance is possible, such as testing the sensors and resetting the opener. However, problems with springs, cables, or motor assemblies should be handled by a licensed technician.
You can do simple tests and resets, but springs or motor assemblies require a professional.
Is it safe to inspect the springs myself?
Inspecting springs visually is fine, but adjusting or replacing them is dangerous. If you suspect worn or damaged springs, contact a pro immediately.
Inspect visually, don’t adjust. If you suspect damage, call a professional.
How long does a typical garage door repair take?
Repair time varies by issue. Simple lubrication or sensor realignment can be completed in under an hour, while major track or spring work may require several hours and a technician.
Mostly under an hour for simple fixes; major work with springs will take longer and usually needs a pro.
Do I need a permit to replace a garage door?
Permit requirements depend on local codes. Glendale may require permits for door replacement or major structural changes, so check with your city’s building department.
Check Glendale’s building codes for permit needs before a full replacement.
What should I do if the door wont move after repairs?
If it still won’t move, recheck safety switches and tracks, ensure no obstructions, and consult a professional to inspect springs and cables for safety.
If it still won’t move, recheck sensors and tracks, then call a pro for springs or cables.
Watch Video
Quick Summary
- Inspect tracks and sensors before touching springs
- Balance tests indicate whether springs are worn
- Only use approved lubricants on metal moving parts
- Call a pro for springs, cables, or bent tracks to stay safe