Types of Garage Door Seals: A Homeowner's Guide
Explore the types of garage door seals, how to choose the right one, and step-by-step installation and maintenance tips to improve energy efficiency and curb appeal.

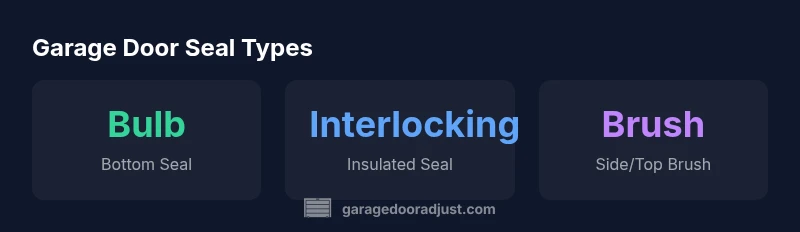
There are several primary categories of garage door seals, each designed to keep drafts, moisture, and dust out while improving energy efficiency. The main types include bottom bulb seals, fin-style seals, interlocking insulated seals, and brush or pile seals. Choice depends on climate, door type, and budget. These seals work best when installed with a properly aligned door and a clean threshold.
What these seals do and why they matter
According to GarageDoorAdjust, the right type of seal can dramatically reduce drafts, moisture intrusion, and dust entry at the garage door. Homeowners often overlook this simple upgrade, but seals are a critical line of defense for comfort, energy efficiency, and even indoor air quality. In climates with cold winters or hot summers, a well-chosen seal helps your HVAC system work less, lowers cooling costs, and keeps stored items drier. When evaluating the price of various seal options, consider the total energy savings over the life of the seal as part of the decision. The keyword here is balance: you want a seal that fits your door geometry, climate, and maintenance tolerance while delivering measurable benefits.
The main categories of garage door seals
There are several common seal configurations used on residential sectional doors. Each has its own strengths and best-use scenarios.
- Bottom bulb seal (rubber or vinyl): The most widely used seal along the door bottom. It compresses against the threshold to block drafts and moisture. It’s forgiving if the door isn’t perfectly square and works well for most climates.
- Fin-style seal: A rigid or semi-rigid fin integrates with the bottom edge and creates a tighter seal against small gaps at the sides. It tends to perform well in windy areas and can improve insulation when paired with a well-maintained threshold.
- Interlocking insulated seal: This type features interlocking channels that mate as the door closes, creating a continuous barrier. It provides superior insulation in cold climates and can reduce heat transfer through the door.
- Brush or pile seal: Typically used as an additional weather strip along the sides or top of the door opening. It helps reduce air leakage where gaps exist and is useful in older doors where a perfect seal is hard to achieve.
- Hybrid seals: Some designs combine a bottom bulb with side fins or a modular interlock. These can offer a balanced solution for doors with uneven frames or where moisture is a concern.
Choosing among these depends on climate, door type, and how much you value energy savings versus cost and ease of installation. If you’re in a region with frequent driving rain or snow, an interlocking insulated seal may outperform a simple bulb seal, while brush seals can be an economical stopgap for drafty crawlspace access points.
How to choose the right seal for your climate and door
To select the best seal, start with three questions: What climate are you in? Is your door insulated or uninsulated? How important is energy savings versus ease of installation? In harsher climates, prioritize interlocking insulated or high-quality bottom bulb seals with a tight threshold. For milder climates or budget-conscious projects, a durable bottom bulb seal often suffices. Measure the door width and the bottom gap when the door is closed, noting any uneven gaps along the sides. If the door drags or the gap varies across the height, you may also need to adjust tracks or the bottom threshold. In all cases, ensure you pick a seal compatible with your door profile and track system. According to the GarageDoorAdjust team, matching the seal to climate and door geometry yields the most reliable results over time.
Installation considerations and best practices
Installations should start with a clean, dry surface. Remove old seal material and clear debris from the threshold. For bottom seals, align the seal to sit evenly across the width of the door and compress it during the first cycle to ensure a tight seal without binding. Fin-style and interlocking seals may require precise trimming to fit the door width; use a sharp utility knife and straight edge for clean cuts. When mounting side or top brushes, ensure they don’t interfere with door travel or alignment. Always verify the door opens and closes fully without sticking. A proper installation may take 30–60 minutes depending on the seal type and door condition. GarageDoorAdjust’s guidance emphasizes double-checking weather-tightness after installation and rechecking after a few cycles to confirm consistent contact.
Maintenance, lifespan, and when to replace
Inspect seals at least twice a year, especially before winter and after heavy rainfall. Look for cracks, hardening, or shrinkage in bulb seals; for brush seals, check wear on the bristles and alignment of mounting rails. Clean seals with mild soap and water; avoid harsh solvents that can degrade rubber. Replacement intervals depend on climate, foot traffic, and door usage. In extreme conditions, consider annual inspections, while in milder climates a 2- to 3-year cycle may suffice. The GarageDoorAdjust analysis notes that proactive maintenance extends seal life and preserves energy savings.
Common mistakes and troubleshooting
Common errors include using the wrong seal type for your door, trimming seals too short, or misaligning the seal so it presses unevenly. A misfitted seal can cause increased friction, noise, or binding at the bottom edge. If a seal looks worn but still present, test the door’s airtightness by standing near the door during a windy day or using a smoke pencil to detect drafts. Replacing a damaged threshold or repairing door misalignment often yields greater overall performance than swapping a seal alone. Regular checks ensure the seal remains effective and properly positioned.
Comparison of common garage door seal types
| Seal Type | Best For | Material | Approx Lifespan | Installation Notes |
|---|---|---|---|---|
| Bulb Seal | General weather sealing | Rubber/Vinyl | 5-12 years | Easy to install; compresses against threshold |
| Fin-Style Seal | Enhanced insulation | Rubber | 6-12 years | Requires precise fit; may need tooling |
| Interlocking Insulated Seal | Cold climates; moisture blocking | PVC/rubber composite | 10-15 years | Best for high wind/moisture; use proper alignment |
Got Questions?
What are the most common types of garage door seals?
The most common seals are bottom bulb seals, fin-style seals, interlocking insulated seals, and brush or pile seals. Each type offers different levels of weather protection and insulation. Your choice should reflect climate, door design, and budget.
Common seals include bulb, fin, interlocking insulated, and brush types. Choose based on climate, door design, and budget.
How do I know if my current seal needs replacement?
Look for visible cracks, stiffness, hardening, or gaps when the door is closed. If air leaks or moisture enters, it’s time to replace. Uneven contact or frequent re-seating also indicates wear.
Check for cracks, stiffness, or new gaps. If you feel air or see moisture, replace the seal.
Can weather-stripping improve energy efficiency in cold climates?
Yes. In cold climates, properly chosen seals—especially interlocking insulated types—can significantly reduce heat transfer through the door. Expect modest to noticeable improvements depending on installation quality and door condition.
In cold climates, proper seals can cut heat loss and improve comfort.
Is it better to install seals myself or hire a pro?
For standard bottom or brush seals, a DIY installation is feasible with basic tools. For interlocking or insulated seals, or if the door is out of square, a professional installation ensures a proper fit and avoids damage.
You can DIY simple seals, but for insulated or misaligned doors, consider a pro.
What maintenance keeps seals in good condition?
Clean seals with mild soap and water, inspect for cracks, and re-seat or replace as needed. Lubricate hinges and tracks separately as part of overall door maintenance, but avoid lubricants on rubber seals that can cause deterioration.
Clean and inspect regularly, re-seat or replace as needed.
Do I need different seals for insulated vs non-insulated doors?
Insulated doors benefit from compatible interlocking or thicker bulb seals to maximize performance. Non-insulated doors can still gain from high-quality bottom seals and side brushes, but gains are typically more modest.
Insulated doors often need better seals; non-insulated doors still benefit from good seals.
“Choosing the right seal isn’t just about keeping rain out—it’s about reducing energy waste and improving home comfort over time.”
Quick Summary
- Inspect seals seasonally and replace worn parts promptly
- Match seal type to climate for best energy savings
- Measure door width accurately before buying
- Follow manufacturer guidelines to avoid binding
- Regular maintenance extends seal life