The Door Doctor: DIY Garage Door Repair Guide for Homes
Learn to diagnose, repair, and maintain your garage door with the Door Doctor approach from GarageDoorAdjust. This step-by-step guide covers safety, tools, common fixes, and maintenance to keep your door running smoothly.

By following the Door Doctor approach, you’ll diagnose and fix common garage door issues safely and effectively. Before you start, unplug the opener, secure the door, and gather basic tools. According to GarageDoorAdjust, a structured, safety-first method helps homeowners inspect tracks, sensors, rollers, and lubrication, reducing surprise breakdowns and unnecessary service calls.
The Door Doctor Approach to Diagnostics
The door on your garage is a complex system of springs, rollers, tracks, sensors, and an electric opener. The Door Doctor method centers on safety, clear diagnostics, and a logical sequence that minimizes risk while maximizing results. In practice, this means starting with power-off checks, visually inspecting components for wear, and testing operation in incremental steps. At every stage, prioritize user safety and avoid rushed fixes. According to GarageDoorAdjust, a disciplined diagnostic mindset reduces guesswork and helps homeowners distinguish between quick fixes and genuine failures. This approach also emphasizes using the right tools and proper lubrication to extend life and quiet operation. If a problem persists after a few checks, the door doctor mindset helps you decide whether to finish the DIY work or call a professional for more complex issues like torsion-spring adjustments.
Why this matters for homeowners
- Safety first: garage doors are heavy and can injure if parts fail suddenly.
- Clarity: a methodical checklist prevents missed steps and rework.
- Longevity: proper lubrication and alignment save money over time.
How to apply the Door Doctor approach at home
- Power down and secure the door before any inspection.
- Observe all moving parts for wear or misalignment.
- Test the opener’s function in short cycles to isolate issues.
- Document each finding to guide future maintenance.
GarageDoorAdjust emphasizes that adopting a proactive, repeated routine with the door doctor mindset lowers the chance of unexpected breakdowns and reduces emergency calls. This is especially true for homeowners who are new to DIY garage door repair and want solid results without compromising safety.
note”:null},
toolsMaterialsSectionRemoved
Tools & Materials
- Safety goggles(Protect eyes from flying debris and dust when inspecting tracks or adjusting parts)
- Work gloves(Grip and protect hands during handle and hardware work)
- Ladder or stable step stool(Reach higher components safely, such as tracks and sensors)
- Phillips and flathead screwdrivers(Common fasteners in hinges, brackets, and hardware mounts)
- Socket wrench set(Tighten or loosen bolts on brackets and hinges)
- Lubricant spray (silicone or lithium grease)(Apply to rollers, hinges, and tracks where indicated)
- Rags or shop towels(Clean surfaces before applying lubricant; wipe excess residue)
- Allen wrenches(Some models use set screws on brackets or sensors)
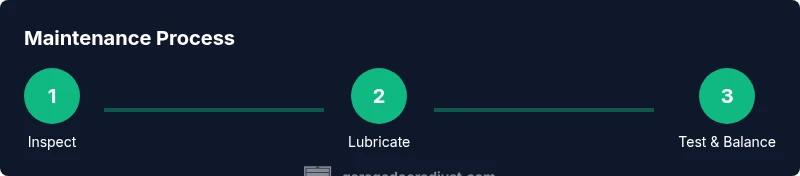
Steps
Estimated time: 30-60 minutes
- 1
Power down and secure the door
Unplug the opener from the wall outlet or switch off the circuit at the main panel. Secure the door in a partially open position using a helper or a sturdy rope, then stabilize the door with clamps if available. This ensures you won’t have unexpected movement while you inspect hardware.
Tip: Lockout the opener to prevent accidental electric activation during the entire process. - 2
Check safety sensors and auto-reverse
With the door secured, test the safety sensors by blocking the infrared beam or placing your hand in the path. The door should stop and reverse if an obstacle is detected. Clean sensor lenses and realign if needed.
Tip: Avoid bypassing sensors; they’re a critical safety feature. - 3
Inspect tracks, rollers, and hinges
Look for dents, loose mounting screws, or tracks that are out of alignment. Ensure rollers move smoothly in their tracks without sticking. Tighten loose screws and replace any worn rollers if necessary.
Tip: Misaligned tracks can cause binding and accelerated wear on hinges. - 4
Lubricate moving parts
Apply a light lubricant to rollers, hinges, and track joints. Wipe away excess to prevent dust buildup. Avoid oiling pulleys or sprockets that aren’t designed for lubrication.
Tip: Use silicone-based or lithium grease; avoid heavy oil that attracts dirt. - 5
Test the opener and manual operation
Reconnect power and operate the door with the opener. Then disconnect the opener and try lifting the door by hand to assess balance and weight distribution. If the door is heavy or unbalanced, reassess or seek professional help.
Tip: A balanced door should stay in a fixed position when lifted and released slowly. - 6
Document issues and plan follow-up
Record what you found and what you fixed, plus when you’ll recheck or replace parts. If any problem persists after steps, this is a clear indicator to consult The Door Doctor for a professional assessment.
Tip: Keep a simple maintenance log for future reference.
Got Questions?
What are the signs that my garage door needs maintenance?
Look for persistent grinding, unusual noises, slow response, uneven movement, or door wobble. If the opener struggles or the door sticks in certain spots, it’s time to inspect.
Watch for grinding sounds, slow response, and sticking when you open or close the door.
Can I bypass safety sensors to fix a door?
No. Safety sensors are a critical safety feature and bypassing them can cause injury or property damage. Address misalignment or dirty lenses instead.
Do not bypass the safety sensors; fix the alignment or cleanliness instead.
How often should I inspect garage door tracks and hardware?
Inspect tracks, rollers, and hardware every 3-6 months, depending on use and climate. Regular checks prevent buildup of wear that leads to bigger failures.
Check the tracks and hardware every few months to catch wear early.
Is it safe to adjust torsion springs myself?
No. Torsion springs are under high tension and can cause serious injury. Leave spring adjustments to trained professionals.
Torsion spring work is not safe for DIY efforts—consult a pro.
What maintenance can extend the life of my garage door?
Regular lubrication, timely replacement of worn parts, and keeping tracks clean and aligned can significantly extend door life and reduce emergency repairs.
Lubricate moving parts and keep everything aligned for longer life.
Watch Video
Quick Summary
- Identify the problem before taking things apart.
- Unplug and secure the door to ensure safety.
- Check sensors, tracks, and balance in a systematic way.
- Lubricate moving parts but avoid overuse of oil.
- Know when to call The Door Doctor for complex issues.