Sarasota Garage Door Repair: A Comprehensive How-To Guide
Comprehensive homeowner guidance for Sarasota garage door repair. Learn safe DIY steps, diagnose common problems, estimate costs, and know when to call a professional in your area.

This guide helps homeowners perform a safe, effective Sarasota garage door repair. You’ll learn to diagnose common issues with springs, tracks, and openers, verify balance, inspect safety sensors, and determine when it’s time to call a professional. Follow the steps to reduce downtime and improve door reliability.
Introduction to Sarasota Garage Door Repair
When your garage door won’t open, or makes unusual noises, it’s a signal to inspect the system for misalignment, worn components, or sensor faults. In Sarasota, humid coastal weather and temperature fluctuations can affect door hardware, lubricants, and weather stripping. This guide from GarageDoorAdjust offers practical, homeowner-friendly steps for diagnosing and addressing common issues while emphasizing safety and local considerations for Sarasota garage door repair.
Safety and Preparation for DIY Repairs
Before touching any hardware, disconnect power to the opener and keep the area clear of bystanders. Wear ANSI-compliant safety glasses and gloves to protect your eyes from snapping components. Have a sturdy ladder, good lighting, and a clean workspace. If you see a damaged spring, frayed cables, or severe track misalignment, treat the situation as hazardous and consider professional service. Safety is the foundation of any Sarasota garage door repair plan.
Common Symptoms and What They Mean
A garage door that stays stubbornly open or closed often indicates sensor or opener problems. Squeaking or grinding noises usually point to worn rollers, hinges, or dry lubrication. If the door closes unevenly or remains unbalanced, its springs, tracks, or balance system may be compromised. In Sarasota, frequent temperature and humidity changes can accelerate wear on exposed hardware, so regular inspection helps catch issues early.
Tools and Materials You’ll Need
Gather essential items before you start: a sturdy step ladder, safety glasses, work gloves, a screwdriver set, a cordless drill, lubricant (silicone-based), replacement rollers, a rubber mallet, and a torque wrench if you’ll address springs or torsion components. Having the right tools on hand reduces downtime and lowers the risk of accidental damage during Sarasota garage door repair.
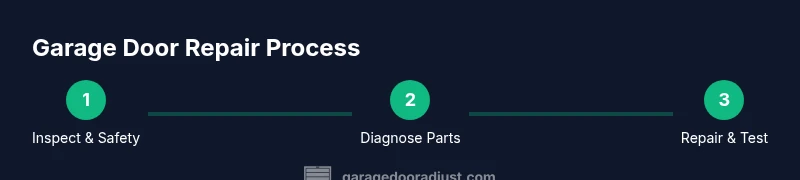
Step-by-Step Diagnostic and Repair Workflow (Overview)
This section provides a high-level walkthrough of a typical diagnostic workflow. Start with a visual inspection of springs, cables, tracks, and rollers. Check door balance by pulling the emergency release and manually opening the door. If you notice binding, misalignment, or unusual wear, isolate the faulty component and replace or service it following manufacturer guidelines. Always test safety sensors after any work.
Maintenance and Preventive Care for Sarasota Homes
Preventive maintenance is cheaper than emergency repairs. Lubricate moving parts twice a year, inspect weather stripping for gaps, tighten loose mounting screws, and clean tracks to remove debris. In Sarasota, seasonal humidity can promote rust, so apply a light protective coating to metal surfaces and inspect sensors to ensure reliable operation across temperature shifts.
Cost Considerations and Budgeting for Sarasota Garage Door Repair
Repair costs vary with the complexity of the issue, parts required, and labor rates. Typical components include rollers, tracks, cables, springs, and the opener. Plan for the possibility of needing a spring replacement or sensor upgrade.Get multiple quotes from reputable technicians and compare service guarantees, ensuring you understand material choices and warranty coverage for your Sarasota garage door repair.
Local Codes, Warranty, and Safety Notes
Florida and Sarasota area codes may influence installation standards, especially for spring systems and door balance. Always verify warranty terms on parts and labor, and document service dates for future reference. When in doubt about compliance or safety, consult a licensed technician who can align repairs with local requirements.
Tools & Materials
- Safety glasses(ANSI Z87.1 rated)
- Work gloves(Grippy, cut-resistant if possible)
- Sturdy ladder(Stable, non-slip feet)
- Screwdriver set(Phillips and flathead sizes)
- Wrench set(Combination wrenches incl. adjustable)
- Cordless drill(Fully charged with bits)
- Lubricant (silicone-based)(Light viscosity for tracks/rollers)
- Replacement rollers(On-hand for worn parts)
- Torque wrench(For springs/cable tension when trained)
Steps
Estimated time: 60-120 minutes
- 1
Power down and prep
Turn off the garage door opener at the wall switch and unplug the unit. Clear the area, set the door in the halfway open position, and gather your tools. This reduces the risk of sudden movement during inspection.
Tip: Always test the door balance by pulling the emergency release and trying to lift manually with the door supported. - 2
Check door balance and springs
With the door disconnected from the opener, smooth the door up and down. If it drops quickly or binds, the balance may be off or a spring component is failing. Do not attempt spring adjustments unless trained.
Tip: Do not attempt to adjust torsion springs yourself; these are under high tension and can cause serious injury. - 3
Inspect tracks, rollers, and hinges
Look for dents, bends, or obstructions in the tracks. Worn or broken rollers should be replaced. Tighten loose fasteners and lubricate moving parts as needed.
Tip: Keep tracks clean from dirt and debris to maintain smooth operation. - 4
Test safety sensors and opener
Reconnect power and test the safety sensors. If the door doesn’t reverse on contact, adjust or replace the sensor alignment. Ensure the opener’s limit switches operate correctly.
Tip: Use a small block to test the sensor beam alignment if you don’t have a dedicated sensor tool. - 5
Lubricate and reassemble
Apply silicone-based lubricant to rollers, hinges, and track joints. Wipe away excess lubricant to avoid attracting dust. Reconnect the door to the opener and test multiple cycles.
Tip: Avoid petroleum-based lubricants on nylon rollers; they can cause premature wear. - 6
Replace worn components as needed
If you identified damaged rollers, bent tracks, or frayed cables, replace them with manufacturer-approved parts. Verify compatibility with your door model.
Tip: Keep spare parts on hand for quick future repairs and maintain a parts inventory log. - 7
Finalize testing and safety
Cycle the door through opening and closing several times. Confirm smooth operation, accurate stopping points, and sensor safety reversal.
Tip: Document the service date and components replaced for warranty and maintenance records.
Got Questions?
Is it safe to attempt garage door repair myself in Sarasota?
DIY work can be safe for simple maintenance, but springs and cables are hazardous. If you’re unsure, consult a licensed technician. Always prioritize safety and use proper tools and protective gear.
DIY work can be safe for simple tasks, but springs and cables are hazardous. If unsure, call a licensed tech and always protect yourself.
What is the typical cost range for Sarasota garage door repair?
Repair costs vary by component and labor, with common parts including rollers, tracks, and sensors. Getting multiple quotes helps you compare parts, warranties, and service guarantees.
Repair costs vary by part and labor. Get several quotes to compare warranties and services.
How long does a typical repair take?
A straightforward repair often takes 1-2 hours, while more complex spring or opener work may require several hours or a scheduled service visit.
Most repairs take one to two hours, longer if springs or complete opener work are involved.
Do Florida codes affect garage door repairs?
Local code requirements can influence installation and safety standards. Always verify that repairs comply with Sarasota codes and manufacturer specifications.
Local codes can affect safety standards; verify repairs meet Sarasota requirements and manufacturer specs.
When should I replace the opener vs repair?
If the opener is old, unreliable, or frequently failing, replacement may be more cost-effective than repeated repairs. Consider energy efficiency and smart features as well.
If the opener is old or unreliable, replacement may be more cost-effective than frequent repairs.
What maintenance should I perform annually?
Inspect balance, tighten hardware, test safety sensors, lubricate moving parts, and replace weatherstripping as needed to keep the system reliable.
Each year, check balance, sensors, and lubricate parts to maintain reliability.
Watch Video
Quick Summary
- Turn off power before any inspection.
- Identify worn parts early to avoid breakdowns.
- Limited DIY when springs are involved—call a pro.
- Maintain lubrication and weather seals for longevity.