Garage Door Repair Tampa: A Step-by-Step Guide
A comprehensive, expert guide to diagnosing and repairing common garage door issues in Tampa, Florida. Learn safe DIY steps, when to call a pro, and how climate affects door parts in 2026.

Goal: Fix common garage door issues in Tampa safely and effectively. This quick answer outlines how to diagnose misalignment, worn springs, noisy rollers, and opener faults, and it shows you what tools you’ll need before you start. Expect practical steps, safety reminders, and when to call a professional to avoid costly mistakes.
Understanding Tampa Climate and Garage Door Durability
The Tampa climate, with high humidity, coastal salt air, and frequent summer heat, creates unique challenges for garage doors. Steel sections and hardware expand and contract with temperature swings, track screws can loosen, and springs may wear faster than in milder climates. Homeowners in this city often notice increased rust on hardware and faster wear of rollers, seals, and weatherstripping. The GarageDoorAdjust team found that area-specific conditions influence both operation and longevity. A practical approach starts with knowing what to inspect regularly and how climate affects parts. In this first section we cover how to assess the door’s condition in the Tampa environment, what signs indicate a potential issue, and how to plan maintenance to extend life and reduce noise and downtime. You will also get an overview of safety considerations and when to seek professional help to avoid injuries or damage.
Common Problems Seen in Tampa Homes
In residential garages around Tampa, common problems include misaligned tracks, binding rollers, rust on hinges and bolts, weatherstripping wear, and opener faults. Humidity accelerates corrosion, and salt air can stain metal components, causing them to seize or creak. You may notice doors that are slow to move, hesitate mid-track, or slam shut unexpectedly. Debris in tracks and misaligned photosensors can trigger nuisance warnings from modern openers. The GarageDoorAdjust analysis shows that most issues arise from poor maintenance, lack of lubrication, or seasonal temperature shifts. Proactive checks—especially after heavy rain or heat waves—can prevent minor faults from becoming costly repairs.
Safety First: Is DIY Right for You?
DIY garage door repair can be appealing for simple maintenance tasks, but it carries significant safety risks, especially with torsion springs and high-tension cables. If you lack the right tools, training, or a partner to help, do not attempt spring adjustments or door removal. Start with basic, non-load-bearing tasks like cleaning tracks, lubricating moving parts, and checking sensor alignment. When in doubt, consult a professional. In Tampa’s climate, corrosion can hide wear inside components, so never overlook rust or fraying cables. Always wear safety glasses, keep hands clear of moving parts, and follow manufacturer instructions for any lubricant or replacement parts.
Tools and Materials You’ll Need Before You Start
Before you pick up tools, review the essential items and decide which are truly necessary for the tasks you plan. A compact, organized toolkit makes the job safer and faster. Basic items include a sturdy ladder, adjustable wrenches, screwdrivers, hex keys, pliers, a socket set, and silicone-based lubricant. Have a rag for cleanup and a marker to note measurements. If you discover damaged weatherstripping or rollers, plan for replacements. Always keep safety gear handy and consider a helper for holding parts. In the Tampa climate, plan for corrosion-proof hardware to extend life.
Step 1: Prepare and Power Down
Power down the door opener and unplug the unit or remove the battery if applicable. This ensures no unexpected movement while you inspect. Verify the wall switch is off and the opener cord is fully detached. If you detect active cables, do not touch live components. Prepare your workspace by clearing the area beneath and around the door, placing a laddersteady, and ensuring you have adequate lighting.
Step 2: Secure and Detach the Opener
Clamp the door in a partially open position with a C-clamp on the track closest to the floor to prevent accidental movement. Detach the opener from the door by unplugging or releasing the quick-release mechanism so you can manually operate the door safely. This step is crucial to avoid sudden door movement that could cause injury.
Step 3: Check Balance and Springs Cautiously
With the door closed, test manual lift to gauge balance and effort. Do not attempt to adjust torsion springs unless you’re trained and equipped with the proper safety equipment. If the door feels heavy or unbalanced, stop and contact a licensed professional. Spring tension is dangerous and can cause serious injuries if mishandled.
Step 4: Inspect Tracks, Rollers, and Hardware
Inspect for bends, dents, rust, or obstructions in the vertical and horizontal tracks. Gently rotate rollers by hand to detect rough spots and replace worn wheels as needed. Tighten loose mounting screws and ensure brackets are secure. Any misalignment or damage to tracks can lead to binding or unbalanced door movement, especially in humid coastal climates.
Step 5: Lubricate Moving Parts
Lubricate hinges, rollers, pivots, and any moving joints with a silicone-based product. Avoid petroleum-based lubricants on plastic rollers. Wipe away excess lubricant to prevent dirt accumulation. In Tampa, regular lubrication helps counteract humidity-related stiffness and reduces noise during operation.
Step 6: Inspect Cables and Sheaves (Do Not Tinker with Tension)
Examine cables for fraying or wear and inspect pulley sheaves for cracks. Do not attempt to adjust or tension cables yourself; this requires specialized equipment and training. If you notice damage, schedule a professional service to avoid severe injury or door failure.
Step 7: Check Safety Features and Reconnect Power
Reconnect power to the opener and perform several controlled opening and closing cycles. Verify that the safety sensors align and reverse properly on contact. Watch for unusual noises, jerks, or hesitations, and address any issues before continuing use.
Step 8: Re-attach the Opener and Test Cycles
Reattach the opener and perform full cycles, listening for smooth operation and noting any remaining misalignment. If there is resistance or noisy grinding, reassess the tracks and hardware. The goal is a quiet, safe, and reliable door that functions consistently.
Step 9: Final Checks and Documentation
Tighten any loose screws, wipe down surfaces, and record maintenance performed and parts replaced. This helps you establish a maintenance cadence tailored to Tampa conditions. Keep a simple log for future reference and plan a yearly inspection to catch signs before they become expensive repairs.
Step 10: When to Call a Pro and What to Expect
If you encounter damaged torsion springs, frayed cables, or persistent misalignment, schedule a visit with a licensed technician. A pro will assess spring condition, verify balance, and ensure proper operation of safety sensors. Expect a thorough inspection, a written estimate, and a detailed explanation of recommended fixes. GarageDoorAdjust recommends prioritizing safety and adherence to local codes during any repair.
Tools & Materials
- Ladder (extendable)(Stable, tall enough to reach tracks and sheaves)
- Adjustable wrench(For mounting brackets and bolts)
- Flathead and Phillips screwdrivers(General screws and fasteners)
- Hex keys / Allen set(For set screws on hardware)
- Pliers (needle-nose and slip-joint)(Grip and bend cables safely)
- Socket set(Nuts and bolts on hardware)
- Lubricant (silicone spray or lithium grease)(Moving parts; avoid tracks and belts)
- Rags and degreaser(Clean contacts and tracks)
- Safety glasses and gloves(Personal protection)
- Tape measure(Verify clearances and track alignment)
- Replacement rollers or weather seals(Only if worn or damaged)
- Chalk or marker(Mark reference points on tracks)
- Temporary clamps or C-clamps(Hold parts during adjustments)
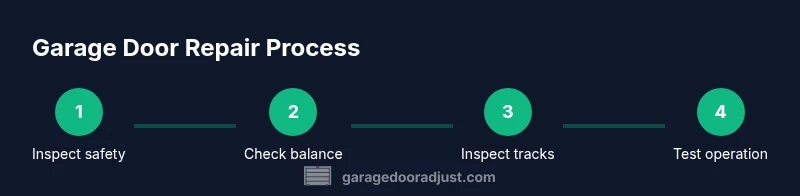
Steps
Estimated time: 60-90 minutes
- 1
Assess safety and power
Power down the door opener and unplug the unit or remove the battery if applicable. Ensure the wall switch is off and the opener cord is fully detached. Prepare the workspace with a clear area and good lighting.
Tip: Always start with power off to avoid accidental movement. - 2
Secure and detach the opener
Clamp the door in a safe, partially open position using a C-clamp on the track to prevent lifting. Detach the opener from the door by unplugging or releasing the quick-release mechanism.
Tip: Do not rely on the opener to hold the door in place. - 3
Check balance and springs cautiously
With the door closed, test manual lift to gauge balance. Do not adjust torsion springs unless you are trained and equipped; untrained changes can cause serious injury.
Tip: If the door feels heavy or unstable, stop and call a pro. - 4
Inspect tracks and rollers
Look for bends, dents, or obstructions in the tracks. Clean debris and lubricate rollers as appropriate. Misaligned tracks cause binding and noise.
Tip: Use a level to verify tracks are plumb. - 5
Lubricate moving parts
Lubricate hinges, rollers, and pivots with silicone-based lubricant. Avoid getting lubricant on tracks to prevent dust and grime buildup.
Tip: Wipe excess to keep components clean. - 6
Inspect cables and hardware
Check cables for fraying and tighten mounting screws, but do not over-tighten. Damaged cables must be replaced by a pro.
Tip: Cables under tension are dangerous; leave main tension areas to professionals. - 7
Check safety features (don’t adjust springs)
Do not attempt to adjust torsion springs. Inspect for wear and call a technician if you notice any risk.
Tip: Never modify springs yourself. - 8
Test door operation without the opener
Reconnect power and run a few manual tests to ensure smooth operation and track alignment before reattaching the opener.
Tip: Be ready to stop the door if anything binds. - 9
Reattach the opener and test cycles
Reconnect the garage door opener and perform several opening and closing cycles to ensure quiet operation and proper sensor reversal.
Tip: Verify safety reversing mechanism works. - 10
Final checks and cleanup
Re-tighten any loose screws, re-lubricate as needed, and tidy the work area. Record parts replaced for future maintenance.
Tip: Maintain a maintenance log for Tampa climate conditions.
Got Questions?
Should I repair a noisy garage door myself?
Noisy doors often indicate worn rollers or misalignment. DIY fixes may reduce noise short-term but ignore safety concerns. If in doubt, consult a professional.
Noisy doors can point to bigger issues. If you're unsure, it's safer to call a pro.
How can I tell if springs need replacement?
If the door is heavy to lift, or drops quickly, springs may be worn. Because springs are under tension, have a professional evaluate them to avoid injury.
If the door feels heavy or unstable, stop and call a pro.
Is it safe to work on a garage door in Tampa climate?
Humidity and salt air can accelerate rust and wear. Prioritize safety and avoid risky repairs without proper tools and training.
Tampa's climate adds wear; proceed with caution and seek professional help when needed.
What tools are essential for basic repairs?
A basic toolkit includes ladders, wrenches, screwdrivers, pliers, hex keys, a level, and lubricant. Keep safety gear on hand.
Keep a basic toolkit and protective gear ready for repairs.
When should I replace the opener?
If the opener struggles repeatedly, or sensors and reversal fail, replacement is wiser than continuous repairs.
If it keeps failing, think about a replacement.
Watch Video
Quick Summary
- Inspect springs/Tracks monthly
- Lubricate moving parts to reduce noise
- Test safety features after any repair
- Call a pro for torsion-spring work