Fort Lauderdale Garage Door Repair: A Homeowner's Step-by-Step Guide
Learn how to diagnose, repair, and maintain your garage door in Fort Lauderdale, FL. This practical, safety-focused guide covers common issues, climate considerations, and when to call a professional.

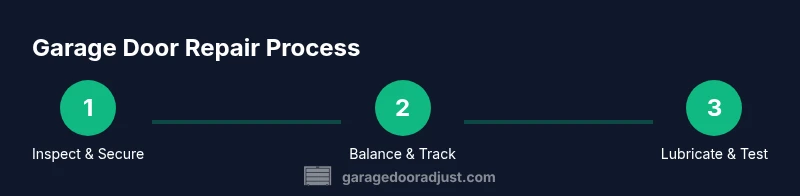
This guide helps you diagnose and repair common garage door issues in Fort Lauderdale, FL with a safe, step-by-step approach. From balance checks to weather sealing and opener alignment, you’ll learn practical actions you can take today. According to GarageDoorAdjust, a structured, home-owner friendly process reduces misdiagnosis and DIY errors for garage door repair fort lauderdale fl.
Fort Lauderdale-Specific Considerations for Garage Doors
Fort Lauderdale’s high humidity, coastal humidity and salt air accelerate corrosion and wear on garage door components. Moisture can creep into springs, tracks, and hinges, causing stiffness and misalignment over time. In this climate, preventive maintenance matters more than in drier regions. According to GarageDoorAdjust, homeowners in coastal climates should prioritize corrosion-resistant hardware, regular lubrication, and inspections of weather seals to keep doors sealing properly and reduce energy loss. This section sets the stage for practical steps you can take to extend the life of your door while mitigating climate-driven issues.
Common Problems Seen in This Climate
Water intrusion and humidity lead to rust on screws, brackets, and rollers; these small failures accumulate and create wobble or binding. Worn weatherstripping allows drafts and moisture to reach the door’s bottom and frame, accelerating decay. Misaligned tracks occur when doors drag against weather-stripping and carpets, often noticed as rubbing sounds or slow response to the opener. In Fort Lauderdale, salt air can corrode exposed metal, especially on exterior hardware. Being aware of these climate-specific problems helps you focus your diagnostic efforts where they hurt most.
Safety First: When to DIY vs Hire a Pro
Garage door repair can be hazardous, especially when components are under tension. Simple maintenance like cleaning tracks, tightening loose screws, and applying lubricant is generally safe for a confident homeowner. However, components such as torsion springs, cables, and door panels under load require professional service. The GarageDoorAdjust Team emphasizes safety: never attempt spring work yourself and always disconnect power before inspection to reduce the risk of electric shock or unexpected door movement.
Tools, Materials, and Prep for Fort Lauderdale Repairs
A well-prepared toolbox helps you perform accurate checks without delays. You’ll want a sturdy ladder, flash light, set of screwdrivers (Phillips and flathead), adjustable wrench, pliers, hex keys, protective gloves, and safety glasses. For climate-specific maintenance, keep silicone-based lubricant (not oil) for tracks and hinges, weatherstripping, a clean rag, and rust remover. Having these ready reduces trip-wacks and keeps you focused on the diagnostic steps rather than scavenging tools.
Step-by-Step Diagnostic Checklist
Start with a visual inspection: look for loose screws, bent tracks, and worn weather seals. Manually test door balance by lowering slowly with the door in the middle of its travel range; plenty of drift indicates balance issues. Listen for grinding or squeaking on opening or closing which signals dry hinges or worn rollers. If the door is heavy, binding, or derailing, pause and assess safety before proceeding. The right balance between inspection and prevention will prevent minor problems from becoming costly repairs.
Inspecting Springs, Cables, and Tracks (What Not to Do Yourself)
Springs and cables carry extreme tension and failure can cause serious injury. Do not attempt to unwind or replace torsion springs unless you are trained and equipped with proper safety gear. Instead, inspect springs for visible gaps, rust, or cracks and look for frayed cables. Tracks should be straight and free of debris; if you see a significant bend, contact a licensed tech. This careful inspection helps you decide if a pro is needed.
Lubrication and Routine Maintenance (Preventive Care)
Lubricate moving parts with a silicone-based or lithium-based spray on hinges, rollers (where exposed), and track joints. Wipe away excess lubricant to avoid attracting dust. Do not over-lubricate the bottom seal or allow oil to migrate to the remote sensor area, as that can affect sensor readings. Schedule lubrication at least twice a year, with extra attention during Florida’s hot, humid seasons to reduce resistance and extend life.
Weather Sealing, Insulation, and Energy Efficiency
Upgrading weatherstripping and improving insulation around the door reduces energy loss and helps the door operate more smoothly in humid climates. Check the bottom seal for compression and replace it if gaps persist. If you notice drafts behind the door, consider upgrading the threshold and adding weather-stripping along the sides. A well-sealed door resists salt air intrusion and helps maintain indoor climate comfort.
Opener Troubleshooting and Sensor Alignment
Sometimes issues come from the opener: battery-powered remotes, sensor alignment, and safety features can fail with wear and humidity. Start by replacing the remote batteries and reprogramming remotes if needed. Clean the photo-eye sensors and ensure nothing blocks the beam. If the opener makes unusual noises, verify the opener is properly mounted and the mounting screws are tight before moving on to more complex diagnostics.
Replacement vs Repair: Making the Right Call
Decide whether to repair or replace based on age, frequency of failures, and door condition. In Fort Lauderdale, climate-related wear can shorten the life of rollers, tracks, and weather seals. If springs or structural panels show significant wear, or if you have repeated failures within a 12-month window, replacing the door or the opener may be more cost-effective in the long run. consult a local professional to get a precise estimate.
Local Resources, Permits, and Cost-Effective Strategies
Local Florida codes rarely require a permit for basic repairs, but structural changes or replacing the door may trigger permitting in some cases. Always verify with your city or county building department. For a cost-effective approach, combine maintenance with seasonal checkups and bundle services from a trusted local technician to minimize travel and labor costs. Build a simple maintenance calendar to track tasks and intervals.
Authority Sources and Safety Guidance
For safety guidance and best practices, refer to authoritative sources: OSHA provides general safety guidelines for home repair projects; university extension programs offer homeowner maintenance tips; energy efficiency sources discuss weather sealing and insulation benefits. These resources help homeowners stay safe while performing hands-on checks and know when to call a professional.
Summary of What to Do Next (Recap)
Begin with a climate-aware inspection, address obvious issues, and reserve high-risk tasks for professionals. Maintain a simple maintenance log, use proper lubrication, and keep weather seals in good condition. This approach helps Fort Lauderdale homeowners keep their garage doors functional, safe, and energy-efficient throughout the year.
Tools & Materials
- Sturdy ladder(Reach high tracks; stable base)
- Flashlight(Inspect tracks and springs clearly)
- Screwdrivers (Phillips and flathead)(Tighten brackets and hinges)
- Adjustable wrench(Tighten hardware without slipping)
- Pliers (needle-nose)(Remove debris and adjust small parts)
- Hex keys/Allen set(Work on bolts and brackets)
- Safety gloves and glasses(Protect hands and eyes)
- Silicone-based lubricant(Use on hinges and tracks (not rubber) 1-2 strokes per joint)
- Rags and rust remover(Cleanup and treat corroded parts)
- Weatherstripping kit(Replace worn seals to improve energy efficiency)
- Voltage tester(Verify power to opener safely)
- Shield or drop cloth(Protect floor and nearby belongings)
Steps
Estimated time: 1-2 hours
- 1
Disconnect power and secure the door
Before touching anything, unplug the garage door opener and disconnect the safety cable or switch. Use a helper to hold the door in the middle of its travel to prevent sudden movement. This step reduces the risk of electric shock and accidental door movement.
Tip: Keep power disconnected until you complete your checks. - 2
Check door balance manually
With the door closed, disconnect the opener and manually raise and lower the door about a quarter of its travel. The door should stay in place when you let go. If it falls or rises, there is a balance or spring issue.
Tip: Do not push too far beyond mid-travel. - 3
Inspect and tighten hardware
Look for loose screws on hinges, brackets, and track mounting. Use the proper screwdriver and wrench to tighten screws without over-tightening. Loose hardware can cause binding and noise.
Tip: Tighten in small increments and recheck movement. - 4
Check tracks for obstructions and alignment
Inspect tracks for dents, debris, or misalignment. If tracks are bent, avoid forcing the door and contact a pro. Clean tracks with a damp cloth and ensure they guide the rollers smoothly.
Tip: Use a level to verify tracks run true. - 5
Lubricate moving parts
Apply a light silicone-based lubricant to hinges, rollers (where accessible), and track joints. Wipe away excess to prevent dust buildup. Avoid lubricating the bottom seal or sensors.
Tip: Only a small amount is needed; over-lubrication invites dirt. - 6
Test the door with the opener after manual check
Reconnect power and test the opener. Ensure safe auto-reverse works and the door responds promptly to remote commands. Listen for unusual noises and stop if something binds.
Tip: Stand clear of the door’s path during tests. - 7
Inspect weather seals and insulation
Check the bottom seal for compression; replace if it’s cracked or no longer seals. Inspect side seals for gaps that let air and moisture in. Proper sealing reduces energy loss and wind interference.
Tip: Seal replacements improve efficiency and door longevity. - 8
Look for rust and corrosion
Assess exposed hardware for surface rust. Treat small spots with rust remover and repaint if necessary. Replace severely corroded components to prevent failure.
Tip: Address corrosion early before it spreads. - 9
Test sensors and remote controls
Clean photo-eye sensors and ensure nothing blocks the beam. Reprogram remotes if needed and replace batteries. This ensures safe operation and prevents false auto-reverse.
Tip: Keep sensors free from dust and moisture. - 10
Decide on professional help for high-risk parts
If you suspect spring, cable, or structural issues, stop and contact a licensed technician. Attempting high-tension repairs without proper equipment can be dangerous.
Tip: When in doubt, hire a pro to avoid injury. - 11
Set up a maintenance schedule
Create a simple calendar to repeat checks every 6 months, including lubrication, weather-stripping inspection, and track alignment. This compounds small improvements into longer door life.
Tip: Document dates and outcomes for easy reference.
Got Questions?
Can I safely DIY garage door repair in Fort Lauderdale?
Basic maintenance like lubrication and track cleaning is safe for a confident homeowner. Complex tasks involving springs or cables should be handled by a licensed pro, especially in humid coastal climates.
Yes for simple tasks, but avoid spring work and high-tension repairs; call a pro for safety.
How do I know if my door is off balance?
If the door drifts, sticks, or feels heavy when opening by hand, it’s likely off balance. Test at mid-travel with the opener disconnected. Persistent drift indicates a balance issue demanding professional attention.
If it drifts or binds, it’s time to call a pro.
How often should rollers and tracks be lubricated?
Lubricate hinges and rollers every 6 months; wipe away excess to prevent dirt buildup. Do not lubricate the bottom seal or sensors.
Lubricate twice a year and keep the bottom seal dry.
What are signs you need a new garage door opener?
Frequent sensor errors, unpredictable responses to remotes, or a door that stalls during operation indicate you may need to replace the opener.
If the opener acts unreliable, consider upgrading.
Does Fort Lauderdale humidity affect garage doors?
Yes. High humidity accelerates corrosion of metal hardware and can degrade seals; regular inspection helps catch problems early.
Humidity speeds wear; inspect more often.
Do I need a permit to repair or replace a garage door in Florida?
Most basic repair tasks do not require a permit, but major structural changes or door replacement may. Check with local authorities.
Check local codes—permits may be required for major changes.
Watch Video
Quick Summary
- Test door balance regularly to prevent sag.
- Do not attempt spring work; hire a pro when needed.
- Inspect weather seals and tracks annually.
- Lubricate moving parts at six-month intervals.
- Document repairs and schedule routine maintenance.