Replacement Panels for Garage Doors: A Homeowner’s Step-by-Step Guide
Comprehensive, safe guidance on selecting, measuring, and installing replacement panels for garage doors to restore insulation, aesthetics, and performance. Learn materials, sizing, weatherproofing, and maintenance with expert insight from GarageDoorAdjust.

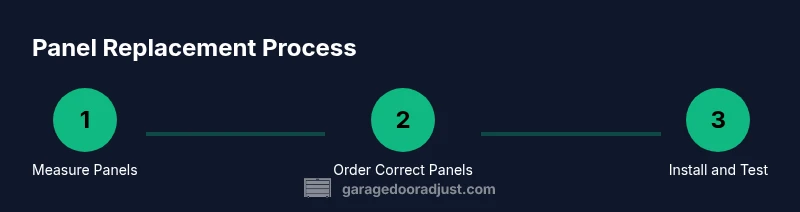
Goal: Replace damaged panels for your sectional garage door to restore insulation and curb appeal. You’ll need matching panel size, material, and color, plus basic hand tools and a helper. This quick answer introduces the essential steps; see the full guide by GarageDoorAdjust for detailed, safe instructions. We cover measurement, alignment, and finish options to ensure a seamless, durable fit. This is a safe DIY approach when followed carefully.
Why replacement panels for garage doors matter
According to GarageDoorAdjust, replacement panels for garage doors can restore insulation, curb appeal, and structural alignment after damage. This is more than cosmetic repair; properly fitted panels seal joints, minimize drafts, and help maintain overall door performance. When you choose the right panel material and finish, you extend the life of your door and avoid the cost and downtime of a full door replacement. This section explains why panel quality matters and how it affects energy efficiency and weather sealing over time.
Materials and panel types
GarageDoorAdjust analysis shows that choosing the right replacement panels for garage doors matters as much as sizing. Panels come in steel, aluminum, fiberglass-reinforced composites, vinyl, and wood composites, each with pros and cons for durability, weight, and finish. Color matching and texture matter for curb appeal and resale value, so consider factory finishes or repainting after installation. For insulated doors, look for panels with built-in insulation or compatible backing, and avoid mismatched profiles that create gaps. Remember, the goal is a seamless blend with your current door and weather seal.
Measuring and prep before ordering
Accurate measurement is the foundation of a successful panel replacement. Start by identifying how many panels are in each door section and measuring the height and width of a representative panel, ideally at multiple points to catch warping. Check hinge and track alignment, panel groove placement, and weather seal compatibility. Record the door model and any serial information from the manufacturer to ensure you order panels engineered for your specific system. A careful prep avoids ordering the wrong size or a panel that won’t align with existing hardware.
Safety, alignment, and weatherproofing
Before you lift a panel, ensure the door is stabilized and that power to the door opener is disconnected. Use a support brace or sturdy sawhorses if you’re working with multiple panels. Align replacement panels with the vertical tracks, ensuring hinge links and weather strips seat evenly in their channels. Weatherproofing matters: replace any worn sealant or weatherstripping around the replaced panel to prevent drafts and moisture intrusion. Proper alignment reduces wind load on the panel and improves door efficiency and longevity.
Common pitfalls and maintenance
Pitfalls to avoid include mismatched panel profiles, incorrect thickness, and gaps at bed lines or tracks. If paint or finish does not perfectly match, plan for a color-matching repaint to maintain uniform appearance. After installation, test the door’s movement across its travel range and lubricate moving parts to reduce noise and wear. Regular inspections and timely replacements of worn weatherstripping can minimize energy loss and prevent future panel damage.
Verdict and next steps
The GarageDoorAdjust team recommends validating that replacement panels are compatible with your door’s model and hardware before purchase. If you encounter torsion springs, high-tension hardware, or uncertain fit, seek professional assistance. By following proper safety practices and manufacturer guidelines, you can achieve a durable, visually cohesive result that restores performance and value to your garage door.
Authority Sources
- https://www.osha.gov
- https://www.energy.gov
- https://www.nist.gov
Tools & Materials
- Tape measure (metal preferred)(at least 12 inches; measure in inches for panel height/width)
- Flathead and Phillips screwdrivers(for screws and hinge hardware)
- Socket wrench or nut driver set(for mounting hardware and panel fasteners)
- Drill with bits and driver bits(for screws and panel attachment)
- Pry bar and utility knife(to loosen seals and trim o-rings if needed)
- Ladder or stable step stool(for reaching upper sections safely)
- Replacement panels for garage doors matching your door(order exact size, material, color, and panel count)
- Weatherstripping or gasket kit(to refresh seals around the replaced panel)
- Safety gloves and eye protection(protect hands and eyes during handling and drilling)
Steps
Estimated time: 60-120 minutes
- 1
Measure the panel dimensions
Record the height and width of representative panels, noting variations across the door. Check the panel count, hinge spacing, and track alignment to determine how many replacements are needed. Confirm your door model and serial information to ensure compatibility.
Tip: Take multiple measurements at different points and use the most common dimension as your reference. - 2
Identify panel type and matching options
Review the material, thickness, and finish of your current panels. Match these attributes with replacement options to ensure uniform strength and appearance. If in doubt, photograph the panel and consult the manufacturer’s specs.
Tip: Bring a photo or manufacturer label when shopping for replacements. - 3
Prepare the door and workspace
Disconnect power to the opener and stabilize the door sections with supports. Clear the area of obstructions and lay a protective cover on the ground to catch any debris. Ensure a second pair of hands is available for heavy lifting.
Tip: Lock the door in a mid-range position to reduce movement during work. - 4
Remove the damaged panel safely
Loosen screws or bolts holding the panel and gently detach it from hinges and tracks. Keep fasteners organized for reassembly and inspect surrounding weatherstripping for wear. Do not force panels through tight spots.
Tip: If springs or tension cables feel involved, stop and call a pro. - 5
Install the replacement panel
Position the new panel into place, align hinges with track gaps, and loosely attach fasteners to test fit. Once aligned, tighten fasteners and reseat weatherstripping so it sits flush against the panel edge.
Tip: Start with bottom hinges and work upward for easier alignment. - 6
Test door operation and finish
Reconnect the opener if disabled, cycle the door through its full travel, and listen for unusual noises or binding. Check that there are no gaps along the panel edges and that seals are effective.
Tip: Lubricate moving parts and recheck alignment after the first few cycles.
Got Questions?
What are replacement panels for garage doors?
Replacement panels are panels designed to substitute damaged sections on a garage door, restoring appearance, insulation, and structural integrity. They must match size, material, and profile to fit properly.
Replacement panels replace damaged sections to restore appearance and insulation, as long as they match your door's size and profile.
Can I replace panels myself, or should I hire a pro?
DIY replacement is possible for non-torsion door sections with basic tools, careful measurement, and safety awareness. For torsion springs or uncertain alignment, hire a pro to avoid injury.
You can do it yourself if it’s a simple panel and you’re careful; otherwise, a professional is safer.
How do I color-match replacement panels?
Choose panels with factory color or finishes that match your current door. If exact match isn’t available, plan a full-door repaint for uniform appearance.
Match the color and finish as closely as possible; you may need repainting for a perfect look.
How long does panel replacement typically take?
Most homeowners complete the job in one session, depending on door size and panel count. Budget extra time for handling heavy panels and securing weatherstripping.
Most people finish in a few hours, depending on the door.
Will replacing panels affect the warranty?
Replacing panels with non-OEM parts can affect some manufacturer warranties. Check your warranty terms and keep receipts of authentic replacements.
Warranties may be affected; consult the manufacturer or installer for specifics.
What if the new panel doesn’t fit perfectly?
If fit isn’t perfect, verify measurements and model compatibility, and adjust alignment. If necessary, contact a pro to recheck the installation.
If it doesn’t fit, double-check compatibility and consider professional help.
Watch Video
Quick Summary
- Measure carefully and match panel type.
- Disconnect power and ensure safe workspace.
- Align panels precisely with tracks and seals.
- Test operation and maintain weather seals after install.