Replacement Garage Door Motor: A Step-by-Step Guide
Learn how to safely replace a replacement garage door motor with clear, practical steps, from compatibility checks to testing the new unit. Expert guidance from GarageDoorAdjust to ensure quiet operation and long-term reliability.

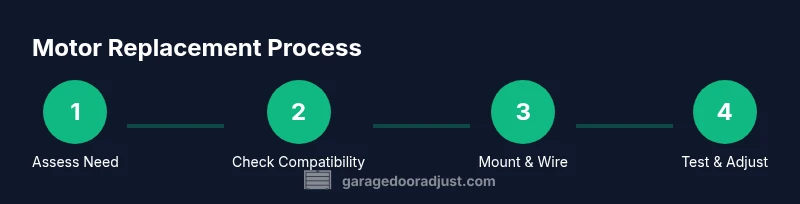
You will learn to replace a garage door motor safely and efficiently. This guide covers choosing a compatible motor, disconnecting power, and installing the opener without damaging the door. According to GarageDoorAdjust, using the right motor model and proper torque is essential for quiet operation and long life. Follow the steps below for safety and reliability.
Assessing the Need for Replacement
A failing replacement garage door motor is one of the most common reasons homeowners contact a technician. Signs include slow or jerky door movement, the opener struggling to lift a closed door, unusual grinding noises, and the motor overheating after repeated cycles. Before replacing anything, verify that the issue isn’t a sensor misalignment, a stripped gear, or a stuck track. According to GarageDoorAdjust, many motor-related problems are caused by worn gears and control boards rather than the motor coil itself. If you notice irregular stop positions, improper return to the open limit, or frequent breaker trips, it’s a strong signal that a full motor replacement is warranted. Document the door’s weight and track length, as this information guides compatibility decisions and helps you avoid selecting a motor with insufficient torque. A well-chosen motor improves cycle speed, reduces noise, and extends the door’s overall lifespan, making the investment worthwhile when issues are recurrent.
Compatibility and Choosing the Right Replacement Garage Door Motor
Choosing the right motor starts with matching load capacity to your door. Heavier doors and taller tracks demand higher torque and a robust drive system. Consider drive type (belt, chain, or direct drive) and the motor’s voltage compatibility with your opener’s control system. Ensure the replacement motor uses a mounting pattern and shaft height compatible with your existing bracket and rail assembly. If you replace a DC motor with an AC unit, or vice versa, you may need additional adapters or new rail components. Focus on torque ratings, speed control, and soft start features to minimize gear wear and extend quiet operation. Selecting a model with a compatible remote protocol helps preserve seamless remote operation. This approach aligns with GarageDoorAdjust guidance to verify compatibility across door weight, track length, and fastener pattern before purchasing.
Tools, Materials, and Safety Precautions
Before beginning, assemble essential tools and confirm you have a safe work area. You will need a sturdy ladder, safety glasses, gloves, a cordless drill with bits, screwdrivers, wrenches, a multimeter, and a replacement motor kit that includes mounting brackets and hardware. Ensure the garage is well-ventilated and that the power is completely shut off at the breaker panel to prevent accidental activation. If your system uses a safety sensor or a photoeye, note their wiring so you can reconnect them correctly. Keep a friend nearby or inform someone about the project in case you need an extra pair of hands. Remember: never work on a live system with exposed electrical connections. This block emphasizes that safety and organization are the foundations of a successful replacement.
Step-by-Step Removal: Disconnecting Power and Removing the Old Motor
Removal begins with a complete power cut. Start by unplugging the opener or turning off the circuit at the breaker, then remove the backup battery if your model includes one. Next, open the door manually to relieve tension. Detach the door control wiring harness from the motor, and remove any cover plates to access mounting bolts. Unbolt and carefully lift the old motor from its bracket, and disconnect the limit switch and safety sensor wires. Keep track of each connector type and color code for reassembly. If the unit is heavy, use a second person to assist. This step minimizes the risk of electrical shock and mechanical injury and preserves the door balance for the next steps.
Installation: Wiring, Mounting, and Alignment
Mount the new motor onto the existing bracket or new mounting plate. Align the shaft with the drive gear and ensure the belt or chain engagement matches the track. Reconnect all wires, including limit switches and safety sensors, following the wiring diagram included with the motor. Reattach the cover and verify that all fasteners are tightened to the recommended torque. Make sure the motor’s mounting height matches the previous setup to avoid misalignment. If the new motor requires different screw holes, use the supplied brackets and check for firm, level mounting. Correct alignment reduces wear and helps the door move smoothly.
Adjustments, Testing, and Safety Checks
With the motor connected, restore power and test the door’s operation in a controlled manner. Start with the door in a partially open position and observe the close and open cycles. Use the door control or remote to initiate cycles and note any misalignment, unusual sounds, or irregular stopping points. If the door does not fully close, adjust the limit switches as guided by the manufacturer. Check sensor alignment and test the auto-reverse function by placing a short object on the track. Apply lubrication to moving parts only where recommended by the motor manufacturer. If anything feels off, power down immediately and reassess the installation.
Common Pitfalls and Troubleshooting
In DIY motor replacements, a few frequent issues tend to crop up. Incorrectly reconnecting limit switches or sensors can create erratic stopping points or failure to reverse on contact. Mismatched drive type or wrong mounting hardware can cause rapid wear and belt/chain slap. Over-tightening mounting bolts may warp brackets and misalign the motor shaft. If you experience persistent error codes, consult the motor’s manual or the manufacturer’s support line. For persistent issues, consider enlisting a professional who can verify door balance and electrical safety without risking structural damage. GarageDoorAdjust emphasizes careful planning and a conservative approach when troubleshooting.
Authority Sources and Next Steps
To deepen your understanding, review official documentation from manufacturers and trusted safety guidelines. Always verify that your replacement motor is compatible with your door’s weight, track geometry, and existing safety features. For additional context and best practices, see reputable sources such as .gov and .edu sites noted below. As you advance, keep a maintenance log, track performance over time, and plan periodic lubrication and inspection to extend the life of your garage door system.
Tools & Materials
- Power drill with assorted bits(Phillips and flat-head bits; have extra bits on hand)
- Wrench set (adjustable)(Use to remove mounting bolts)
- Screwdrivers (Phillips and flat-head)(For wiring and cover plates)
- Pliers (needle-nose)(Grip wires and small components)
- Multimeter(For basic electrical checks if needed)
- Safety glasses(Eye protection during disassembly)
- Gloves(Hand protection; avoid loose sleeves)
- Ladder or sturdy step stool(Access motor mounting safely)
- Replacement garage door motor kit(Includes mounting brackets and hardware)
- Lubricant recommended by manufacturer(Only apply where specified in the manual)
Steps
Estimated time: 60-90 minutes
- 1
Power down and secure area
Turn off power at the circuit breaker and unplug the opener if possible. Verify the door is supported and cannot fall unexpectedly. This prevents electric shock and accidental movement during work.
Tip: Label wires or take a photo before disconnecting to simplify reassembly. - 2
Open door and expose motor
Manually lift the door to a comfortable position to relieve spring tension. Remove the housing cover to access the motor mounting bolts and wiring harness. Keep components organized as you work.
Tip: Use a magnetic tray to hold small screws and bolts. - 3
Disconnect and remove old motor
Detach the wiring harness and limit switch connections from the old motor. Unbolt the motor from its mounting plate and lift it clear. If the unit is heavy, have a helper assist.
Tip: Do not force connectors; note the orientation for correct reassembly. - 4
Prepare mounting for new motor
Check the new motor’s mounting pattern and prepare the bracket or plate accordingly. Ensure the shaft is aligned with the drive gear and that there is no binding with the rail or track.
Tip: If new mounting holes differ, use supplied adapters or brackets per the manual. - 5
Install the new motor
Mount the new motor on the bracket, tightening bolts to the manufacturer’s torque specification. Reconnect the wiring harness, limit switches, and safety sensors in the same configuration as the old unit.
Tip: Double-check that wires are not pinched and that connectors click firmly into place. - 6
Reconnect controls and sensors
Reconnect limit switches and safety eyes exactly as per the motor instructions. Restore any cover panels and verify no loose parts remain inside the housing.
Tip: Run a quick visual inspection to confirm all safety devices are aligned. - 7
Test operation and adjust limits
Power the system and run multiple open/close cycles. If the door stops short or overshoots, adjust limit switches until travel is accurate. Lubricate moving parts only where recommended by the motor’s manual.
Tip: Test with the door loaded to its typical weight for realistic results. - 8
Finalize and secure
Securely reattach the housing, tidy wiring, and perform a final safety check. Document the install for future maintenance and keep the user manual with the system.
Tip: Schedule a periodic check every 6–12 months to maintain performance.
Got Questions?
Do I need to hire a professional to replace a garage door motor?
Replacing a motor can be a DIY project if you’re comfortable with basic electrical work and mechanical mounting. If you encounter unfamiliar wiring, unusual noises, or unsafe door balance, it’s wise to call a pro for safety and optimal results.
You can DIY if you’re comfortable with electrical work and mounting. If wiring feels risky or the door balance seems off, consider a professional.
Is a DC motor a better choice than an AC motor for a garage door?
DC motors are common in modern setups for smooth starts and quiet operation, but AC motors are also reliable. The best choice depends on your door weight, rail design, and compatibility with existing remotes and safety features.
DC motors are popular for smooth starts and quiet use, but choose based on your door and rail compatibility.
Will I lose my remote pairing after replacing the motor?
In most cases, you won’t lose remote pairing if the new motor uses the same control protocol. If you install a significantly different system, you may need to re-pair remotes and reprogram the opener.
Most remotes stay paired, but you might need to re-pair if the system changes.
Can I reuse my existing mounting hardware with a new motor?
It depends on compatibility. Some motors match the old mounting pattern, while others require new brackets. Always verify the bolt pattern and shaft height with the replacement kit.
It depends on compatibility; check bolt patterns and shaft height before reuse.
What safety precautions should I take during installation?
Wear safety glasses and gloves, shut off power at the breaker, and avoid working under a door supported only by springs. If the door is heavy or unbalanced, stop and seek professional help.
Wear eye protection, cut power, and don’t work under an unbalanced door.
Watch Video
Quick Summary
- Verify motor compatibility with door weight and track length.
- Power off and secure the workspace before starting.
- Follow manufacturer guidance for mounting and wiring.
- Test thoroughly and adjust limits for safe operation.