Garage Door Opener Drive Belt Replacement: Step-by-Step Guide
A comprehensive, step-by-step guide to inspect, replace, and maintain your garage door opener drive belt for safer, quieter operation. Includes tools, safety, practical tips, and maintenance to extend belt life.

By the end of this guide, you will be able to inspect a worn or damaged garage door opener drive belt, select the correct replacement, safely remove the old belt, install the new belt with proper routing, and test the system for smooth, reliable operation. The process covers safety steps, belt tension, pulley alignment, and post-install testing to prevent belt slip or noise.
Understanding the drive belt role
The garage door opener drive belt is a flexible line that transmits motor torque to the trolley, which, in turn, moves the door along the track. In most belt-driven openers, the belt travels around pulleys and attaches to a moving carriage that lifts the door as the motor turns. The belt is designed to withstand repeated cycles, but it ages, stretches, or frays under stress. When belts slip, wear unevenly, or fail, the door may hesitate, move slowly, or stop before reaching the fully open or closed position. According to GarageDoorAdjust, the belt is a critical wear item that homeowners should monitor during routine maintenance, especially in homes with frequent daily cycling or older hardware. Common signs of belt wear include frayed edges, glazing on the belt surface, missing or cracked teeth on any connected pulley gear, excessive slack, or a noticeable mismatch between motor noise and door movement. Addressing these issues early helps prevent sudden failure and costly repairs down the line.
Signs of wear and failure
Worn drive belts typically announce themselves with a mix of symptoms that worsen over time. Listen for slippage sounds as the door moves, especially during the opening cycle. Watch for slow or hesitant movement, uneven lifting, or the door stopping before it reaches its full travel. Visual cues include frayed edges, glazing (shiny patches) on the belt, cracks, or missing teeth on pulleys that share the belt path. A belt that is visibly stretched or has risen off its driven pulley is a clear indicator that replacement is overdue. If the door’s movement feels erratic or the opener strains when lifting a light load, schedule an inspection before attempting a DIY repair. Regular checks reduce the risk of a sudden belt failure that could leave the door stuck.
Belt materials and compatibility
Drive belts come in several constructions, including rubberized belts with fabric reinforcement, polyurethane blends, and sometimes steel-reinforced designs for heavier doors. The right belt depends on your opener model, horsepower rating, and the pulley configuration. Some modern openers use enclosed belt systems that are less exposed to debris, while older units expose the belt along its path. When selecting a replacement, verify your model number, belt length, and width from the owner’s manual or the manufacturer’s website. Using an incorrectly sized belt can cause premature wear, noise, or misalignment. If you’re unsure, consult the user guide or contact the manufacturer for a compatible part list. Accurate matching protects performance and safety.
Safety considerations before work
Safety must come first when servicing a garage door opener. Always disconnect power at the outlet or circuit breaker before inspecting or handling any moving parts. Lock the door in place manually to prevent it from closing unexpectedly while you work. Wear eye protection and keep bystanders at a safe distance. Avoid wearing loose clothing or jewelry that could snag on components. Finally, work in a well-lit area and keep a clear workspace; a crowded area increases the chance of accidental contact with the door or motor gear. If you’re not confident performing this task, seek professional assistance.
Tools and replacement parts you’ll need
Before you begin, assemble the essential tools and parts to keep the job safe and efficient. Replacement belt: ensure it matches your model’s length and width exactly. Safety glasses, work gloves, and a sturdy ladder or step stool are important for access. A basic socket wrench set, pliers, and screwdrivers (flathead and Phillips) are usually sufficient for most belt routes. A torque wrench is optional but helpful for re-tightening hardware to recommended specs. Keep a clean rag and some mild degreaser on hand to wipe down pulleys if needed. Finally, have your owner’s manual handy for model-specific notes and diagrams.
Plan your replacement: approach and prep
Take time to plan the replacement to avoid rushing and mistakes. Confirm the exact belt part number for your opener model and gather any model-specific service notes. Clear the workspace and verify you can safely reach all belt-routing points. If your unit has a manual release for the trolley, practice using it with the door removed from tension to understand the mechanics. Create a quick checklist: power off, remove guards, note belt routing, test tension range, and reassemble. A clear plan reduces mistakes and speeds up the actual replacement.
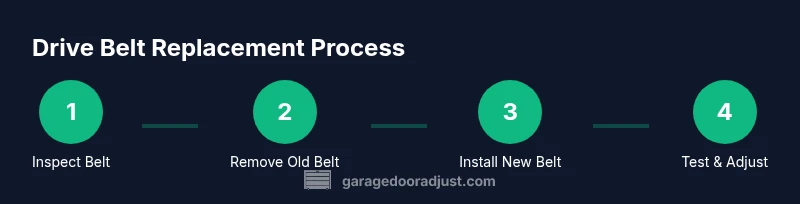
The replacement process: overview
Replacing a garage door opener belt is a methodical, repeatable process. Start with power isolation, then remove any protective covers or guards to access the belt path. Detach the old belt from the drive sprockets, inspect pulleys for wear, and prepare the new belt for installation by confirming its directionality and routing. Route the new belt in the same path as the old one, ensuring it sits in all grooves and sits flush against pulleys. Re-tension the belt according to the manufacturer’s spec and reassemble guards. Finally, power up the system and perform a controlled check with the door both open and closed, watching for smooth, silent operation. If you notice slipping, re-check routing and tension.
Belt tension and pulley alignment essentials
Proper tension is critical to belt longevity and smooth operation. A belt that is too loose can slip, while one that is too tight can strain bearings and create noise. Use the tensioning method specified by the manufacturer, which may involve a tension gauge or a manual description like “1/4 inch deflection at mid-span.” Align pulleys so the belt tracks true; misalignment causes uneven wear and may cause the belt to climb out of a pulley groove. Check for any wobbling pulleys or loose mounting hardware and tighten as needed. After adjustment, rotate the drive by hand (carefully) to confirm there is no binding and that the belt seats correctly in all grooves.
Post-install tests and adjustments
With a belt installed and secured, power the opener and test the door at no-load first. Observe the travel path and listen for unusual noises such as squeaks, clicking, or grinding. If the door hesitates or stalls, recheck belt routing and tension. Re-engage safety features such as photobeam sensors and auto-reverse tests to ensure they respond correctly to obstacles. If any of the safety devices misbehave, re-check wiring connections and consult the manual. Finally, run the door through a full cycle with the door fully loaded in both directions to confirm reliable operation.
Long-term maintenance and preventative care
To maximize belt life, perform a brief inspection every 3–6 months, focusing on belt edges, tracks, and pulleys. Clean the belt path and remove debris that could cause mis-tracking. Lubricate only the pulley axles and moving metal parts as recommended by the manufacturer; avoid lubricating the belt itself, which can degrade friction properties. Replace the belt at the first sign of wear—fraying, cracking, or glazing—and every few years as part of a preventative maintenance schedule, depending on usage and environment. Keeping a written maintenance log helps you track wear and plan replacements before a failure occurs.
Tools & Materials
- Replacement drive belt (model-specific length/width)(Match exact part number or measure belt length and width per manual)
- Safety glasses(Protect eyes from moving parts and debris)
- Gloves(Grip securely and protect hands during handling)
- Screwdrivers (Phillips and flathead)(Access belt guards and fasteners)
- Socket wrench set(Remove and reassemble mounting hardware)
- Pliers(Work around tight belt routing and clips)
- Ladder or sturdy stepping stool(Reach high mounting points safely)
- Rag and mild degreaser(Clean pulleys if needed)
- Lubricant for pulleys (silicone or white lithium grease)(Lubricate pulley axles if recommended by manufacturer)
Steps
Estimated time: 30-60 minutes
- 1
Power down and secure the door
Unplug the opener or shut off the circuit breaker to isolate power. Manually secure the door in the fully open position to minimize movement while you work. Confirm there is no power flowing to the unit by attempting a light test on the opener after covering any exposed wiring.
Tip: Lock the door in place with a sturdy brace to prevent accidental closing during the work. - 2
Remove belt guards and access points
Remove any protective covers or belt guards to expose the belt path. Set fasteners aside in a labeled container so you can reassemble later. Inspect the belt area for signs of damage or debris that could affect routing.
Tip: Take a photo of the belt routing before removing components to guide reassembly. - 3
Release tension and remove the old belt
Loosen the tensioning mechanism or detatch one end from its pulley depending on your model. Gently slide the belt off the drive pulleys, keeping track of its exact routing. Do not force the belt if it sticks; check for hidden fasteners or clips.
Tip: If the belt is stubborn, recheck tension settings or consult the manual to avoid damaging pulleys. - 4
Inspect pulleys and tracks
Look for glazing, wear, or burrs on pulleys that could wear the new belt. Inspect the tracks and rollers for debris, alignment issues, or binding. Clean any buildup and note if replacement parts may be needed.
Tip: Repair or replace worn pulleys before installing a new belt for best results. - 5
Install the new belt and route carefully
Position the new belt and route it along the same path as the old belt, ensuring it sits in every groove. Make sure the belt sits evenly on pulleys and that there are no twists or kinks. Confirm both ends are ready to be secured.
Tip: Double-check belt orientation and direction to avoid immediate misalignment after power up. - 6
Re-tension the belt to spec
Tighten the tensioning mechanism until the belt has the manufacturer-recommended deflection or tension. Use a tension gauge if provided, or follow the manual’s deflection guideline. Rotate the belt by hand to verify smooth movement without binding.
Tip: Do not overtighten; excessive tension can wear bearings and shorten belt life. - 7
Reassemble guards and reconnect power
Replace any guards and fasteners you removed, then restore power to the unit. Do a careful visual check to ensure nothing is loose or protruding. Ensure the safety eyes and other safety devices are reconnected and functioning.
Tip: Test the safety features immediately after power restoration. - 8
Test operation with door in load
With the door in the closed position, test the opener’s full cycle. Listen for smooth operation, observe balanced movement, and check for unusual noises. If the door operates correctly, continue with a few additional open/close cycles to confirm consistency.
Tip: If the door stops or jerks, re-check routing and tension before repeating tests.
Got Questions?
How do I know if the drive belt needs replacement?
Look for visible wear such as fraying, cracking, glazing, or missing teeth. If the belt shows significant slack or the door moves jerkily or slowly, replacement is likely needed.
Check for frays, cracks, glazing, or slack. If you notice slow or jerky movement, replace the belt.
Can I replace a garage door opener belt myself?
Yes, with the correct belt and proper safety steps. Follow the manufacturer’s instructions and ensure the unit is powered off before starting.
Yes, with the right belt and safety steps. Follow the manual and power down first.
What belt sizes are common for openers?
Belt sizes vary by model and horsepower. Always verify the exact length and width from your manual or the manufacturer’s parts list.
Check your model’s manual to confirm the exact belt size.
Will replacing the belt affect the warranty?
Warranty terms vary by brand. Check the manual or contact the manufacturer to confirm whether DIY belt replacement impacts coverage.
Check the manual or contact the manufacturer to confirm warranty terms.
Should I lubricate the belt?
Typically, belts should not be lubricated. Lubricate only pulleys and bearings if recommended by the manufacturer.
Don't oil the belt; if lubricating is advised, do it only on pulleys.
What safety precautions are essential during replacement?
Power off the opener completely, secure the door manually, wear eye protection, and keep others away from the work area.
Power off, secure the door, wear protection, and keep others away.
Watch Video
Quick Summary
- Inspect belt wear regularly to prevent failures.
- Verify belt size matches your opener model.
- Disconnect power before any belt work.
- Ensure correct tension and pulley routing for smooth operation.
- Test operation and safety features after installation.