Belt for Garage Door: A Step-by-Step Guide
Learn how to diagnose, select, and replace the belt for a belt-driven garage door opener. This guide covers belt types, compatibility, safety steps, and maintenance to prevent jams and extend life.

You will diagnose, replace, and test a belt-driven garage door opener belt. You’ll confirm belt type and length, gather safety gear, and follow a step-by-step replacement process to restore smooth operation. Requirements include disconnecting power, securing the door, and using a compatible belt for your model. This quick answer outlines the plan and what you’ll verify before moving to the full guide.
Understanding the belt in belt-driven garage door openers
Belt-driven garage door openers use a rubber or composite belt to transfer motor torque to the door assembly. Belt technology varies; some belts are reinforced with fibers or a steel core, while others rely on a high-strength polymer. These belts run quietly and smoothly when properly tensioned and aligned, but they wear with use, heat, and friction. A worn belt can cause slipping, slower lifting, or jerky operation, which can lead to misalignment and potential safety risks. The belt for garage door is a critical linkage; neglecting it can degrade balance, reduce response time, and increase motor load. Regular awareness of belt condition—cracks, fraying, glazing, or looseness—helps homeowners prevent unexpected failures. According to GarageDoorAdjust, matching belt length and profile to your specific model is essential for reliable performance. Always consult your opener’s manual before inspecting or replacing a belt, because different models use different belt geometries and tension ranges.
Signs your belt may need inspection or replacement
Common wear indicators include audible squealing, slipping under load, or a noticeable lag between command and door movement. Visually inspect for frayed fibers, glazing on the belt surface, or cracks along the belt length. If you see uneven belt wear on one side, that points to pulley misalignment or a warped drive pulley. A belt that sits crooked in its grooves or fails to stay seated in pulleys is a red flag. If the door stalls or won’t fully open, check the belt tension and routing before assuming a motor fault. Regular inspection helps identify stretched belts and worn pulleys before they fail, reducing the risk of door imbalance or sudden closure. GarageDoorAdjust analysis shows that proactive belt inspection lowers repair costs and minimizes downtime.
Safety first: prerequisites before maintenance
Before any belt work, unplug the opener or switch off the circuit breaker to eliminate electrical hazards. Secure the door with clamps or wedges to prevent accidental movement; never rely on balance alone when the door could drop. Wear safety glasses and gloves; belts, pulleys, and springs can move suddenly and cause injury. Keep curious pets and children away from the work area. If you’re near the torsion spring, do not attempt adjustments without proper training. Always discharge capacitors and avoid touching live components when handling electrical connections. By following these precautions, you reduce the risk of injury and damage to the opener. GarageDoorAdjust recommends adhering to the manufacturer’s safety guidelines for belt-related maintenance.
Belt types and compatibility: polyurethane vs steel-reinforced
Residential belt-driven openers commonly use polyurethane belts with fabric reinforcement or steel-reinforced belts for longevity. Poly belts are quiet and light, suitable for moderate use, but may wear faster in homes with frequent cycles. Steel-reinforced belts offer greater durability in high-traffic settings but can be stiffer and slightly louder. When selecting a replacement, confirm the belt length, width, and groove count to match your drive pulley. If you’re unsure, check the model manual or contact the manufacturer for the exact part number. Using an incompatible belt profile can cause poor tension, misalignment, and added motor strain. GarageDoorAdjust notes that correct compatibility is as critical as belt quality for long-term reliability.
How to measure belt length and choose the right belt
Measure the belt length by laying the belt flat from one end to the other, noting any curvature around pulleys. Compare this to the current belt and to the pulleys’ groove count, which determines the correct belt profile. Ensure the door is balanced and the opener is unplugged during measurement. Record belt width and groove pattern (ridge count); these specs guide compatible replacements. Consult the manufacturer’s parts table or your model’s manual to confirm the exact part number and profile. If you cannot locate the information, bring the old belt to a reputable supplier for cross-checking. Accurate measurement prevents ordering the wrong belt and delays.
Diagnosing belt slip and pulley wear
Run the opener slowly and watch belt movement across each pulley. Signs of slip include the belt failing to grip the pulley during acceleration, a shiny or glazed surface, or audible slippage. Inspect pulleys for wear, loose bearings, or wobble; bent or cracked pulleys can misalign the belt and hasten wear. Check track alignment and overall door balance, since a misaligned track increases belt friction. Look for frayed fibers, deep grooves, or visible metal from pulleys. If the belt shows obvious wear or damage, replace it rather than attempting a partial repair. A correctly tensioned belt minimizes wear and keeps operation quiet. Regular checks help prevent unexpected belt failures.
Replacing the belt: overview and common pitfalls
A belt replacement involves removing the worn belt, cleaning pulleys, routing the new belt along the correct path, and applying the proper tension as specified by the manufacturer. Pitfalls to avoid include routing the belt incorrectly, not seating it fully in the drive pulley, and over-tightening, which can strain the motor and shorten belt life. Verify the belt sits evenly in all grooves and that there are no twists. If you’re unsure about the correct routing, refer to the service manual or seek professional guidance. After installation, test travel to ensure smooth operation and confirm that safety features respond properly when the door is in motion.
Maintenance tips to extend belt life
- Lubricate only the metal components (sparingly) with a silicone-based lubricant; avoid petroleum-based products that can degrade belts. - Inspect alignment and tension periodically, especially after accidental impacts or repairs. - Keep tracks clean and free of debris to prevent belt binding. - Replace worn belts promptly and never reuse a belt past its service life. - Schedule periodic professional checkups if you’re not confident performing checks yourself. Regular maintenance reduces noise, improves balance, and extends belt life. The GarageDoorAdjust approach emphasizes proactive care over reactive fixes to keep the system operating smoothly.
When to call a professional and warranty considerations
If the belt is damaged or pulleys show wear you cannot safely correct, contact a qualified technician. A pro can verify tension, alignment, and safety features and perform the replacement using factory parts. Some warranties require professional installation; attempting DIY replacement may void coverage. If you notice unusual noises, jerky motion, or persistent binding, seek prompt help to avoid door damage or injury. The GarageDoorAdjust team recommends weighing risk and choosing professional service when in doubt, especially for heavy or high-traffic doors.
Authoritative references
- OSHA Safety and Health Topics: Garage Door Safety and Electrical Safety (https://www.osha.gov)
- University Extension Resources (https://extension.illinois.edu)
- Consumer Reports – Home Maintenance and Safety (https://www.consumerreports.org)
Tools & Materials
- Replacement belt (correct type and length)(Match belt profile and groove count to the drive pulley; bring model number to verify compatibility)
- Power drill with appropriate bit(For removing screws on the motor housing or track brackets)
- Socket wrench set(Loosen bolts on the drive bracket and pulleys)
- Adjustable wrench(Use on tensioner bolts and mounting nuts)
- Pliers(Help remove or slip the belt on pulleys; keep fingers clear of moving parts)
- Safety glasses(Eye protection in case of belt snap or debris)
- Gloves(Protect hands during belt removal and installation)
- Locking pliers or clamps(Secure the door during maintenance to prevent movement)
- Owner’s manual or model-specific parts list(Verify belt specs and replacement procedure)
Steps
Estimated time: 60-90 minutes
- 1
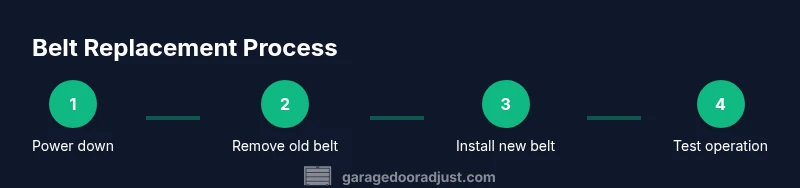
Power down and secure the door
Unplug the opener or switch off the circuit breaker. Use clamps to hold the door in a balanced position so it cannot move unexpectedly. This makes the belt replacement safer by removing energizing forces and reducing risk during the job.
Tip: Take a quick photo of current routing for reference; it helps when routing the new belt back on. - 2
Release and remove the old belt
Loosen belt tension and slip the belt off the motor pulley and drive pulley. Work slowly to avoid snagging fingers on pulleys or springs. Inspect the belt’s path and retract any slack so you don’t pinch your hands.
Tip: Have a towel ready to catch the belt and prevent it sliding into tight spaces. - 3
Inspect pulleys, tracks, and tensioner
Look for wear on pulleys, cracks in the track, or wobble in the tensioner. If anything shows signs of damage, replace those parts or consult a pro. A misaligned track will wear the new belt quickly and defeat the purpose of a replacement.
Tip: Document any wear with photos to support future service or warranty claims. - 4
Install the new belt and route correctly
Place the new belt along the same routing path as the old one, ensuring it sits fully in grooves with no twists. Confirm the belt is oriented to move the door toward the intended end. If required, rotate the motor shaft to seat the belt fully.
Tip: Refer to the model’s manual for the exact belt routing; a misrouted belt is the leading cause of immediate failure. - 5
Set belt tension according to spec
Tension is critical: too loose causes slipping, too tight strains the motor. Use the manufacturer’s recommended tension method or a tension gauge if provided. After setting, spin the pulley by hand to confirm smooth travel.
Tip: If a tension gauge is not provided, aim for a gentle resistance when manually turning the pulley. - 6
Test operation and safety features
Reconnect power and run a full door cycle. Check for smooth travel, no unusual noises, and proper reverse when encountering an obstacle. Confirm safety beams or sensors respond correctly and the door stops if blocked. If anything seems off, power down and re-check routing and tension.
Tip: Test with the door open and closed to ensure consistent performance; never leave the opener unattended during testing.
Got Questions?
Can I replace a belt myself, or should I hire a professional?
A belt replacement can be a DIY task for many homeowners if you follow the manufacturer’s instructions and take proper safety precautions. For complex torsion systems or uncertain belt specifications, a professional ensures correct tensioning and wiring, and preserves warranty coverage.
You can replace it yourself if you follow the manual and stay safe, but consider a pro for complex systems to protect warranties.
How do I know the correct belt length and type for my opener?
Check the model number in your manual or on the opener’s labeling. The belt length, width, and groove count must match the drive pulley. If the old belt is readable, you can cross-check its specifications with a supplier.
Look up your model's belt specs in the manual or on the label, and match length, width, and grooves.
What safety precautions should I take before starting belt maintenance?
Always unplug power, secure the door, wear eye protection, and keep hands clear of the belt and pulleys. If you’re near the torsion spring, do not attempt adjustments without training. Verify no one can accidentally reactivate the system during work.
Unplug, secure the door, and wear safety gear before you start; avoid torsion-spring work unless trained.
How long should a belt last under normal use?
Belt lifespan varies by use, environment, and maintenance. Regular inspections and proper tensioning help maximize life, but you should expect wear over years in busy garages. Replace when you notice glazing, cracks, or stretching beyond manufacturer specs.
lifespan depends on use and maintenance; inspect regularly and replace when worn.
Can a worn belt cause the door to jam or fail to open?
Yes. A worn or misaligned belt can slip or catch, leading to jerky motion or door jams. Replacing the belt and correcting pulley alignment typically restores smooth operation.
A bad belt can cause jams; replace it and fix alignment to restore smooth operation.
Should I lubricate the belt, and with what?
Do not lubricate the belt itself. Use a silicone-based lubricant on metal moving parts near the belt if needed, but keep lubricant off the belt surface to prevent slippage and degradation.
Lubricate metal parts only; don’t apply lubricant to the belt itself.
Watch Video
Quick Summary
- Inspect belt tension and routing before and after operation
- Choose the correct belt profile and length for your model
- Safety first: unplug, secure, and wear protection
- Regular maintenance extends belt life and reduces noise
- When in doubt, consult a professional or the manufacturer