Replace Garage Door Weather Seal: A Step-by-Step Guide
Learn how to replace garage door weather seal with a clear, safety-focused guide. Tools, steps, and maintenance tips to stop drafts and improve energy efficiency—backed by GarageDoorAdjust insights.

You can replace garage door weather seal to stop drafts and moisture intrusion, boosting comfort and energy efficiency. This guide covers essential tools, a clear step-by-step process, and safety tips. According to GarageDoorAdjust, choosing the right seal and following proper installation ensures a tight, long-lasting fit. It also explains when to repair vs replace and how to test the seal after installation.
Why replacing the garage door weather seal matters
According to GarageDoorAdjust, a worn weather seal is a major source of drafts, moisture, and energy loss. Replacing the seal restores a tight barrier at the door’s bottom and sides, helping maintain comfortable indoor temperatures and reducing heating and cooling costs over time. While the initial investment is modest, the long-term savings and improved comfort make this a smart DIY project for many homeowners. A proper seal also helps keep out pests, dirt, and moisture that can cause rust or damage to the door frame. When you notice increased drafts around the door or visible gaps along the bottom edge, it’s often time to replace the weather seal. This quick upgrade can restore insulation without major structural work. With the right seal choice and careful installation, you’ll enjoy a quieter, more efficient garage that’s better protected from the elements.
Types of weather seals for garage doors
There are several styles of weather seals used on garage doors, each with its own installation method and ideal use case. The most common options include self-adhesive vinyl bulks/seals that press into a bottom groove, bulb-style vinyl seals that compress against the floor, and metal-retained T-seals that slide into a track. Bulb seals are forgiving for irregular gaps, while bulb-and-channel combinations provide durable, long-lasting protection in harsher climates. When choosing, consider your door type (insulated vs uninsulated), climate, and whether you want a temporary DIY fix or a more permanent, weather-tight solution. A good rule is to select a seal that covers the widest gap you observe and fits your door’s bottom profile. If you have a wooden or metal door with a flat edge, a flexible tape-seal or self-adhesive option can provide a quick, economical fix. Look for seals rated for outdoor use to withstand temperature fluctuations and UV exposure.
How to choose the right seal for your door
Start by measuring the door height and width and inspect the bottom edge for grooves or retaining channels. If your door uses a vinyl bulb that sits in a groove, you’ll want a seal that matches the groove depth and thickness. For doors with a flat edge, a flexible tape-seal or self-adhesive option can provide a quick seal. Always check the manufacturer’s instructions or consult a local hardware specialist to confirm compatibility with your door model. Finally, consider color and material durability to ensure weather resistance across seasons. If you’re unsure, start with a universal bulb seal and trim to fit after test-fitting. A well-chosen seal will compress firmly without buckling or leaving gaps when the door closes.
Common installation challenges and how to avoid them
Misalignment is the most common issue when replacing a garage door weather seal. Before installing, clean the bottom edge and groove with a mild cleaner and dry thoroughly. Don’t cut the seal too short—leave a small margin to account for door movement. If you encounter resistance, pause, re-check the groove depth, and verify you’re using the correct seal type. Avoid over-stretching a flexible seal, which can tear or peel over time. Take care around the door’s roller tracks and hardware to prevent scratches or interference with movement. Work slowly in a well-lit area, and use a plastic trim tool rather than metal implements to protect the surface. If your door makes contact with the seal in more than one place, re-check alignment and consider replacing the entire bottom edge profile for a uniform seal.
Maintenance tips to extend seal life
Inspect the seal every season for cracks, tears, or flattening. Clean it with a mild soap solution and rinse, then dry completely. Lubricate adjacent metal tracks with a silicone-based lubricant if needed, but avoid oil-based products that attract dirt. Replace the seal at the first sign of persistent wear or gaps larger than a dime. Store extra seals flat, away from direct sunlight to prevent warping. Regularly removing debris from the seal groove helps prevent grit from abrading the edge. If you notice peeling or brittleness near fasteners, replace the entire seal rather than patching sections. A well-maintained seal keeps your garage more comfortable and protects the door hardware from moisture-related corrosion.
Quick safety checklist before you start
- Disconnect automatic openers when working near the door to prevent unexpected movement.
- Wear eye protection and gloves to guard against sharp edges.
- Use a stable ladder or step stool if you must reach the door edge; never stand under a moving door.
- Work in daylight or well-lit conditions to avoid mistakes.
- If you’re unsure about compatibility or installation, consult a professional to avoid costly mistakes.
AUTHORITY SOURCES
- Energy.gov: Weatherstripping for garage doors and energy efficiency. https://www.energy.gov/energysaver/weatherstripping
- University Extension guidance: Door and weather seal maintenance. https://extension.illinois.edu
- OSHA Safety Guidelines: Safe work practices near moving machinery and doors. https://www.osha.gov
Tools & Materials
- Measuring tape(Minimum 10 ft; helps determine seal length and groove depth)
- Plastic trim tool or putty knife(Gently pry old seal without scratching metal or paint)
- Utility knife or scissors(Trim new seal to exact length with clean edge)
- Replacement weather seal (bulb or vinyl)(Choose the seal type compatible with your door groove or track; add extra for adjustments)
- Isopropyl alcohol or mild cleaner(Clean the door edge and groove before installing the new seal)
- Cloth rags(Dry and wipe surfaces after cleaning)
- Gloves and safety glasses(Protection against sharp edges and debris)
- Silicone-based lubricant (optional)(Lubricate adjacent metal tracks if needed, avoid oil-based products)
Steps
Estimated time: 30-60 minutes
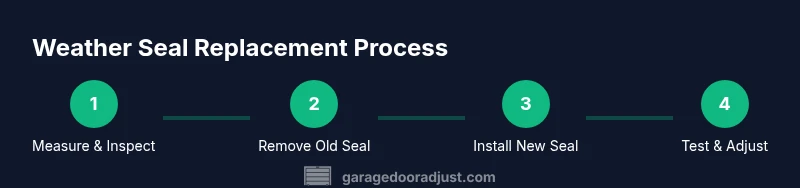
- 1
Measure and inspect the current seal
Before removing anything, inspect the seal for cracks and wear. Measure the door width and the groove depth to determine the length and type you’ll need. Confirm whether you’ll use a bulb seal, tape-seal, or a tracked style based on your door profile.
Tip: Measure twice, cut once; this prevents waste and misfits. - 2
Remove the old seal
Carefully pry the old seal from its groove using a plastic trim tool to avoid scratching metal or paint. If the seal is glued, work slowly along its length and keep backing cleaner residue from the groove. Remove the entire seal in one piece if possible to gauge fit for the new piece.
Tip: Take breaks if the seal is stubborn to avoid damaging the groove. - 3
Clean the edge and groove
Wipe the bottom edge and groove with isopropyl alcohol or a mild cleaner. Allow the surface to dry completely before placing the new seal. This ensures the adhesive (if used) or the seal itself adheres and seats properly.
Tip: A clean groove ensures a tight seal and prevents air leaks. - 4
Cut the new seal to length
Unroll the new seal and lay it along the door edge. Trim to length with an extra 1/4 inch for expansion as the door moves. Make clean, straight cuts to prevent fraying and ensure a snug fit.
Tip: Use a sharp blade for clean edges. - 5
Install the new seal into the groove or track
Press the seal firmly into the groove or align with the track. Start at a corner and work around the door to avoid gaps or overlaps. Check that the seal sits flush and does not buckle or protrude.
Tip: Work gradually to maintain even contact along the entire edge. - 6
Check for fit and adjust
Close the door slowly to observe gaps. If you notice bulges or misalignment, remove the seal and reseat it, ensuring full contact along the bottom edge. If gaps persist, consider replacing the entire bottom profile or choosing a different seal type.
Tip: Don’t force a seal that won’t seat properly. - 7
Test operation and finalize
Open and close several times to ensure smooth operation and that the seal does not rub on the floor or tracks. Clean any debris and store any extra material for future use. If required, apply a small amount of silicone-based lubricant to nearby metal parts (not the seal surface).
Tip: A final test confirms a durable, airtight seal.
Got Questions?
What is a garage door weather seal and why replace it?
A weather seal blocks drafts, moisture, and pests at the door edges. Replacing it restores insulation and helps maintain comfortable temperatures while reducing energy use.
A weather seal keeps drafts and moisture out, improving comfort and energy efficiency.
Can I replace the weather seal myself, or do I need a pro?
Most homeowners can replace the seal with basic tools and a step-by-step guide. If you encounter structural damage or misalignment, seek professional help.
Yes, you can usually do it yourself with the right steps; call a pro if the door is damaged or misaligned.
What seal types should I consider for replacement?
Consider vinyl bulb, compression, or tape-seal options compatible with your door’s bottom groove or track. Choose based on climate and door style.
Vinyl bulb, compression, or tape-seal options—pick one that fits your door and climate.
How long does a weather seal typically last?
Durability depends on climate and use; seals last several years with proper maintenance. Look for wear signs each season.
Seal life varies, but with maintenance, it lasts several years.
What are warning signs that the seal needs replacement?
Visible cracking, tearing, persistent drafts, or moisture intrusion indicate replacement is due.
If you see cracks or feel drafts, replace the seal.
Do I need to seal both the interior and exterior sides?
If both sides are exposed to weather, sealing both sides helps reduce air leaks. Check your door profile for guidance.
Seal both sides if both are exposed to weather.
Watch Video
Quick Summary
- Measure accurately before buying.
- Choose the right seal type for your door.
- Follow steps carefully for a snug fit.
- Test fit and adjust gaps fully.
- Maintain the seal yearly to extend life.