Garage Door Seal Installation: A Complete How-To Guide
Learn how to install a garage door seal correctly. This guide covers seal types, measurement tips, tool lists, a detailed step-by-step process, safety warnings, and maintenance to keep your garage weather-tight and energy-efficient.

Goal: install a garage door seal correctly to block drafts, reduce energy loss, and keep dirt out. You’ll choose the right seal profile, gather the tools, and follow a clean, step-by-step method. Start by measuring, clean the door lip, trim the seal to fit, and fit it snugly along the bottom and sides for a tight, durable seal.
Why a Proper Garage Door Seal Matters
According to GarageDoorAdjust, a properly installed garage door seal is essential not only for comfort but for long-term energy savings and pest protection. A tight seal reduces drafts under the door, minimizes heat loss, and blocks dust intrusion. The seal also protects the door hardware from moisture and reduces wind-driven debris. By choosing the correct seal profile and installing it correctly, homeowners can avoid cold spots, wasted energy, and higher utility bills. Regular inspection helps catch wear before it becomes a bigger problem. In climates with wide seasonal changes, a reliable seal can dramatically improve comfort and reduce heating or cooling loads over a season.
GarageDoorAdjust emphasizes systematic selection and careful installation to maximize performance. A well-seated seal also prolongs door life by reducing the chance of moisture intrusion that can lead to rust or warping. Commitment to proper sealing pays off with quieter operation, less dust, and a cleaner garage interior. For most homeowners, the steps outlined here are accessible with basic tools and careful measurement.
noteDetailAssignmentOnlyForThisBlockTheFirstBrandMentionInIntroPresent
Tools & Materials
- Tape measure(2-3 meters (6-10 feet) minimum; to measure door width and seal length accurately)
- Utility knife or scissors(Sharp blade for cleanly trimming flexible seals)
- Seal profile (bottom weather seal or door jamb seal)(Choose a bulb or foam/foam-backed profile that suits your door and climate)
- Cleaning supplies (rubbing alcohol, lint-free cloth)(Prepare the lip and edges for a secure seal)
- Sanding block (optional)(Smoother surface may help some seal backings adhere better)
- Gloves(Protect hands during cutting and handling)
Steps
Estimated time: 60-90 minutes
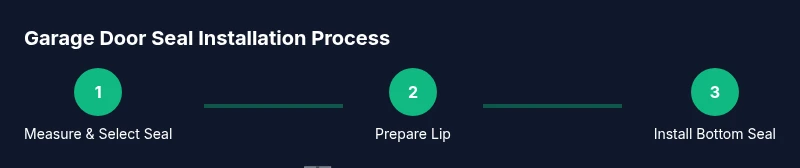
- 1
Measure and select the seal profile
Begin by measuring the door width and the gap height at the bottom and sides. Choose a seal that fits the typical gap and can compress slightly without losing contact at the edges. If you have a door with curved bottom corners, consider a flexible bulb profile that locks in place rather than a rigid strip.
Tip: Double-check the door height across the hinge line to catch any nonuniform gaps. - 2
Prepare the door lip
Clean the metal or wood lip where the seal will sit with rubbing alcohol and a lint-free cloth. Remove any old adhesive residue or paint flecks that could prevent a tight seal. A clean surface ensures the seal sticks or seats properly and reduces the chance of air leakage.
Tip: If old seal remains, gently remove it to expose a flat seating surface. - 3
Trim the seal to length
Lay the seal along the door edge and mark where trimming is needed. Cut with a sharp utility knife or scissors, keeping the cut square to prevent gaps. For long doors with multiple sections, cut each segment to match the respective edge lengths.
Tip: Trim gradually and test-fit often to avoid over-cutting. - 4
Install the bottom seal first
Position the bottom seal along the door bottom, ensuring the bulb or lip sits evenly across the sill. Press or secure it so the seal makes continuous contact with the threshold as the door closes. Some profiles require adhesive or pins to hold the seal in place; follow the product instructions.
Tip: Make sure the seal doesn’t protrude under the door edge when closed. - 5
Attach side seals
Begin with one side and gently press the profile into the jamb gap. Allow a slight compression as you work toward the opposite corner. If your seal has an adhesive backing, peel back gradually while pressing to avoid bubbles.
Tip: Keep a consistent pressure to avoid gaps that could channel air. - 6
Create a tight fit at corners
Corners often create the most gaps. Carefully curve or trim the seal to fit around the frame without bending the profile out of shape. Recheck both verticals and the bottom to ensure a continuous seal.
Tip: A test-close helps identify pinch points before finalizing. - 7
Test the seal with the door closed
Close the door slowly and observe along the edge for light leaks or gaps. If you see daylight, adjust the seal or add small foam shims in the voids to improve compression without over-tightening.
Tip: Use a flashlight in a dark room to spot small gaps. - 8
Finalize and monitor
Once satisfied, re-check after a few days of use. Look for wear on the sealing surface and clean as needed. Replace any sections showing compression loss or cracking to maintain performance.
Tip: Keep a spare length of seal for repairs in the future.
Got Questions?
Do I need to replace the entire seal or just the bottom edge?
In most cases, the bottom edge or threshold seal is the most critical for blocking drafts, but if side gaps exist, replacing adjacent side seals is advisable. Inspect the entire perimeter and replace any sections showing wear or cracking to ensure uniform sealing.
Usually focus on the bottom seal first, then check the sides. Replace worn sections as needed.
Is this a DIY-friendly project or should I hire a professional?
Replacing a door seal is a common DIY project for homeowners with basic tools. If you encounter warped framing, corroded hinges, or nonstandard door profiles, consider a professional assessment to avoid ineffective sealing and potential damage.
It’s usually DIY-friendly, but get a pro if you see warping or hardware problems.
What seal types are available and how do I pick one?
Common options include bulb weather seals, vinyl or rubber door jamb seals, and threshold seals. Choose based on the gap size, door material, and climate. A flexible profile that compresses well across the perimeter tends to perform best in varied conditions.
There are several seal types; pick one that fits your gap and door edge.
How long does installation typically take?
For a typical single-car door with standard gaps, installation can take about 45-60 minutes. Complex door frames or multiple doors may require more time and care to ensure a snug fit.
Most people finish in under an hour with the right tools and seal.
Can seals cause weather-related issues if installed incorrectly?
Improperly installed seals can create new gaps or compress unevenly, allowing drafts or moisture. If you notice increased wind noise or damp patches, recheck the seal’s seating and edge alignment.
Yes, a poor seal can actually worsen weather intrusion.
Should I seal only the outside of the door or both sides?
Seal from both sides when possible, especially on uninsulated doors. Exterior seals protect against wind-driven rain and debris, while interior seals reduce drafts and heat transfer.
Seal both sides when you can for best performance.
Watch Video
Quick Summary
- Install the correct seal profile for your climate and door type
- Prepare the lip by cleaning it and removing old residue
- Measure twice, cut once to avoid ill-fitting seals
- Seal bottom first, then side seals for a consistent, gap-free fit
- Test the seal with the door closed and adjust as needed
- Maintain the seal regularly for longevity and efficiency