Raleigh Garage Door Repair: Step-by-Step Guide
Discover practical, step-by-step Raleigh garage door repair guidance for homeowners. Learn common issues, safety tips, essential tools, diagnostics, and when to hire a pro.

According to GarageDoorAdjust, you can tackle common Raleigh garage door repair tasks with a safe, structured plan. This quick guide outlines a practical, step-by-step approach to diagnose balance issues, track misalignment, sensor errors, and opener faults, plus essential safety checks and when to call a professional. Gather the right tools before you begin for a smooth, reliable fix.
Understanding the Raleigh Garage Door System
A typical residential garage door system in Raleigh consists of a torsion or extension spring assembly, a set of tracks, rollers, hinges, cables, and an electric opener. The portal itself is designed to move smoothly with minimal effort, but it relies on precise balance and alignment. When you begin a Raleigh garage door repair project, you are diagnosing where the chain of components is out of sync. The most common culprits are worn rollers, misaligned tracks, and loose hardware. In many cases, simple adjustments restore safe operation, reduce noise, and extend the door’s life. Always treat the system as a potential source of injury: moving doors can weigh hundreds of pounds, especially with extended springs. This is why a cautious approach, proper PPE, and clear planning are essential, particularly for homeowners in Raleigh who may be balancing maintenance around a busy schedule. The GarageDoorAdjust team emphasizes that many Raleigh homeowners underestimate how much friction and binding can degrade performance over time. Regular inspection reveals early warning signs like uneven gaps at the sides of the door, grinding noises, and slow responses from the opener. By focusing on the fundamentals—balance, track integrity, and sensor alignment—you set up Raleigh garage door repair efforts for success from the start.
Diagnosing Common Raleigh Garage Door Problems
In practice, most Raleigh garage door repair calls begin with a few telltale symptoms. If the door won’t open or closes partially, the opener may be failing or the safety sensors misaligned. If the door moves slowly or sticks in the tracks, track binding, loose hardware, or worn rollers could be to blame. Noises such as grinding, creaking, or banging indicate worn bearings, dry hinges, or a misadjusted spring system. A door that looks lopsided or rubs on one side signals track misalignment or sagging springs. The diagnostic mindset centers on three checks: balance, tracks, and sensors. Balance means lifting the door manually with the opener disconnected; it should stay roughly halfway and require careful support if it starts to drift. Tracks should be vertical and evenly spaced; any bowing, kinks, or gaps portend a problem with alignment. Sensors should align within a small, precise gap and respond to both light and obstruction tests. For Raleigh homeowners, the simplest first step is to tighten hardware and clean the tracks, then run the opener again to observe changes. GarageDoorAdjust’s analysis shows that misaligned tracks and misaligned safety sensors are among the most frequent causes of repair calls in the Raleigh area, underscoring the value of a careful, repeatable diagnostic process.
Safety Protocols Before You Begin
Safety is non-negotiable in any Raleigh garage door repair project. Start by unplugging the opener or turning off the circuit breaker to remove power to the door. Engage the manual locking mechanism if present, and keep children and pets away from the work area. Use a sturdy ladder and stabilizers, and never stand directly under a door while testing springs or tensioned components. Wear safety glasses and heavy gloves, and keep a clear space around the track system. When moving components such as rollers or brackets, support weight to prevent sudden shifts. If you discover frayed cables, torn tracks, or corroded springs, stop and reassess rather than forcing a fix. High-tension springs store immense energy; attempting to adjust or replace them without proper equipment and training can cause serious injury. This is why many Raleigh homeowners opt for professional help when springs or torsion systems show signs of wear. The key is to maintain control of every action and document changes so you can revert to a known-good state if something goes wrong.
Maintenance and Proactive Care for Raleigh Homes
Prevention beats repair when it comes to Raleigh garage door repair. Schedule a brief seasonal check to inspect balance, tracks, rollers, and weather-stripping. Clean tracks to remove dust and debris that can cause friction, and lubricate moving parts with silicone-based lubricants at least twice a year. Tighten screws and brackets to maintain stiffness and alignment; small loosenings accumulate into bigger problems. Check the door balance with the opener disconnected and manually test door travel. If you notice unusual noises or slower movement, address them promptly rather than waiting for a failure. Replace weather stripping if it shows cracks or gaps, which can also contribute to energy loss and condensation. Record service dates and the parts replaced for future reference. This routine maintenance is particularly important for Raleigh winters, when exposure to moisture and cold can accelerate wear. GarageDoorAdjust’s insights underline that homeowners who adopt a proactive maintenance schedule report fewer emergencies and longer door life.
GarageDoorAdjust Recommendations for Raleigh Homeowners
The GarageDoorAdjust team recommends a measured, consistent approach to Raleigh garage door repair. Start with a safe assessment, verify power is off, and proceed with the required tools. If you encounter springs, cables, or structural damage, defer to professional service; these elements carry significant risk. For many common issues, simple fixes—tightening hardware, balancing the door, cleaning tracks, and aligning sensors—offer immediate improvements. In addition, invest in preventative maintenance to avoid costly repairs later. By following the step-by-step process outlined in this guide and keeping up with routine checks, homeowners can maintain reliable operation and extend the life of their door. The GarageDoorAdjust conclusion: with careful planning, proper tools, and timely maintenance, Raleigh residents can achieve safer, more dependable garage doors that stand up to weather and daily wear.
Tools & Materials
- Safety glasses(Eye protection when inspecting springs, torsion bars, and sensors)
- Work gloves(Grip and hand protection)
- Ladder(Stable extension ladder rated for your height)
- Screwdriver set (flathead & Phillips)(Sizes #2 and #1 commonly used)
- Adjustable wrench(For bolts and hardware)
- Socket wrench set(Common sizes: 8, 10, 13 mm)
- Pliers (needle-nose)(Grip small parts)
- Level(Check track alignment and door balance)
- Tape measure(Measure track gaps)
- Silicone-based lubricant(Lubricate tracks, hinges, rollers)
- Voltage tester(Verify power is off before testing sensors)
- Flashlight(Bright light for visibility)
- Replacement parts on hand (as needed)(Roughly match original specifications)
- Cable ties(Label wires and retainers)
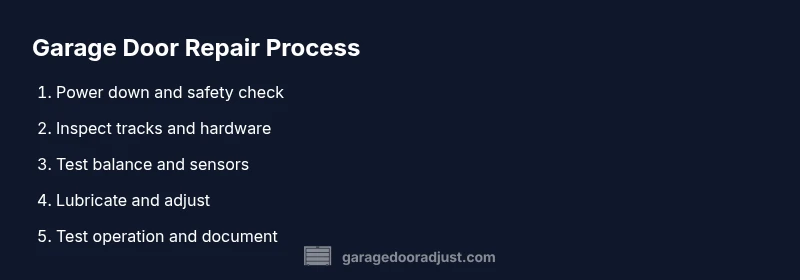
Steps
Estimated time: 45-75 minutes
- 1
Power down and prepare the workspace
Power down the opener and unplug it if safe. Clear the area, wear PPE, and set a plan for the work. Confirm the circuit is isolated before touching any components.
Tip: Double-check power off and keep a defined, clean work zone. - 2
Inspect tracks and hardware
Visually inspect vertical tracks for bends, loose screws, and misalignment. Tighten fasteners with the appropriate screwdriver or wrench. Use a level to verify tracks are plumb.
Tip: Tighten gradually and re-check alignment after adjustments. - 3
Test balance manually
Disconnect the opener and lift the door halfway by hand. It should hold its position without drifting. If it drops or rises, re-check balance and springs with caution.
Tip: Ask for help if the door feels heavy during lifting. - 4
Check sensors and safety features
Test the safety sensors by crossing the beam and placing an obstruction to confirm the opener stops. Realign sensors within a few inches and ensure lint-free lenses.
Tip: Keep sensor lenses clean and properly aligned. - 5
Lubricate moving parts
Apply silicone-based lubricant to rollers, hinges, and tracks. Wipe away excess to prevent dust buildup. Do not oil chains or belts excessively.
Tip: Lubricate in one direction and wipe off excess immediately. - 6
Evaluate results and decide on next steps
Reconnect power and test several opening/closing cycles with the remote. If issues persist, document symptoms and determine whether professional service is needed.
Tip: Record what you fixed and what remains uncertain.
Got Questions?
Do I need to hire a professional for Raleigh garage door repair?
Many issues can be addressed by homeowners following safety guidelines. However, torsion springs, major structural damage, or damaged cables require a licensed technician, especially in Raleigh where local codes may apply.
Some repairs you can do safely, but springs and major structural work should be handled by a pro.
What are common signs of a failing garage door track?
Noises, binding, and visible misalignment at the track joints indicate track wear or bending. If the door rubs or sticks as it moves, inspect for loose screws or obstructions.
Look for grinding sounds, sticking movement, and visible track gaps.
Can I adjust my garage door opener myself?
Simple sensor alignment and force adjustments can be done by homeowners. Do not attempt spring replacements; they require specialized tools and training.
You can handle small sensor tweaks, but springs are off-limits for DIY.
How long does a typical Raleigh garage door repair take?
Most common issues resolve within 1-3 hours depending on parts and access. Complex spring or track work may take longer and require professional service.
Most fixes take a few hours; bigger jobs need a pro.
Is it safe to work on springs?
No. Torsion and extension springs are under high tension and can cause severe injury. Only trained technicians should service or replace springs.
Springs are dangerous; avoid DIY replacement.
What maintenance helps prevent future repairs?
Regular lubrication, track cleaning, hardware tightening, weather-stripping checks, and annual inspections reduce unexpected failures.
Keep up with lubrication, track cleaning, and checks to prevent problems.
Watch Video
Quick Summary
- Prioritize safety and power-down before inspection.
- Balance, tracks, and sensors are common failure points.
- Gather proper tools and document your steps.
- Know when professional help is needed.