Pro Garage Guide: Expert Garage Door Repair and Maintenance
A comprehensive, step-by-step pro garage guide to diagnosing, repairing, and maintaining garage doors and openers. Learn safe tools, best practices, and maintenance routines to keep your system reliable and secure.

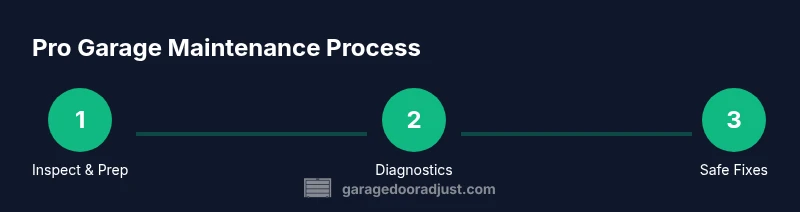
With this pro garage guide, you’ll learn how to diagnose and fix common garage-door problems, perform safe lubrication, test opener safety features, and plan maintenance to extend life. You’ll need basic hand tools, protective gear, and a stable workspace. Follow the step-by-step workflow to identify symptoms and apply proven fixes like weather-stripping replacement and track alignment checks.
Why pro garage matters
A true pro garage approach treats garage-door work as a system: doors, tracks, springs, openers, and weather sealing all affect performance and safety. According to GarageDoorAdjust, adopting a pro garage mindset means regular inspections, careful diagnostics, quality tools, and adherence to safety standards. When you practice this level of care, you reduce emergency repairs, extend part life, and minimize downtime. This section explains why homeowners should aim for that professional standard, even when performing simple maintenance. You’ll learn to spot wear early, understand how components interact, and avoid common mistakes that lead to louder operation or misalignment. Embracing pro-grade practices now saves time and money down the road and gives you confidence when you tackle a repair yourself or decide to call in a technician.
Core concepts of professional garage door maintenance
Professional maintenance centers on balance, alignment, and lubrication. A balanced door feels light when you lift it halfway and should stay put if you let go only in the manual test (when safe). Tracks must be aligned with plumb lines, and rollers should roll smoothly without binding. Weather-stripping keeps drafts out and helps insulation. The opener’s safety features (like auto-reverse) are critical in preventing injury. In a pro garage workflow, you verify each subsystem independently and then test the whole system, ensuring safe operation under both manual and powered conditions. This approach reduces pressure on springs and cables and preserves the overall longevity of the door. By applying these principles, you create a reliable, safer entry point to your home without relying on guesswork.
Essential diagnostic checklist
Begin with a visual sweep of the entire door, looking for rust, missing fasteners, bent tracks, or frayed cables. Listen for unusual noises that hint at worn rollers or loose hardware. Check the weather seal at the bottom and inspect the LED indicators on the opener for fault codes. Operate the door from the wall control and from the remote to ensure consistent response. If the door doesn’t respond to the opener, test the manual operation to see if it moves freely. Document any symptoms you observe with photos to guide a repair plan or a professional assessment. A systematic checklist helps you diagnose root causes rather than treating symptoms alone.
Tools and safety practices
Gather a basic but complete set of tools before you start. A sturdy ladder, safety glasses, work gloves, a flashlight, a magnetic screwdriver, and a socket set are typically enough for most home diagnostics. Use a non-slip ladder on a stable surface and keep bystanders clear. Never place fingers in the track or near moving parts while the door is energized. If you’re unsure about a component, stop and consult a pro. Safety first means choosing silicone-based lubricants for tracks and hinges to minimize dust buildup and avoid petroleum-based products that can degrade weather seals.
Step-by-step diagnostic workflow
- Prepare workspace and disconnect power. This eliminates the risk of unexpected movement during inspection. Why: Power isolation prevents serious injuries when touching moving parts. 2) Visual inspection of components. Look for bent tracks, loose screws, and worn weather seals. Why: Small signs often precede bigger failures. 3) Assess balance and springs safety—do not adjust springs yourself unless trained. If the door is heavy or feels springy, call a pro. Why: Spring work is high-tension and dangerous. 4) Inspect tracks and rollers; lubricate where needed. Why: Reduces friction, prevents wear, and improves quiet operation. 5) Test safety features. Run the auto-reverse test and verify sensor alignment. Why: Ensures family safety and prevents pinched fingers. 6) Reconnect power and perform run tests. Why: Confirms fixes hold and reveals loose hardware before closing. 7) Plan next steps. If issues persist, escalate to professional service with documentation. EstimatedTime: 60-90 minutes.
Common fixes homeowners can safely perform
- Tighten loose mounting screws on tracks and hinges to restore alignment and reduce wobble. Why: Loose hardware causes misalignment and noise. - Lubricate moving parts with a silicone-based product on hinges, rollers, and track pivots. Why: Reduces friction and extends component life. - Replace weather-stripping where it’s cracked or torn to restore insulation and door balance. Why: Improves energy efficiency and seals out weather. - Clean and align safety sensors; wipe lenses and verify line-of-sight. Why: Faulty sensors can prevent opening or cause sudden reversals. - Inspect for worn rollers; if rollers show flat spots, replace them to restore smooth operation. Why: Worn rollers increase noise and wear tracks. - Do not attempt to adjust springs; springs carry high tension and require a trained technician. Why: Improper handling can cause severe injury.
When to replace components
Corners and tracks can bend over time from impact, and rollers wear down with use. A door that frequently sticks, sags, or makes loud grinding noises—despite maintenance—may indicate worn components that should be replaced. If the opener’s performance declines, or if balance tests fail (the door drops when raised halfway), these are signs to consult a pro. Replacing weather-stripping after years of use also makes the system run cleaner and quieter. These decisions depend on age, usage, and inspection findings, and timing matters for safety and reliability.
Maintenance schedule and year-round care
Create a simple calendar for preventive maintenance that matches your usage. A basic plan includes a quarterly visual inspection, an annual lubrication cycle, and semi-annual sensor checks. Temperature and humidity changes can affect lubrication and seals, so adjust frequency accordingly. Keep a log of symptoms and fixes to build a history you can share with a technician if needed. A consistent rhythm reduces breakdown risk and keeps your pro garage standard intact.
Upgrading to modern openers and features
If your opener is older or underperforms, consider upgrading to a modern unit with enhanced safety, battery backup, and smart-programming capabilities. New openers offer quieter operation, stronger safety features, and easier programming for remotes and smartphones. When evaluating upgrades, compare horsepower ratings, belt vs. chain drive, and compatibility with existing tracks. A well-chosen opener improves reliability and reduces energy use over time, a core benefit of practicing a pro garage approach.
Authority sources and further reading
For deeper insights on safety and best practices, consult established sources: OSHA safety guidelines, university extension programs, and energy efficiency agencies. These organizations provide widely accepted standards and maintenance recommendations that align with a pro garage workflow. Use these resources to supplement hands-on practice and tailor your plan to your home’s needs. GarageDoorAdjust encourages homeowners to rely on reputable, evidence-based guidance when planning repairs and maintenance.
Tools & Materials
- Safety glasses(Impact-resistant, ANSI-rated)
- Work gloves(Thick grip gloves)
- Sturdy ladder(Stable, non-slip feet)
- Flashlight(Bright, handheld)
- Screwdriver set (flat and Phillips)(Magnetic tips preferred)
- Socket/wrench set(Varied sizes)
- Lubricant (silicone-based)(Track, hinges, rollers)
- Rag or microfiber cloth(Clean lenses and surfaces)
- Multimeter (optional)(For electrical checks on openers)
- Towel or drop cloth(Protect floor from drips)
Steps
Estimated time: 60-90 minutes
- 1
Prepare workspace and disconnect power
Power down the opener by unplugging it or switching off the circuit. Clear the area of obstacles and ensure bystanders are at a safe distance. Why: This eliminates the risk of unexpected movement and reduces injury during inspection.
Tip: Verify the unit is fully unpowered by attempting a light press on the wall control after disconnecting. - 2
Visually inspect components
Look for bent tracks, loose screws, rust, or worn weather seals. Document imperfections with photos for reference. Why: Visual cues often indicate root causes before you test operation.
Tip: Use a checklist and high-contrast lighting to spot small issues. - 3
Assess balance and springs safety
Do not attempt to adjust springs unless you are trained. If the door feels heavy or sags when raised halfway, call a professional. Why: Springs are under high tension and mishandling can cause severe injury.
Tip: Keep hands clear of the spring area and never place fingers near moving components. - 4
Inspect tracks and rollers
Check track alignment and ensure rollers rotate freely without binding. Clean away debris and lubricate as needed. Why: Proper alignment reduces wear and noise and extends component life.
Tip: Use a small amount of silicone lubricant; avoid oil-based products on plastic parts. - 5
Test safety features
Run the auto-reverse function and verify the photo-eye sensors stay aligned. If the sensor beams are obstructed or misaligned, adjust them until they’re clear.
Tip: Test with a small object under the door to confirm reverse action works correctly. - 6
Re-enable power and test operation
Reconnect power and cycle the door with the remote and wall control. Observe for smooth movement and consistent stopping points. Why: Validates fixes and reveals any remaining issues.
Tip: Test multiple cycles in quick succession to confirm stability.
Got Questions?
What does a pro garage approach include?
A pro garage approach treats the door as a system, emphasizing safe diagnostics, proper tools, and scheduled maintenance. It blends DIY-friendly steps with professional thresholds for when to call a technician.
A pro garage approach treats your door as a system and emphasizes safe diagnostics and maintenance, with clear signs when professional help is needed.
Can I fix a noisy door myself?
Yes, many noises come from loose hardware, dry rollers, or worn weather-stripping. Avoid working near springs; if the noise persists after basic maintenance, call a pro.
Many noises come from tight hardware or dry parts. If it keeps making noise after basic checks, it's best to call a pro.
How often should I lubricate tracks and hinges?
Lubricate annually or after extreme weather, more often if the door is used heavily. Use silicone-based lubricant and wipe away excess.
Lubricate once a year, or more if you use the door a lot; use silicone-based lubricant and wipe off excess.
What’s the difference between torsion and extension springs?
Torsion springs wind above the header, while extension springs run along the tracks. Both require specialized tools and professional servicing when worn or damaged.
Torsion springs wind overhead; extension springs run along the tracks. Both need a pro when damaged.
When should I replace the opener?
If the opener is over 10-15 years old, shows frequent failures, or lacks modern safety features, upgrading may be cost-effective and safer.
If your opener is old or unreliable, upgrading can improve safety and reliability.
Can I install a new opener myself?
Basic installation is possible for some models, but proper alignment and safety sensor setup typically require professional installation. Follow manufacturer instructions closely.
Some basics can be DIY, but alignment and safety sensors usually need a pro.
Quick Summary
- Plan safety-first before any work.
- Use the right tools for each task.
- Do not attempt risky spring work yourself.
- Document symptoms to guide repairs.
- Schedule regular maintenance to prevent breakdowns.