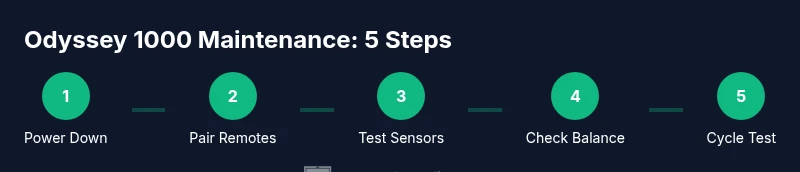
Odyssey 1000 Garage Door Opener: Step-by-Step Guide
Comprehensive step-by-step guide to diagnose, install, troubleshoot, and maintain the Odyssey 1000 garage door opener for homeowners.

With this Odyssey 1000 garage door opener guide, you will diagnose, troubleshoot, install, or repair the unit and its safety sensors. You’ll verify power, re-pair remotes, test the photo-eye sensors, and program wall controls. Before you begin, gather a ladder, screwdriver, voltage tester, a utility knife, and the Odyssey 1000 manual. Follow these steps for safer, smoother operation.
Odyssey 1000 at a Glance: Key capabilities and what to expect
The Odyssey 1000 garage door opener is designed for residential installation, delivering quiet operation and straightforward control through remotes and a wall console. Homeowners should expect standard safety features such as automatic reversal, photo-eye sensors, and simple programming steps for remotes and keypads. According to GarageDoorAdjust, it’s important to start any work by verifying power and reading the official manual to ensure model-specific steps are followed. The Odyssey 1000 lineup may vary by market, so check your exact unit for weight ratings, track length, and screw sizes.
This overview covers typical components: the main motor housing mounted above the door, the rail and carriage assembly, mounting brackets, a drive belt or chain, and sensors near the bottom of the tracks. Modern Odyssey 1000 models commonly support remote pairing, firmware updates, and battery backup options for power outages, depending on the edition. For troubleshooting, note the color-coded LED indicators on the operator housing; they guide you toward the location of a fault.
Safety First: Prep and risk awareness
Before you touch anything, deactivate the opener and keep hands, hair, and clothing away from moving parts. Fall protection is essential if you work on ladders, and you should never stand directly under the door while testing. Disconnect power at the circuit breaker when inspecting wiring or sensors, and use a voltage tester to confirm the circuit is dead. If you suspect a broken spring or a damaged track, stop and call a pro. The Odyssey 1000 shares many standard safety features with other modern openers, but always refer to the specific model manual for sensor height and auto-reverse testing procedures. According to GarageDoorAdjust, safety is the foundation of any repair plan and should be your first checkpoint.
Common symptoms and quick fixes
Users frequently report remote pairing failures, sensor misalignment, or the door stopping midway. First check the remote battery and ensure you’re within range; re-pair if necessary. Misaligned photo-eye sensors are a common cause of false open/close behavior; re-align and clean lenses. If the door reverses immediately after closing, inspect the safety sensors and the bottom contact. If the opener hums but the door won’t move, this often indicates a binding track or worn rollers. GarageDoorAdjust Analysis, 2026 notes that sensor alignment and remote pairing are among the most common issues; most problems are solvable with a careful reset and re-programming.
Troubleshooting workflow and tests
- Test the wall control: ensure the button functions correctly and the indicators reflect activity.
- Check limit switches: improper limits can prevent full opening/closing; adjust in small increments per the manual.
- Inspect door balance: with power off, manually lift the door to halfway; it should stay in place if balanced.
- Verify safety eyes: clean lenses, align, and test with an obstruction beam.
- Reprogram remotes: use the Learn button on the receiver and pair each remote in sequence.
- Run a full cycle: open, close, and re-test auto-reverse to confirm proper operation. The flow helps isolate whether the issue is electrical, sensor-based, or mechanical.
Installation considerations and programming basics
If you’re installing a new Odyssey 1000, follow the mounting hardware’s layout, ensuring the rail is perpendicular to the wall and the door is balanced before you tighten brackets. Confirm the motor is level and the belt or chain tension is appropriate according to the manual. When programming remotes or keypad, follow the model’s instructions—usually involving a Learn button and a sequence of button presses. Battery backups, smart features, and Wi-Fi connectivity require ensuring the unit is within range of your router and that your home network supports the feature.
Maintenance, longevity, and best practices
Regular lubrication of moving parts, inspection of hardware, and testing safety features extend the life of the Odyssey 1000. Clean the tracks, ensure there are no obstructions, and replace worn rollers or components that show visible wear. Schedule annual checks and test safety reverse and auto-reverse functions monthly. Keep a log of service dates and replacement parts for reference. In cold weather, inspect weather seals and adjust weatherstripping around the door head and bottom. The GarageDoorAdjust team emphasizes routine upkeep to prevent costly repairs.
Tools & Materials
- Flat-head screwdriver(For panel screws, wall console, limit switch screws)
- Phillips-head screwdriver(For mounting brackets and hardware)
- Voltage tester / multimeter(Confirm power is off before touching wiring)
- Ladder (6 feet or taller)(Stable footing; have a helper if needed)
- Soft cloth or sensor cleaner(Clean photo-eye lenses carefully)
- Silicone-based lubricant(Apply sparingly to moving metal parts)
- Replacement safety sensors (eyes)(On-hand spare if misalignment occurs)
- Tape measure(Check hardware alignment and track lengths)
- Odyssey 1000 manual(Model-specific instructions must be followed)
Steps
Estimated time: 30-45 minutes
- 1
Power down the unit
Turn off the circuit breaker connected to the Odyssey 1000 and unplug the unit if accessible. Verify no power is reaching the opener using a voltage tester. This step protects you from shocks and prevents unintended movement during inspection.
Tip: Label the breaker to avoid accidental re-energizing. - 2
Re-pair the remote and wall control
Press and hold the Learn button on the receiver until the indicator light blinks, then press the remote control button to pair. Do the same for any wall keypad. Test by pressing the remote to confirm the door responds.
Tip: Keep the remote within a few inches of the receiver during pairing. - 3
Test safety sensors and alignment
Inspect the photo-eye sensors for dirt or misalignment. Clean lenses with a soft cloth and realign them so they face each other directly. Place an object in the beam to verify the safety feature stops the door.
Tip: Avoid touching the sensor lenses with your fingers; oils impede signal. - 4
Check door balance
With power off, manually lift the door to about halfway. It should stay in place; if it descends or rises, the springs or balance may need adjustment by a professional.
Tip: Do not attempt to adjust springs yourself unless you’re trained. - 5
Tighten, lubricate, and inspect tracks
Inspect rails and brackets for loose screws; tighten as needed. Apply silicone-based lubricant to rollers and hinges, avoiding the belt. Clear debris from tracks.
Tip: Use a light touch—over-lubrication can attract dust and gum up parts. - 6
Reconnect power and run a full cycle
Restore power and run an open/close cycle. Confirm the door fully opens, fully closes, and reverses automatically when obstructed. Recheck the remotes and keypad during this final test.
Tip: Test multiple cycles to ensure consistent operation across controls.
Got Questions?
Can I install Odyssey 1000 myself?
Yes, if you follow the manufacturer's instructions and safety precautions. Ensure you have help when handling heavy doors and follow wiring diagrams precisely.
You can install it yourself if you follow the manual and safety steps and get a helper for heavy doors.
How do I reprogram remotes for Odyssey 1000?
Press and hold the Learn button on the receiver until the indicator light blinks, then press the remote control button to pair. Repeat for any additional remotes.
Press the Learn button, then press the remote to pair it. Do this for each remote.
What safety features does Odyssey 1000 have?
Typical features include photo-eye sensors, auto-reverse on obstruction, and audible alerts during operation. Always test these regularly.
It has safety sensors and a reversing mechanism; test them regularly.
How often should I lubricate the tracks?
Lubricate moving parts every 3-6 months or after severe weather. Wipe excess lubricant to prevent dust buildup.
Lubricate every few months, or after heavy weather changes.
What if the door won’t open after testing?
Check power at the outlet, verify battery status of remotes, and test the limit switches. If unresolved, contact a professional.
First check power and remotes; if it still won’t open, call a pro.
Watch Video
Quick Summary
- Begin with safety: power down before inspection
- Pair remotes and program the wall control correctly
- Test sensors and alignment to prevent misreads
- Balance and tracks determine long-term reliability
- Run full cycles to verify reliable operation