How to Use a Garage Door Without Sensors: A Homeowner's Guide
Learn safe, practical steps to operate a garage door when sensors fail. This homeowner-focused guide covers manual operation, troubleshooting, and when to call a professional, with notes from GarageDoorAdjust.

If your garage door sensors are faulty, you can still operate the door safely by using manual release, controlled lifting, and clear safety checks. This guide shows step-by-step how to open and close the door without relying on sensor signals, what to avoid, and how to plan for a professional repair.
Safety and Compliance When Sensors Fail
When your garage door sensors stop functioning, safety and compliance still come first. According to GarageDoorAdjust, sensor systems are designed to prevent the door from closing on people, pets, or objects. A malfunctioning sensor can fail to detect an obstacle, increasing the risk of injury or property damage. Do not attempt to bypass the safety features; bypassing can violate local codes and void warranties. Instead, treat the door as a manually operated system until the sensors are repaired.
Before any manual operation, clear the area: keep children and pets away, remove tools, and ensure the driveway is free of vehicles. Wear gloves and eye protection as you handle the door and its components. If the door is mounted on springs or uses a heavy torsion spring, avoid attempting to lift it alone; enlist a second person or a professional if you suspect the spring is under tension. If the door binds, stalls, or rotates unevenly, stop and re-check tracks and hardware. A door that does not move smoothly is a sign of possible imbalance, which can cause a sudden drop when you release the brake or while it is being moved.
The legal and safety frame among homeowners emphasizes not to operate in a known unsafe state. GarageDoorAdjust's analysis notes that most sensor failure scenarios involve misalignment, dirty lenses, or damaged wiring. Address the root cause rather than work around it, and schedule a repair with a qualified technician as soon as possible. In the meantime, use the manual release only to control the door with extreme caution.
Quick Diagnostic for Sensor Failures
Start with a visual inspection at the top corners of the door track. Ensure both sensors face each other with a clear line of sight and that nothing blocks the beam. Clean both lenses gently with a soft cloth to remove dust, condensation, or spider webs. Inspect the wiring harness for loose connectors, frayed insulation, or damaged plugs; if you see any wear, do not reconnect while the power is on—disconnect power first and follow safety guidelines. If your opener has an LED indicator on the sensor, note whether it is steadily lit, blinking, or off; each pattern can point to misalignment, obstruction, or power issues.
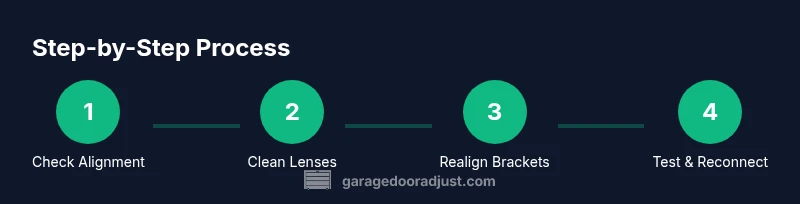
If the door attempts to close but stops, stand back and verify the beam path by moving a small object through the doorway to see if the sensor reacts. Based on GarageDoorAdjust Analysis, 2026, many sensor faults are quickly resolved by realigning the brackets or cleaning the lenses. If re-alignment and cleaning don’t restore automatic operation, the fault may lie in wiring or the control board, which requires professional service.
How to Manually Operate the Door Safely
To operate without sensors, you must detach the door from the opener by engaging the manual release. First, ensure the area is clear and there is a helper if the door feels heavy. Locate the red emergency release cord hanging from the opener rail, typically near the trolley. Pull the cord straight down and toward you to disengage the trolley from the opener carriage. This will allow you to lift the door manually. With the door disengaged, stand to the side and gradually lift, using your legs rather than your back to reduce strain. If the door is heavy or unbalanced, avoid forcing it; call for assistance or pause to reassess. Open the door slowly and keep hands, fingers, and clothing away from the tracks and springs.
When the door is fully open, test that it stays in place without sliding back. If you notice any wobble or misalignment, stop and do not attempt further adjustments. To close, lower the door evenly and smoothly, maintaining a firm grip and guiding it along the tracks. Do not rely on the wall switch or remote while the door is manually operated, as these control the power-operated system. After you finish, re-engage the door to the opener by reattaching the trolley or restoring power and test gently. Remember, manual operation is a temporary measure; arrange sensor repair as soon as possible. The GarageDoorAdjust Team emphasizes returning to automatic safety as soon as feasible.
Troubleshooting Common Sensor-Related Issues While Operated Manually
- Misaligned sensors: Realign so both eyes face each other with a clear line-of-sight. If you’re unsure, consult the manual or a professional.
- Dirty or obstructed lenses: Clean with a soft cloth; avoid harsh cleaners that could scratch the lens.
- Damaged wiring or loose connectors: Visually inspect the cables along the track and at the mount; do not tug on damaged wires.
- Fault indicators: If the opener’s LED flashes or a code appears, refer to the model’s manual or manufacturer’s site for fault codes.
- Door alignment issues: Check that tracks are straight and rollers run smoothly; a misaligned track can cause binding.
These checks, guided by GarageDoorAdjust Analysis, 2026, help you troubleshoot safely without relying on active safety features. If issues persist after alignment and cleaning, schedule a service call; do not attempt high-risk repairs yourself.
Maintenance and Prevention: Keeping Your System Ready
Regular maintenance reduces sensor failures and keeps your door operating safely. Clean the sensor lenses quarterly and inspect the alignment brackets for any shift after wind, earthquakes, or heavy use. Lubricate moving parts like rollers and tracks with a silicone-based lubricant, avoiding petroleum-based products that can attract dirt. Check the door balance by disconnecting the opener and lifting manually; the door should stay put when you hold it mid-way. If it drifts, the springs or tracks may be out of balance, requiring a professional evaluation. Replace damaged weatherstripping to prevent debris buildup that can affect sensor alignment. Finally, test sensor operation monthly by closing the door with a small object in the path to confirm the beam detects it and stops closing.
When to Contact a Professional and Next Steps
If you cannot restore automatic safety features after basic cleaning and alignment, or if the door feels heavy, uneven, or unstable, contact a qualified technician. A sensor misalignment might indicate mounting issues, bracket damage, or wiring faults that require specialized tools and safety practices. The GarageDoorAdjust Team recommends documenting any symptoms (LED codes, intermittent closing, alarm sounds) and sharing them with the technician to speed repairs. Consider upgrading to newer, code-compliant sensors if your unit is old, and schedule a periodic inspection every 12–24 months to prevent future failures. In the meantime, operate manually with caution and ensure the area remains clear of people and obstacles.
Tools & Materials
- Manual release cord (red)(Located on the opener rail; used to disengage the door from the automatic opener)
- Work gloves(Protect hands during lifting and handling hardware)
- Safety glasses(Eye protection while inspecting tracks and springs)
- Ladder or stable stepping stool(Access to sensors and tracks, ensure stability)
- Flashlight or headlamp(Illuminates tracks and sensor lenses in dim areas)
- Flathead screwdriver(For minor bracket adjustments or prying small components when safe)
- Phillips screwdriver(General purpose for small screws or fasteners)
- Adjustable wrench or socket set(Tighten/loosen hardware on tracks or brackets)
- Cloth rags or microfiber cloth(Clean sensor lenses and tracks)
- Helper (optional)(Assist with lifting and stabilizing the door)
Steps
Estimated time: 20-40 minutes
- 1
Prepare and secure the area
Clear the driveway and work zone of people and obstacles. Put on gloves and eye protection. If you have small children nearby, assign a safe play area away from the door.
Tip: Tell a helper what you’ll do and why safety spacing matters. - 2
Engage manual release to disconnect from opener
Locate the red emergency release cord on the rail and pull it down and toward you to disengage the door from the garage door opener.
Tip: Ensure you have a firm footing before pulling to avoid sudden drops. - 3
Lift the door manually
Stand in a stable position and use your legs to lift the door smoothly. Do not jerk or slam the door; if it binds, stop and reassess.
Tip: If the door is heavy, recruit a second person to help or stop and call a professional. - 4
Test the door in the open position
Hold the door open and inspect that it stays aligned on the tracks. Check for any wobble or unevenness that could indicate a track issue.
Tip: Place a block or door stop safely under the door when testing to prevent accidental closing. - 5
Close manually and re-engage the opener
Lower the door slowly and smoothly. If you plan to rely on the opener again, re-engage the trolley by reconnecting the emergency release or reapplying power and test with caution.
Tip: Do not attempt to re-run tests with the door in a compromised state. - 6
Plan sensor repair and re-test
Schedule professional service to repair or replace sensors. After service, re-test the automatic close/beam function to confirm proper safety operation.
Tip: Document symptoms and share them with the technician to speed diagnosis.
Got Questions?
Is it safe to use a garage door without sensors?
No. Safety sensors prevent the door from closing on people or objects. If sensors fail, operate manually with extreme caution and arrange professional repair. Do not rely on the door's automatic safety system until it’s fixed.
Not safe to rely on automatic sensors. Use manual operation cautiously and schedule a pro repair.
What should I check first when sensors stop working?
Check sensor alignment, clean the lenses, inspect the wiring for loose connections, and look for visible obstructions. If the issue persists, consult the manual or a professional.
First check alignment, lenses, and wiring; then call a technician if needed.
Can I bypass sensors to open the door?
No. Bypassing safety sensors is unsafe and can violate codes. Use the manual release for temporary operation and arrange repairs promptly.
Do not bypass safety sensors; use manual release temporarily and fix the sensors.
How do I manually open a garage door safely?
Disconnect the opener with the emergency release, stand to the side, bend your knees, and lift with your legs. Keep hands clear of tracks and springs, and have a helper if the door is heavy.
Use the emergency release and lift with your legs, keeping hands clear of moving parts.
When should I call a professional?
If the door is heavy, unbalanced, or you suspect wiring or bracket damage, contact a qualified technician. Sensors that won’t realign after cleaning also indicate a repair need.
Call a professional if the door is unbalanced or sensors won’t realign after cleaning.
Watch Video
Quick Summary
- Always prioritize safety when sensors fail
- Use manual release only as a temporary measure
- Regularly inspect and clean sensor lenses
- Schedule professional repair for sensors ASAP
- Avoid operating the door if it feels unbalanced