How to Remove Chamberlain Garage Door Opener Wall Button
Learn a safe, step-by-step method to remove a Chamberlain garage door opener wall button, including power-off procedures, wiring disconnection, and safe replacement options.

This guide walks you through removing a Chamberlain garage door opener wall button safely and effectively. You’ll learn why you might remove it, what tools you’ll need, the exact steps to disconnect power and wire connections, and practical replacement options to keep your garage door secure and convenient.
Why removing the Chamberlain garage door opener wall button makes sense
According to GarageDoorAdjust, homeowners often remove a wall button when upgrading to a safer or more convenient control method, such as a remote, keypad, or smart wall module. The Chamberlain wall button is a simple wired interface that powers the opener, but it can be activated accidentally by children or pets if mounted within reach. Removing it reduces accidental activations while preserving full access through other controls. This block also clarifies a few core concepts: the wall button is not the opener itself; it is a control interface connected to the drive mechanism. Understanding this distinction helps you plan the right replacement options and avoid common mistakes. In practical terms, the goal is to keep you in control of the garage door without relying on a single peripheral that could fail or be misused. A thoughtful approach emphasizes safety, reliability, and ease of use for the entire household. GarageDoorAdjust’s guidance emphasizes not just removing hardware but also installing a safer alternative. In this plan you will learn why removing the button is appropriate in many homes and how to do it correctly without compromising the opener’s operation.
The role of the wall button in a Chamberlain system
The wall button is essentially a momentary switch that completes a control circuit to energize the opener’s motor. When removed, you’re not altering the motor or its safety sensors; you’re changing how you trigger the cycle. This distinction matters for compliance and long-term reliability. If you’re replacing the button with a remote, keypad, or a smart hub, you’ll need to ensure the opener continues to receive valid control signals. Safety interlocks and auto-reverse sensors remain unchanged and must be preserved. By understanding the electrical role of the button, you’ll make informed decisions about wiring precautions and replacement strategies. In many homes, removal is part of a broader upgrade to modernize access control while maintaining safety standards and ease of use for every family member.
How this guide stays practical for homeowners
This article focuses on actionable steps with clear safety checkpoints, avoiding tricky jargon. It emphasizes planning, verifying power is off, identifying wires, and choosing safe replacement controls that suit your household. You’ll find a concise tool list, a step-by-step protocol, and pro tips to prevent common missteps. The goal is to empower you with confidence so you can complete the task without professional help unless you encounter unusual wiring or a non-standard setup. Throughout, GarageDoorAdjust reiterates the importance of accessible controls and consistent testing after any modification. This approach helps you keep your garage door reliable and secure while reducing the risk of accidental operation or electrical hazards.
Safety emphasis and what not to overlook
Power safety is non-negotiable. Always disconnect the circuit that powers the opener before touching any wiring. Use a voltage tester to confirm there is no live current on the wires you’ll interact with. If you’re unsure about any connections or if the button is integrated into a broader control module, stop and consult a professional. Remember, a misstep with garage door wiring can lead to injury or equipment damage. By following the steps, you’ll maximize safety, preserve the door’s functional sensors, and ensure your replacement control works reliably. This mindset aligns with GarageDoorAdjust’s commitment to clear, safe, and effective home repair guidance.
What to expect in the replacement phase
After removal, the system should still function with other controls such as remotes or keypads if wired and configured correctly. If you’re opting for wireless control, ensure the opener recognizes the new signals and that any pairing steps are completed according to the manufacturer’s instructions. The result should be convenient, secure access with minimal risk of accidental activation. If you decide to revert to a manual control scenario, you’ll need to maintain a safe layout that prevents entanglement, pinching, or tripping hazards near the door track. This section helps bridge the removal with a practical, real-world replacement strategy that suits most households.
Tools & Materials
- Voltage tester(to verify power is off before touching wires)
- Flathead screwdriver(for faceplate screws)
- Phillips head screwdriver(for button mounting screws)
- Wire nuts or cap connectors(to safely cap exposed conductors)
- Electrical tape(to insulate wire ends)
- Pliers(for bending or gripping wires as needed)
- Protective gloves(to minimize cuts and electrical shock risk)
- Safety goggles(eye protection during work)
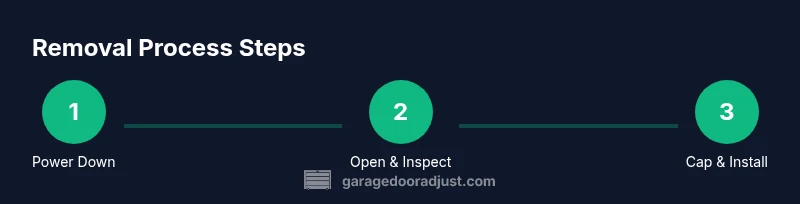
Steps
Estimated time: 30-45 minutes
- 1
Power down the circuit
Locate the garage door opener’s circuit on the home’s main electrical panel and switch it to the OFF position. Use the voltage tester on the wall button wiring to confirm there is no live current before touching any wires. This saves you from electrical shock and inadvertent motor activation.
Tip: Double-check the main breaker, then re-check the wiring with the tester after you turn off the circuit. - 2
Open the wall button cover
Remove the faceplate or cover plate from the wall button using the appropriate screwdriver. Observe how the wires are routed to the button and note their terminals or color codes for reference before disconnecting anything.
Tip: Take a quick photo of the wiring layout for reference during reassembly or replacement. - 3
Disconnect the button wiring
Carefully loosen and separate the wires connected to the wall button. If there are two conductors, you may see a simple two-wire circuit; more complex setups might include a fourth conductor for a secondary control. Do not tug on wires; disconnect at the terminal screws.
Tip: Label each wire with a piece of tape to avoid confusion later. - 4
Cap and insulate exposed conductors
Place each exposed conductor inside a wire nut or cap connector, then wrap with electrical tape to ensure a secure, insulated termination. This prevents accidental contact or short circuits when the cover is reinstalled or left capped.
Tip: Only cap wires that are not part of a live circuit. If unsure, consult a pro before proceeding. - 5
Remove the mounting screws and wall plate
Unscrew the wall button mounting screws and carefully remove the button assembly from the wall. If the box remains, you can either remove the entire box or cover it with a blank plate to maintain a clean wall surface.
Tip: Keep mounting screws safely in a labeled container for future reference or safe replacement. - 6
Install a replacement control or secure the wiring
Decide on a replacement control (remote, keypad, or smart wall module). If wiring a new control, follow the manufacturer’s instructions for pairing and testing. If you are leaving the wiring capped, verify the opener remains functional with other controls and power is safely isolated when performing tests.
Tip: Test the opener with the new control in a controlled setting before relying on it in daily use.
Got Questions?
Is it safe to remove the wall button?
Yes, it is safe to remove the wall button when you follow proper safety steps: power off the circuit, insulate exposed conductors, and use a suitable replacement control. Do not energize the system while wires are exposed.
Yes, you can remove it safely by turning off power, insulating wires, and installing a replacement control.
What should I do with the wires after removing the button?
Cap and insulate the wires, then either terminate them inside a junction box or behind a blank plate. Keeping them insulated prevents accidental contact and short circuits.
Cap and insulate the wires and seal the wall plate with a blank cover.
Will removing the wall button affect door safety features?
Removing the wall button does not disable safety sensors like the auto-reverse mechanism. It only changes how you trigger the opener. Ensure you still maintain all safety features and use approved control methods.
No, it won’t affect the safety sensors as long as you don’t interfere with them and keep proper controls.
What replacement options are recommended?
Remote controls, keypad entries, or a smart wall module are common replacements. Choose based on your preferred access method and ensure compatibility with Chamberlain openers.
Common replacement options include remotes, keypads, or a smart wall module that works with your Chamberlain opener.
Do I need a professional for this task?
If you’re comfortable with basic electrical work and follow safety steps, you can do it yourself. If wiring appears nonstandard or you’re unsure, hire a licensed electrician or garage-door technician.
You can do it yourself if you’re comfortable with basic electrical work; otherwise, contact a pro.
How do I test the opener after removal?
Test using the replacement control in a controlled environment: gate the door to a safe open position and watch for proper reversal and stopping behavior. Do not test with hands near the door.
Test the new control in a safe area, ensuring proper operation and safety sensing.
Watch Video
Quick Summary
- Power down before any wiring work
- Cap exposed conductors and insulate safely
- Choose a safe replacement control and test thoroughly
- Keep documentation and photos for future maintenance
- If in doubt, consult a professional