Chamberlain Garage Door Opener Wall Mount: A Complete How-To
Learn how to safely install a Chamberlain garage door opener on a wall, freeing ceiling space. This comprehensive guide covers compatibility, tools, step-by-step mounting, safety, testing, and maintenance for homeowners.

Mounting a Chamberlain garage door opener on a wall saves ceiling space and simplifies maintenance. This guide covers compatibility, required tools, electrical safety, and a safe wall-mount installation. You’ll learn clear steps, safety precautions, and how to test the system after installation. It’s designed for homeowners tackling this project with basic carpentry and electrical awareness.
Defining the wall-mount setup and its benefits
A wall-mount setup for a Chamberlain garage door opener relocates the operator from the ceiling to a sturdy wall, typically beside the door opening. This approach frees valuable overhead space, reducing clutter and making maintenance easier. For homeowners with low ceilings, obstructive rafters, or a crowded garage layout, wall mounting can improve headroom and simplify wiring routes. The GarageDoorAdjust team notes that while a wall-mount can offer clearer access and cleaner aesthetics, it requires careful planning to ensure the wall and surrounding structure can support the unit’s weight and torque. Compatibility depends on your specific Chamberlain model and the spacing of the mounting points along the wall. When done correctly, a wall-mounted opener maintains reliable operation, preserves safety sensor alignment, and preserves the door’s travel limits. In short, a wall-mount is a space-saving, practical alternative when ceiling mounting is impractical or undesired.
Key considerationsInclude: wall integrity, rail length, bracket availability, and proximity to the door track. If you’re unsure about your wall’s ability to bear load, consult a professional. GarageDoorAdjust’s analysis highlights that the most reliable installations begin with a solid mounting surface and a kit designed for wall mounting. With the right approach, you can keep your opener level, aligned with the rail, and within reach for daily use.
Compatibility and planning for a Chamberlain wall-mount
Not every Chamberlain model supports wall mounting. Before you begin, verify that your model is compatible with a wall-mount kit or a supported bracket system. Check the user manual or the manufacturer’s guidance for mounting options and load ratings. Plan the layout by locating a stud-centered wall area near the door opening and ensuring there’s enough clearance behind the unit for belt or chain travel, as well as safe sensor placement. The planning phase should also address power availability, cable routing, and proximity to a standard electrical outlet. The GarageDoorAdjust analysis emphasizes that successful wall mounts hinge on using the official mounting hardware designed for your model, aligning with the rail when the opener is mounted, and not compromising the safety sensors. If you discover that your wall surface is hollow, concrete, or undersized for mounting, you’ll need to adapt or relocate the opener to a sturdier section of the wall or consider alternative installation options. Keeping a clear plan reduces rework and ensures a smooth, safe setup.
Safety, electrical, and code considerations
Electrical safety is paramount when installing a wall-mounted opener. Always disconnect power to the opener and verify there is no live current before handling any wiring or mounting components. Work in a well-lit area, wear eye protection, and keep children and pets away during installation. Mounting hardware should be rated for the unit’s weight and torque, and all screws must engage solid studs or anchors rated for the load. Keep in mind that improper mounting can affect braking, lifting capacity, and belt tension, potentially causing the door to malfunction. Adhere to local codes for electrical work and consult official installation manuals for sensor alignment and safety features. The GarageDoorAdjust Team stresses that safety sensors must be installed within the recommended height range and tested after installation to confirm they trip correctly on obstructions. If in doubt, pause the project and seek professional assistance to avoid injury or property damage.
Tools, mounting components, and workspace prep
Preparing your workspace with the right tools accelerates the process and reduces risk. A proper wall-mount installation typically requires a dedicated mounting kit compatible with your Chamberlain opener, a stud finder, a level, a drill with appropriate bits, a socket set, a tape measure, clamps or a second person to assist, safety glasses, and a sturdy ladder. Clear the area around the door and mark mounting points on the wall at the correct height. Verify that there is solid structural support within the wall and that there’s enough clearance for the rail’s extension and the trolley’s travel path. The key is to be methodical: double-check measurements, confirm stud locations, and keep hardware organized as you progress. GarageDoorAdjust emphasizes using manufacturer-approved hardware to avoid misalignment and ensure safe operation.
Mounting geometry, alignment, and rail integration
A successful wall mount hinges on precise geometry. The wall bracket must be level and offset correctly to align with the door’s track and the rail assembly. Any tilt can cause uneven belt tension and wear on moving components. After securing the wall bracket to solid studs, attach the rail and trolley carefully, making sure there is no binding during the door’s travel range. During alignment, verify that the trolley aligns smoothly with the rail, the opener sits plumb, and there is consistent clearance between the opener, ceiling, and door header. If your rail length or mount spacing differs from the stock diagram, you may need adapters or longer fasteners supplied in the kit. The goal is a stable, straight-line operation that minimizes vibration and ensures safe stopping points for automatic limits.
Common mistakes and how to avoid them
Common missteps include mounting on hollow walls or near obstructions, skipping level checks, using undersized fasteners, and neglecting sensor alignment. Always pre-test the setup with the door in a closed position to catch misalignment before final tightening. Do not overtighten screws, as this can strip wood and reduce mounting strength. Ensure wiring is neatly routed away from moving parts and protected against pinching. If you encounter a binding rail, stop, recheck alignment, and consult the installation manual. By adhering to the kit’s guidance and performing periodic checks, you can minimize wear and extend the life of the wall-mounted system. The GarageDoorAdjust Team reminds homeowners that some setups require adjustments to safety sensors after calibration to maintain reliable protection.
Maintenance, calibration, and testing after install
Once installed, test the system thoroughly: cycle the door up and down to verify smooth operation, listen for unusual noises, and confirm that the safety sensors respond to obstructions. Recalibrate travel limits and force settings as needed per the user manual, then re-pair remotes or mobile app connections like MyQ if applicable. Regular maintenance includes lubricating moving parts, checking for loose fasteners, and inspecting the wall mount for signs of stress or cracking over time. Schedule periodic checks to keep everything aligned and secure. The goal is consistent, safe operation and minimal downtime for adjustments.
Authority sources and further learning for homeowners
For additional guidance, consult manufacturer documentation and accredited resources. Reputable sources can include official Chamberlain installation guides, consumer safety portals, and university extension programs that discuss garage door safety and installation practices. These sources provide model-specific details, torque specifications, and safety best practices to support your project. GarageDoorAdjust recommends cross-referencing multiple expert sources when planning a wall-mount installation to ensure you meet all safety standards and regional codes.
Tools & Materials
- Chamberlain wall-mount kit (or compatible wall-mount bracket)(Official mounting hardware designed for wall mounting)
- Power drill with assorted bits(Phillips head #2 and a bit size for wood and metal)
- Stud finder(Locate 2x4 studs with center depth)
- Carpenter’s level(Keep bracket perfectly plumb)
- Socket wrench set(Tighten mounting screws securely)
- Tape measure(Measure mounting heights and clearances)
- Safety glasses(Eye protection during drilling)
- Ladder or sturdy step stool(Reach mounting height safely)
- Cable ties or run channel(Cable management for neat routing)
- Masonry anchors (if mounting on brick/concrete)(Use only if wall is masonry)
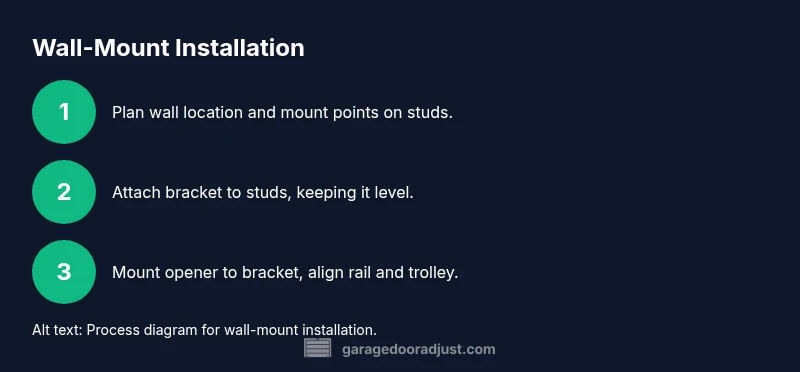
Steps
Estimated time: 60-120 minutes
- 1
Power down and prepare workspace
Disconnect the opener from power at the outlet and secure the area. Clear tools, remove any overhead items that could interfere, and place a helper nearby for lifting the heavy unit.
Tip: Tag the power cord and confirm the outlet is de-energized with a tester. - 2
Locate mounting location and ensure wall integrity
Find a solid wall section near the door opening. Use a stud finder to locate two adjacent studs at the intended mounting height and mark the center of each stud.
Tip: Avoid mounting on drywall alone; ensure studs or solid anchors are available. - 3
Attach wall-mount bracket to studs
Position the bracket so it is level, then drill pilot holes and run long screws into the studs. Tighten securely and recheck level before proceeding.
Tip: Use a level and never over-tighten; excessive force can strip wood. - 4
Mount the wall plate and check clearance
Install the wall plate or additional adapter as required. Verify there is ample clearance for the rail and that the plate sits flush against the wall.
Tip: Keep the area clean of obstructions that could snag the trolley. - 5
Mount the opener to the wall bracket
With a helper, lift the opener and align it with the wall bracket. Secure with hardware provided, ensuring the unit is square and stable.
Tip: Have a second person assist to avoid dropping the unit. - 6
Connect rail and trolley to the opener
Attach the rail to the main unit and ensure the trolley engages smoothly with the rail. Check for any binding or misalignment.
Tip: Do not force the rail; misalignment will cause wear. - 7
Install safety sensors and wiring
Mount safety sensors per manufacturer instructions. Route wires neatly and avoid pinch points near moving parts.
Tip: Test sensor operation with a hand-waved obstruction to verify safety response. - 8
Reconnect power and calibrate
Plug the system back in, set travel limits, and re-pair remotes or apps like MyQ. Run several cycles to confirm smooth operation and safety response.
Tip: If the door reverses unexpectedly, recheck limits and force settings.
Got Questions?
Is wall mounting compatible with all Chamberlain models?
Not all Chamberlain models support wall mounting. Check your model’s guidelines and use the official mounting kit for supported configurations.
Wall mounting is model-specific. Verify compatibility with the official guidelines and use the approved mounting kit.
Do I need to disconnect power during installation?
Yes. Always unplug and ensure there is no live current before handling wiring or mounting hardware.
Yes—disconnect power and verify there’s no electricity before starting.
How long does installation typically take?
Most homeowners complete the installation in about an hour to two hours, depending on wall type and experience.
Most installations take roughly one to two hours with proper planning and helpers.
Should I hire a professional for wall mounting?
If you’re uncomfortable with electrical work or heavy lifting, hiring a professional can ensure safety and proper alignment.
If you’re unsure about electrical or structural aspects, a professional is a good idea.
Will MyQ features work after wall mounting?
MyQ features can work if wiring, sensors, and rail alignment are correct and the connection to the app or remotes is re-established per instructions.
MyQ can still work when installed correctly and paired after mounting.
What are the key safety checks after installation?
Re-test auto-reverse, test the sensors, and verify travel limits and force settings are accurate. Make adjustments as needed.
Check auto-reverse, sensor function, and travel limits; adjust if needed.
Watch Video
Quick Summary
- Plan layout and verify wall strength beforehand
- Use manufacturer-approved mounting hardware
- Calibrate safety sensors and limits after install
- Test thoroughly and maintain regular checks