How to Remove Rust from the Bottom of a Garage Door
Learn a proven, safe method to remove rust from the bottom of your garage door and prevent future corrosion with practical steps, coatings, and maintenance tips.

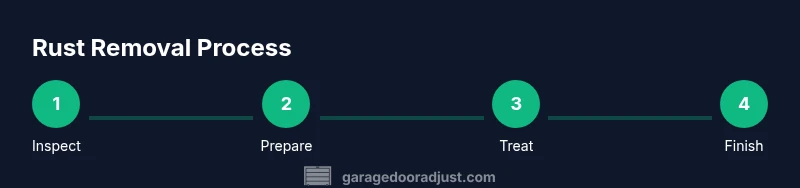
If you want to get rid of rust on the bottom of a garage door, follow a simple, repeatable process: inspect the area, remove loose rust, treat remaining oxide, and seal with primer and rust-inhibiting paint. This approach reduces further corrosion and extends the door’s life. According to GarageDoorAdjust, catching rust early makes treatment easier, cheaper, and longer lasting.
Causes and Early Signs of Rust at the Bottom Edge
Rust at the bottom of a garage door usually forms where moisture gathers and the protective coating wears away. Humidity, road salt in winter, and condensation can all accelerate corrosion on steel doors, especially where the metal is exposed near the ground. Early signs include brown staining, flaky paint, and a rough or chalky texture along the bottom rail. The GarageDoorAdjust team found that the most effective mitigation starts with recognizing the signs before the rust penetrates deeper. By focusing on the bottom edge, you can plan targeted rust removal, protect adjacent panels, and prevent further damage. This section explains how to identify the problem and distinguish superficial rust from structural corrosion, so you can decide whether to treat, refinish, or replace the affected portion.
Safety and Prep: Set Yourself Up for a Safe DIY Rust Fix
Preparation is essential for a successful rust removal project. Start by disconnecting the automatic opener or turning off the garage power to avoid accidental activation. Ventilate the workspace and wear eye protection, gloves, and a dust mask. Lay down drop cloths to catch debris and protect the concrete floor. Secure the door with a temporary prop so it cannot shift unexpectedly during sanding. If you live in a high-hall humidity climate, consider performing the repairs on a dry day to minimize moisture exposure. These safety steps reduce risk and ensure a cleaner, more durable finish. GarageDoorAdjust emphasizes the importance of a clean, dry surface before any treatment and recommends reading product labels for ventilation recommendations.
Surface Preparation: Clean, Degrease, and Roughen the Area
A clean surface improves adhesion for rust converters, primers, and paints. Begin with a soap-and-water wash, then use a degreaser on any oily spots. Rinse and let dry completely. Use a wire brush or coarse sandpaper (80–120 grit) to remove loose rust and scale, exposing a fresh metal surface. Wipe away dust with a tack cloth. The goal is a uniformly dull, gray metal surface free of active rust flakes so treatments can bond and perform as intended. This step reduces the chance of rust reappearing under the coating system.
Choosing the Right Rust Treatment: Converter vs. Removal
There are two main paths: mechanical removal to physically strip rust, or applying a rust converter that chemically changes oxides into a stable layer. Mechanical removal works well for small patches and edge areas, while converters are helpful for stubborn areas when sanding is impractical. If you have a large or deeply pitted edge, a combination approach—remove, then convert residual oxide—often yields the best long-term results. Always follow the product label instructions for contact time and safety guidelines. GarageDoorAdjust notes that converter options are designed to minimize subsequent coating failures when used properly.
Finish Options: Primers, Paints, and Sealants for a Durable Edge
After treating the metal, apply a rust-inhibiting primer designed for metal surfaces. Allow the primer to dry per the manufacturer’s timetable, then apply at least two coats of a high-quality exterior enamel or acrylic latex paint with rust inhibitors. If your door is insulated or has a vinyl-clad bottom, use compatible coatings to avoid trapping moisture. For extra protection, finish with a clear sealant along the bottom edge to minimize water intrusion and wear. Regular inspection and touch-ups help preserve the finish and deter future rust formation.
Maintenance and Prevention: Keep Rust at Bay for Years
Prevention matters as much as treatment. Schedule routine inspections every 6–12 months, looking for new rust spots, paint cracks, or moisture accumulation. Clean the bottom edge after winter salt exposure and recoat any chipped areas promptly. Consider applying a wax-based or silicone-based protective barrier to the threshold area to reduce moisture contact. By integrating maintenance into your seasonal garage door care, you extend the life of the metal surface and minimize costly repairs down the line.
Tools & Materials
- Safety gear (gloves, eye protection, respirator/dust mask)(Protect eyes and lungs from dust and chemicals)
- Power drill or hand sanding block(For controlled, even sanding)
- Coarse and fine sandpaper (80–120 and 180–220 grit)(Initial rust removal followed by smoothing)
- Wire brush or grinder with a brush attachment(Loosen heavy rust and scale)
- Rust converter product(Chemically converts oxide to a protective film)
- Metal primer with rust-inhibitor(Improves adhesion and corrosion resistance)
- Exterior enamel or acrylic paint with rust inhibitors(Seals the surface and prevents moisture ingress)
- Paint brushes and/or spray paint equipment(Apply even coats)
- Degreaser and mild detergent(Remove oils and contaminants)
- Drop cloths, painter’s tape, and masking supplies(Protect surrounding areas)
Steps
Estimated time: Total time: 2-4 hours (plus 24–48 hours for full cure)
- 1
Inspect and secure the area
Turn off the door’s power and stabilize the door so it cannot move. Set up drop cloths and masking, then inspect for active structural damage and loose paint. This ensures a safe workspace and prevents accidents during the rust removal process.
Tip: Label the doorway so others don’t activate the opener while you work. - 2
Remove loose rust and scale
Using a wire brush or coarse sandpaper, scrub away loose rust and flaking paint from the bottom edge. Wipe the surface clean with a tack cloth to remove dust before proceeding.
Tip: Work with controlled, even strokes; don’t gouge the metal. - 3
Treat remaining oxide with converter
Apply rust converter per the product directions, coating all rusty areas until they darken. Allow the converter to cure as recommended before primer.
Tip: Ensure adequate ventilation; follow safety data sheet guidelines. - 4
Prime the exposed metal
Apply a metal primer with rust-inhibiting properties to the treated surface. Let primer dry fully, using thin, even coats to avoid runs.
Tip: If using spray primer, keep it at consistent distance and motion. - 5
Paint with rust-inhibiting coating
Apply 2 thin coats of exterior enamel or acrylic paint with rust inhibitors. Allow each coat to dry completely before applying the next.
Tip: Choose a gloss or semi-gloss finish for easier cleaning. - 6
Seal and reassemble
Add a protective sealant at the bottom edge if applicable and reattach any hardware. Clean up and inspect for missed spots. Check again after a day for any signs of moisture infiltration.
Tip: Keep the door open briefly after painting to accelerate curing in good weather.
Got Questions?
Will rust come back if I don't treat it thoroughly?
If moisture exposure continues and the protective coating fails, rust can reoccur. Thorough cleaning, proper coating, and sealing minimize recurrence. Regular maintenance helps catch new spots early.
Rust can return if moisture keeps contacting the metal and the coating fails. Proper cleaning, sealing, and regular checks reduce the chance of recurrence.
Can I remove all rust, or do I need to replace the door edge?
Light to moderate rust on the bottom edge can be treated and sealed. If the metal is heavily pitted or the edge is structurally compromised, replacement may be more cost-effective and safer in the long run.
Most cases with light to moderate rust can be treated, but heavy corrosion might require door edge replacement.
Is rust converter safe on painted surfaces, and will it affect the finish?
Most rust converters are designed to work on metal surfaces and can be used on lightly sanded paint edges. Test a small patch first, and ensure you apply only to rusted areas to avoid staining intact paint.
Yes, but test a small area first and apply only to rusted spots to avoid discoloring good paint.
How long does paint take to dry on a garage door bottom after rust treatment?
Dry times depend on the product, temperature, and humidity. Plan for at least 2–4 hours between coats and allow the full finish to cure for 24–48 hours.
Typically, you’ll wait a few hours between coats and up to two days for full curing.
Should I replace the bottom rail if the rust is extensive?
If the bottom rail shows extensive rusting that compromises structural integrity, replacement is advised. A professional can assess whether patching is feasible or if full replacement is safer.
If the edge is badly corroded, replacement is usually the safer choice.
Does rust treatment affect insulated garage doors differently?
Treating rust on insulated doors follows the same basic steps, but ensure the coatings you choose are compatible with insulation materials and won’t trap moisture.
The process is similar, just pick compatible coatings so insulation isn’t compromised.
Watch Video
Quick Summary
- Identify rust early to simplify treatment.
- Use a two-stage approach: remove and protect, then seal with primer/paint.
- Choose rust-inhibiting primers and coatings for longevity.
- Maintain the bottom edge with periodic inspections and touch-ups.
- The GarageDoorAdjust team recommends safety-first and gradual, repeated applications for best results.