Best Way to Break Garage Door Rust: A Homeowner's Guide
Discover the best way to break garage door rust with a safe, step-by-step approach. Learn rust removal, protective coatings, and long-term maintenance for durable, rust-free doors.

Today’s quick answer: you can safely address rust on a metal garage door by a layered, non-destructive approach. Start with a thorough inspection, then remove loose rust with a wire brush, apply a rust converter or remover, sand smooth, and finish with a rust-inhibiting primer and topcoat. Ongoing maintenance will reduce future rust formation.
Why rust forms on garage doors
In exploring the best way to break garage door rust, homeowners learn that rust begins where moisture and salt meet exposed metal, especially at joints and hardware. Rust is iron oxide that forms when iron or steel surfaces are exposed to moisture, oxygen, and electrolytes. Garage doors face rain, humidity, and car exhaust, and areas where water collects in corners and seams are most vulnerable. According to GarageDoorAdjust, rust often starts at joints and hardware because those areas experience more moisture retention and abrasion. The GarageDoorAdjust team found that seal strips and poor drainage can trap moisture, accelerating corrosion over time. Left untreated, rust can lead to pitting that weakens the metal, creates rough surfaces that grab dirt, and causes hardware to seize or fail. Before you tackle rust, evaluate how widespread it is: surface rust appears as flaky paint or dull patches, while deep brown rust with bubbling metal signals more serious corrosion. If you see deep pitting or structural concerns, plan to replace affected panels or consult a pro. Good rust control begins with understanding the problem and setting realistic goals for restoration versus replacement.
tip":"Assess the rust in at least two areas (top edge and hinge region) to determine if it’s surface rust or deep corrosion."
number":1},
Tools & Materials
- Wire brush or heavy-duty steel brush(Use a stiff-bristle brush to knock loose rust without grinding the metal.)
- Sandpaper or a sanding block(Grain sizes 80-120 for initial rust removal, then 220-320 for smoothing.)
- Rust remover or rust converter product(Choose a chemical designed for metal rust; test on a small area first.)
- Protective gloves(Nitrile or leather gloves to protect hands from sharp edges and chemicals.)
- Safety glasses or goggles(Eye protection is essential when brushing or sanding.)
- Respirator or dust mask(Protect lungs from fine rust dust and chemical fumes.)
- Paint with rust-inhibiting primer and topcoat(Use a rust-inhibiting primer followed by a UV-resistant topcoat.)
- Painter’s tape and drop cloths(Contain the work area and protect adjacent surfaces.)
- Solvent or degreaser(Clean metal surface before priming to improve adhesion.)
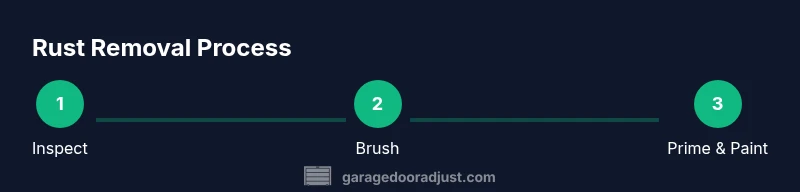
Steps
Estimated time: 60-120 minutes
- 1
Inspect and secure the area
Assess the extent of rust, check for structural damage, and clear the work area. Document areas that require attention and set up drop cloths to protect nearby surfaces. Explain the plan to everyone in the household and ensure kids and pets are out of the workspace.
Tip: Start with a clean, well-lit area so you don’t miss hidden rust spots. - 2
Mask and protect yourself
Put on gloves, goggles, and a respirator if using chemical rust removers. Protect surrounding metal, wood trim, and concrete with painter’s tape and drop cloths to prevent accidental staining.
Tip: Ventilate the area well to avoid inhaling fumes. - 3
Remove loose rust
Use a wire brush to knock off loose rust and flaking paint from the affected areas. Work in small sections to keep control and avoid gouging the metal.
Tip: Always brush with steady, downward strokes to avoid scattering debris. - 4
Apply rust remover or converter
Follow the product instructions to apply the rust remover or converter. Allow the recommended dwell time for the chemical to work on the rust before moving to the next step.
Tip: Do a small test patch first to confirm compatibility with your door finish. - 5
Sand and smooth the surface
After chemical treatment, sand the area to a smooth metal surface. Remove all residues and wipe with a clean cloth before priming.
Tip: Finish with fine grit to avoid leaving deep scratches that show through paint. - 6
Prime and paint
Apply a rust-inhibiting primer, then two coats of a high-quality exterior paint designed for metal. Allow proper curing time between coats for best adhesion.
Tip: Lightly sand between coats for better bonding. - 7
Apply protective coatings to hardware
Treat hinges, tracks, and other exposed hardware with a protective coating or lubricant after painting to reduce future corrosion risk.
Tip: Use a silicone-based or lithium-grease product for long-lasting lubrication. - 8
Clean up and recheck
Remove masking, clean tools, and inspect the door after 24–48 hours for any missed rust spots. Re-treat as needed to prevent reoccurrence.
Tip: Set reminders to inspect rust-prone areas seasonally.
Got Questions?
What is the difference between surface rust and deep rust on a garage door?
Surface rust sits on the top layer and is usually removable with brushing and sanding. Deep rust involves pitting and corrosion that may threaten structural integrity and often requires more extensive repair or panel replacement.
Surface rust is typically removable with brushing and sanding, but deep rust may need panel replacement.
Can I use household products to remove rust, or should I buy professional rust removers?
Many household items can help with rust removal, but commercial rust removers are generally more effective and calibrated for metal finishes. Always test on a small area first and follow the product instructions.
You can start with household options, but for heavy rust, a purpose-made rust remover is usually better.
How often should I inspect for rust on a garage door?
Inspect for rust at least twice a year, aligning with seasonal changes. Focus on joints, hinges, and weather-stripped areas where moisture can accumulate.
Check your door twice a year, especially after wet seasons.
Will rust removal affect my warranty or the door finish?
Some warranties may require professional service for rust-related issues or using approved products. Always check your door’s warranty terms before doing major work.
Check the warranty first; some rust work might affect coverage.
Is rust removal safe on all door materials (steel vs aluminum)?
Steel is prone to rust; aluminum forms oxide but resists corrosion differently. Always tailor your approach to the metal type and use compatible products.
Steel rusts more than aluminum; pick products that suit your metal.
What safety steps are essential when removing rust?
Wear PPE, work in a well-ventilated area, and follow chemical product instructions. Keep pets and children away from the workspace.
Wear protection, ventilate, and follow the product directions.
Watch Video
Quick Summary
- Inspect rust thoroughly before acting
- Choose the right rust removal method for your door material
- Prime and coat promptly to prevent re-rust
- Maintain a seasonal rust-check schedule to catch early warning signs