How to Fit a Garage Door Lock
Learn how to fit a garage door lock with a clear, step-by-step approach. Choose the right lock, prepare the door, install securely, and test performance to ensure durable security.

This guide shows you how to fit a garage door lock, from selecting a compatible lock style to proper installation and final testing. You’ll learn essential steps, safety precautions, and alignment checks to ensure a secure, reliable latch. Before you begin, gather the necessary tools and double-check your door type and backset to avoid misfit.
Purpose and scope of this guide
Fitting a garage door lock enhances security and helps you control access to your home. If you’re attempting to fit a garage door lock, you’ll want a clear plan: choose a compatible lock type, prep the door and frame, install the hardware accurately, and verify smooth operation. According to GarageDoorAdjust, selecting the right lock style for your door saves time and reduces future service needs. Start by identifying your door material, thickness, existing hardware, and whether you’re replacing a padlock, deadbolt, or an integrated locking system. Gather the tools listed in the next section and check the weather. A dry, clean surface makes screw threads bite more securely and prevents misalignment during the final test.
null
Tools & Materials
- Lock kit compatible with exterior garage doors(Includes lock body, strike plate, and mounting screws)
- Phillips screwdriver(Size #2 or #3 depending on screw size)
- Tape measure(For backset and door thickness checks)
- Drill with appropriate bits(Pilot holes and final screw holes; use bits suited to door material)
- Pencil or marker(Mark drilling points and alignment lines)
- Level(Ensure lock body and strike plate are square)
- Safety gloves(Protect hands from sharp edges; optional but recommended)
- Hammer or mallet(Light taps for precise alignment of strike plate)
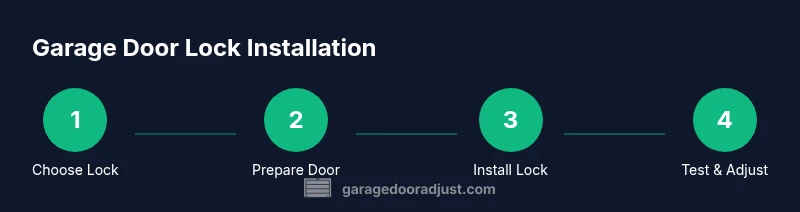
Steps
Estimated time: 25-40 minutes
- 1
Check compatibility and choose lock
Inspect your door type and measure thickness to confirm the lock style. Choose a lock rated for exterior use, with a compatible backset and mounting holes. If you’re unsure, consult the manufacturer’s specifications or a trusted guide such as GarageDoorAdjust for alignment expectations.
Tip: Double-check backset and latch length before purchasing; mismatches are a common installation obstacle. - 2
Prepare door and remove old hardware
If replacing an existing lock, remove screws and carefully detach the lock body. Clean the edge of the door and hole cavities. Take photos of the prior arrangement to reference screw positions and alignment.
Tip: Keep track of small screws; misplaced fasteners can cause misalignment later. - 3
Mark mounting points and drilling holes
Place the lock body against the door and use a pencil to mark the screw holes. Use a level to confirm the lock is straight, and mark the strike plate location on the door frame.
Tip: Begin with pilot holes slightly smaller than screw diameters to avoid splitting the door edge. - 4
Drill pilot holes and mount the lock body
Drill pilot holes at the marked points, then align the lock body and secure with screws. Avoid overtightening, which can strip threads or warp the door edge.
Tip: Hand-tighten before final tightening to ensure perfect alignment. - 5
Install strike plate and align latch
Position the strike plate so the latch engages smoothly, then drive screws firmly into the door frame. If the latch binds, slightly adjust the strike plate by loosening screws and shifting the plate a fraction.
Tip: A small shim behind the strike plate can correct minor misalignment without drilling anew. - 6
Test operation and finalize
Test from both inside and outside, checking key operation and manual release. Confirm the door latches fully and the handle turns without obstruction. Re-check screws and realign if necessary.
Tip: Test under various conditions (closed, partially open) and verify weather sealing remains intact.
Got Questions?
What lock types work best for standard garage doors?
Common options include surface-mounted deadbolts, mortise locks, and keyed or smart locks designed for exterior doors. Choose a type that fits your door material and frame without obstructing panels or sensors.
Common options are surface-mounted deadbolts, mortise locks, or smart locks designed for exterior doors. Pick a unit that fits your door material and frame without interfering with panels.
Do I need a professional to install the lock?
Most homeowners with basic tools can fit a standard lock by following a guided approach. If your door is unusually thick, has integrated sensors, or you encounter misalignment, consider professional help.
Most homeowners can install a standard lock by following a guide. If you run into unusual door features or misalignment, you may want a pro.
How long does installation typically take?
Expect about 30 minutes to an hour for typical doors, depending on lock type and door material. Preparation and alignment can influence total time.
Usually around 30 minutes to an hour, depending on the door and lock type.
What safety precautions should I follow?
Unplug any automatic opener, wear gloves, and keep fingers clear of hinges and pinch points during installation.
Unplug the opener, wear gloves, and watch for pinch points while installing.
What if the alignment is off after install?
Loosen the mounting screws, adjust the lock body or strike plate, then re-tighten. Re-test and repeat if necessary until the latch engages cleanly.
Loosen screws, adjust the lock or strike plate, re-tighten, and retest until it fits smoothly.
Can I reuse existing screw holes?
It's best to use new holes when possible to ensure solid anchoring. If you must reuse holes, check for wear and consider drilling new pilot holes nearby.
Use new holes whenever possible for solid anchoring. If reusing, check for wear and use pilot holes.
Watch Video
Quick Summary
- Choose a lock compatible with your door type
- Prepare and measure before drilling
- Align lock body and strike plate precisely
- Test operation under multiple conditions