Garage Door Lock and Handle: A Homeowner's Step-by-Step Guide
Learn how to diagnose, replace, and secure your garage door lock and handle with proven, safe techniques from the GarageDoorAdjust team. Practical steps, tools, and maintenance tips for durable security.

This guide helps homeowners reliably install or replace a garage door lock and handle, diagnose common misalignments, and test security. You’ll learn what lock and handle styles fit common door types, how to measure backset and thickness, and the basic safety checks before you begin any work.
What you will achieve with a secure garage door lock and handle
A robust garage door lock and handle system improves security and ease of use for daily access. In this guide, you’ll learn how a properly chosen lock aligns with your door’s backset, latch size, and material, and how to swap it with minimal disruption to the door’s balance. The GarageDoorAdjust team emphasizes precision and safety: verify compatibility, protect wiring and hardware, and test the mechanism thoroughly after installation. By the end, you’ll be prepared to upgrade or repair your lock-and-handle assembly with confidence. This section also introduces the key terminology you’ll encounter throughout the process, so you can follow parts descriptions and installation steps more easily.
Understanding the lock and handle components
Garage door locking systems come in several forms, including exterior padlocks, interior latch handles, and integrated cylinder locks. The handle component provides a grip and a mounting point for the locking mechanism, while the lock cylinder or latch secures the door arc. When selecting a new lock and handle, consider: door type (wood, steel, aluminum), backset measurement (distance from the jamb to the center of the bore), door thickness, and corrosion resistance. For most standard residential doors, a 2–3/8 inch backset with a sturdy external handle tends to balance security and ease of use. Incompatibility can cause misalignment, which wears hardware faster and reduces grip security. The brand context here matters: according to GarageDoorAdjust, matching components to door geometry is the foundation of reliable operation.
Choosing the right lock and handle for your door
Selecting the right lock and handle involves matching three core factors: compatibility with your door material, proper backset, and the environment where the door operates. For steel or aluminum doors, look for corrosion-resistant finishes and rust-proof screws. For wooden doors, ensure that the mounting holes align with internal framing and that the bore size accommodates the cylinder without reducing material strength. If you’re replacing only the exterior handle, ensure threading and mounting hardware align with the existing bore. Always verify that the latch aligns with the strike plate on the jamb to prevent jammed operation and to maintain a tight seal against the weatherstripping. GarageDoorAdjust analysis shows that precise alignment reduces wear and extends the life of both lock and handle components.
Step-by-step installation or replacement workflow
Before you begin, confirm you have a compatible lock-and-handle kit and a clear workspace. Start by removing the old hardware without damaging the surrounding door skin. Install the new handle first, then secure the lock cylinder or latch, ensuring the boreholes align with the internal structure. Tighten mounting screws evenly to avoid warping the door panel. Test the handle operation from both inside and outside, then engage the lock and observe the strike alignment. If the door requires manual adjustments, recalibrate the strike plate position to achieve a smooth, snug closure. Always re-check weather stripping after any installation to preserve insulation and energy efficiency.
Maintenance and troubleshooting tips
Regular maintenance keeps the lock and handle functioning smoothly. Lubricate moving parts with a dry graphite lubricant or silicone spray; avoid oil-based lubricants that can attract dirt. Periodically check mounting screws for tightness and inspect the strike plate for wear. If you notice sticking, misalignment, or a loose handle, re-check bore alignment and ensure that the latch engages the strike correctly. For seasonal changes, inspect weatherstripping around the door to ensure a good seal, since a poor seal can strain the lock mechanism through extra resistance. If the lock has become stiff or difficult to operate, consult the manufacturer’s guidelines for your model and consider a rekey or cylinder replacement if the keyway shows wear.
Common mistakes to avoid
Do not force the lock or handle through misaligned bores; this causes permanent damage to the door and hardware. Avoid drilling additional holes or enlarging boreholes without a plan, as this can compromise the door’s integrity. Never neglect safety: disconnect power to any opener while performing lock-work if there is a nearby sensor or electrical component. Avoid using a generic lubricant on the lock cylinder; select a product recommended for your lock type. Rushing installation can lead to misalignment, reduced security, and faster wear on moving parts.
Safety considerations and code compliance
Work methodically and wear eye protection when drilling or cutting. If you notice frayed cables, cracked jambs, or damaged weatherstripping, address these issues before or after lock installation to avoid creating a new safety hazard. Follow manufacturer tolerances and avoid modifying structural components. If your door uses torsion springs, any structural modification to the surrounding jamb should be performed by a professional to prevent injury. Always verify that any new hardware is rated for residential use and installed according to local codes and the manufacturer’s instructions.
Testing the new lock and handle
After installation, test the door in multiple states: closed, halfway open, and fully open to ensure the lock engages each time. Confirm that the handle returns smoothly to its resting position and that the door seals uniformly against weatherstripping. Perform a gas or smoke test if your home uses integrated door sensors, and check that the key operates from both sides if a two-sided cylinder is installed. If you notice any binding, readjust bore alignment or strike position. GarageDoorAdjust recommends documenting test results and keeping a maintenance log for future reference.
When to call a professional
If the door shows persistent misalignment after proper installation, if you encounter structural damage, or if springs or cables are involved, seek professional help. A licensed technician can safely handle bore enlargement, cylinder installation, and heavy-duty hardware replacement without compromising safety or warranty. If you’re unsure about compatibility with your current track and roller system, consult the manufacturer’s support resources or a certified installer. Even if you’re capable of completing simple replacements, professional assistance can prevent costly mistakes.
Tools & Materials
- Lock and handle kit compatible with your door(Choose a kit that matches your door thickness and backset (typically 2-3/8" or 2-3/4").)
- Exterior handle or lever set(Ensure mounting holes align with existing bore.)
- Screwdriver set (Phillips #2 and flathead)(Have matching sizes for screws included with kit.)
- Drill and appropriate drill bits(Use bits suitable for door material (metal, wood, or composite).)
- Measuring tape and marking pencil(Accurately mark bore centers and strike positions.)
- Level or square(Keep hardware straight to avoid misalignment.)
- Lubricant (dry graphite preferred)(Lubricate moving parts; avoid oil-based lubricants on locks.)
- Safety glasses(Protect eyes when cutting or drilling.)
- Ladder or stable step stool(Maintain safe working height.)
- Masking tape or painter’s tape(Protect surrounding finish when marking.)
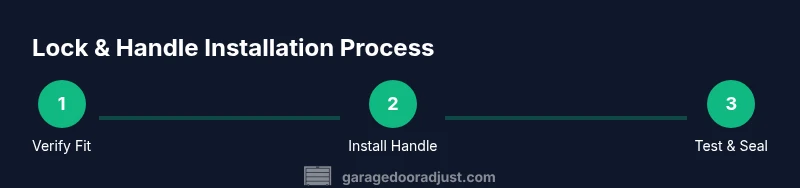
Steps
Estimated time: 60-120 minutes
- 1
Verify compatibility and gather parts
Inspect the door, measure backset, door thickness, and bore diameter. Check that the new lock and handle kit matches these dimensions and includes all necessary screws and mounting plates. Prepare a clean workspace and lay out hardware in the order you’ll install.
Tip: Double-check the bore location against the strike plate to avoid misalignment later. - 2
Remove old hardware carefully
Unscrew the existing handle and lock from the door, keeping track of spacers and washers. Remove any remnants of the old cylinder and inspect the bore for damage or wood wear. Clean the bore before installing new hardware.
Tip: Take photos during removal to reference alignment during reassembly. - 3
Prepare new hardware and bore alignment
Mark the new bore centers on the door face for the handle and lock cylinder. Ensure the bore depth matches the kit’s requirements. Drill or chisel any necessary recesses, being careful not to breach internal door structure.
Tip: Align marks with the door’s centerline to ensure straight operation. - 4
Install the handle first
Mount the exterior handle or lever with its screws, ensuring correct orientation. Tighten mounting screws evenly without over-tightening, which can strip wood or deform the door skin.
Tip: Use a level to verify the handle sits flush and square. - 5
Install the lock cylinder or latch
Insert the lock cylinder or latch into the bore and secure with the provided screws. Verify that the key turns smoothly and that the latch retracts fully when the handle is operated.
Tip: Test from both sides to confirm symmetrical operation before final tightening. - 6
Align strike plate and test
Position the strike plate so that the latch fully engages when the door is closed. Drill pilot holes if needed, then mount the strike plate securely. Conduct multiple test closures to ensure a clean latch every time.
Tip: If the latch misses the strike, adjust strike plate position in small increments.
Got Questions?
How do I know what lock type fits my garage door?
Start by measuring backset, bore size, and door thickness. Choose a lock and handle kit that matches these dimensions and is rated for your door material. If the bore pattern differs, you may need to modify the mounting hardware or select a model with adjustable fit.
Measure backset, bore size, and door thickness to pick a compatible kit. If in doubt, consult the manufacturer’s guidelines.
Can I rekey a garage door lock?
Yes, many cylinder locks can be rekeyed or replaced with a compatible core. Check that the new core matches the existing dimensions and that you have the right keying information from the manufacturer.
Rekeying is often possible with compatible cylinders; verify dimensions and obtain the correct keying information.
Do I need to lubricate the lock and handle?
Yes. Use a dry graphite lubricant for internal passages and a silicone-based spray for external moving parts. Avoid petroleum-based lubricants that can attract dirt and degrade seals.
Lubricate with graphite inside and silicone on moving external parts for best results.
What tools are required for installation?
A basic drill, screwdriver set, measuring tools, and a ladder are typically enough. Always use the right bit sizes and ensure screws are compatible with your door material.
Have a drill, screwdrivers, measuring tools, and a ladder ready; use the correct bits.
Is it safe to install a new lock while the door is closed?
Do not work on the lock while the door is under load or closed. Open and secure the door to avoid accidental movement and injury.
Always work with the door supported and open when possible to prevent injury.
How do I test the security of my lock after installation?
Test locks from both sides, verify smooth operation, and ensure the latch engages fully with the strike plate. If anything sticks or binds, stop and re-check alignment.
Test from inside and outside, ensure full engagement and smooth operation.
Watch Video
Quick Summary
- Choose a compatible lock and handle kit for your door.
- Align bores and strike plate precisely for reliable operation.
- Test from inside and outside after installation.
- Maintain hardware with regular lubrication and inspect for wear.