Lock for Garage Door: A Step-by-Step DIY Security Guide
Learn how to select, install, and maintain a reliable lock for your garage door with practical steps, safety tips, and maintenance guidance from GarageDoorAdjust.

This guide helps homeowners select and install a reliable lock for their garage door, troubleshoot common lock failures, and upgrade to a secure system. You’ll learn how to identify compatible lock types, verify door alignment, and perform a safe, DIY-rated installation or recognize when professional help is needed for best results.
Why a strong lock for garage door matters
A secure lock for the garage door is a critical layer of home defense. Even when you have a sturdy exterior door and an operational automatic opener, a reliable lock reduces the chance that an intruder can gain entry through the garage. The GarageDoorAdjust team emphasizes that focusing on the lock hardware is often a cost-effective path to higher overall security. In addition to deterring break-ins, a well-chosen lock makes it easier for you to manage access, especially if you have multiple residents or frequent service visits. When you start with the right lock for garage door, you also improve weather sealing and reduce wear on the door’s latch and track, prolonging the life of the system. This guide uses practical, homeowner-friendly language and steps to help you avoid common missteps and ensure safe operation.
Lock types and how they work
There are several categories of locks that can secure a garage door, and understanding how they operate helps you pick the right solution for your setup. Mechanical locks, such as keyed deadbolts and hasps, provide physical resistance to forced entry and don’t rely on power. Electronic or smart locks offer keyless access and audit trails, but they require a power source and sometimes a compatible opener or hub. Some garages use padlocks or retrofit bolts that swing into place when the door is closed, while others rely on integrated locking mechanisms inside the opener unit. When selecting a lock for garage door, consider whether you want a purely mechanical solution, a smart lock that integrates with your home system, or a hybrid that combines convenience with a physical barrier. Always verify compatibility with your door material (wood, steel, or composite), track design, and frame construction.
Compatibility and choosing the right lock
To choose the right lock for garage door, you must assess door material, track type, spring configuration, and how the door is mounted. Wood doors may allow easier drilling and screw mounting, while metal doors require corrosion-resistant hardware and possibly different strike plates. If your garage already has an automated opener, ensure the lock integrates without hindering the motor or limit switches. Consider weather exposure and UV resistance for exterior hardware, and prefer heavy-duty hardware with corrosion-resistant finishes for longevity. Finally, evaluate security features such as anti-drill plates, reinforced strike plates, and tamper-resistant screws. The goal is a lock that fits securely, is easy to operate, and remains functional after seasonal temperature changes.
Tools and prep before installation
Gather the right tools before you start. A well-prepared project reduces frustration and helps you stay safe. You’ll likely need a drill with appropriate bits, screwdrivers (Philips and flat-head), a measuring tape, a pencil for marking, a level, safety glasses, and the lock kit itself. If you’re upgrading an existing locking solution, you may need a chisel for engraving or adjusting strike plates, and possibly a Dremel for beveling. Read the lock manufacturer’s instructions for any model-specific requirements, and plan your mounting location to minimize interference with the door’s travel path. Pre-clean and dry-fit parts to confirm alignment before drilling holes.
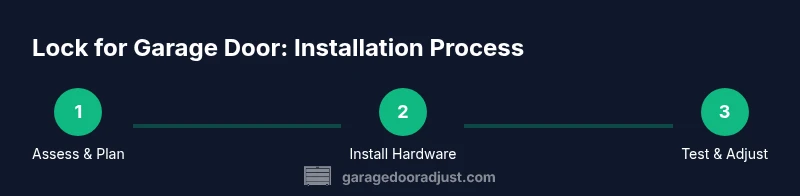
Step-by-step installation basics and troubleshooting
The installation process for a garage door lock varies by model, but the core steps are similar: measure and mark, mount the lock body, attach the strike plate, align and test, and finalize. Loose or misaligned hardware can make the lock difficult to operate or compromise security. If you encounter stubborn fit or binding, recheck hinge alignment and ensure the lock does not contact the door or track when the door moves. Take your time with each step to avoid stripping screws or creating misalignment that could void warranties. Remember to disconnect power if you’re integrating a smart lock with the opener during the process.
Maintenance, troubleshooting, and common issues
Regular maintenance keeps the lock reliable long after installation. Clean the exterior with a damp cloth and dry thoroughly to remove dust and debris, lubricate moving parts with a dry silicone spray or light machine oil, and check screws for tightness every few months. If you notice sticking, misalignment, or a stubborn key, inspect the mounting screws and strike plate, then adjust as needed. In some cases, especially in climates with extreme temperatures, expansion and contraction can affect fit; in these cases, a longer screw or a slightly looser strike plate may be required. If you cannot resolve a persistent issue, consult a professional to avoid damaging the door frame or lock hardware.
Authority sources and further reading
For solid, independent guidance on garage safety and hardware standards, refer to credible sources such as the U.S. Consumer Product Safety Commission and National Institute of Standards and Technology. These organizations provide safety guidelines and performance standards that underpin practical lock installation recommendations. Always verify model-specific instructions from manufacturers and consider professional installation for complex setups. See the following references for further reading:
Tools & Materials
- Lock kit for garage door(Choose a lock rated for exterior use; verify compatibility with your door type (wood, steel, etc.) and mounting pattern.)
- Drill with appropriate bits(Use pilot bits for metal or wood; keep drill at a right-angle to avoid mis-drilling.)
- Screwdrivers (Phillips and flat-head)(Have both sizes on hand for different screw types.)
- Measuring tape and pencil(Mark mounting locations precisely; double-check before drilling.)
- Level(Ensure lock body sits square to the door frame to prevent binding.)
- Safety glasses(Protect eyes when drilling or grinding.)
- Weather-resistant strike plate and screws(Upgrade to reinforced strike plate if installing on exposed exterior area.)
- Silicone or graphite lubricant(Lubricate moving parts; avoid oil-based lubricants on exposed hardware.)
Steps
Estimated time: 60-90 minutes
- 1
Inspect door and mounting area
Check the door type (wood, steel, or composite) and the existing locking points. Confirm there is space for the new lock body and that mounting holes won’t interfere with tracks or hinges. This step ensures you won’t drill into critical components, and it helps you plan the exact hole pattern.
Tip: Measure twice and mark with a pencil before drilling to avoid misalignment. - 2
Mark mounting locations
Use the lock’s template or manufacturer instructions to mark the exact locations for mounting screws. Double-check that these marks align with the door edge and that the strike plate will align with the frame when the door is closed.
Tip: Use a level to ensure the lock body will sit square on the door. - 3
Drill pilot holes and mount the lock body
Drill pilot holes at the marked locations. If mounting into wood, pre-drill with a slightly smaller bit to prevent splitting. Insert screws and tighten until the lock body sits flush and secure, avoiding overtightening which can strip the wood.
Tip: Work slowly and keep the drill perpendicular to the surface for clean holes. - 4
Attach strike plate and align
Position the strike plate on the door frame so that the lock bolt engages smoothly when closed. Secure it with screws and adjust for any binding. This step is critical for reliability and security.
Tip: If the door isn’t closing perfectly, micro-adjust the strike plate by loosening screws slightly and sliding the plate. - 5
Reconnect to door opener (if applicable)
If you use an automatic opener, ensure the new lock does not interfere with the opener’s limit switches or sensors. Physically test unlocking and locking from both inside and outside to verify consistent operation.
Tip: Disconnect power only if the lock upgrade requires wiring; otherwise, leave power on and follow manufacturer steps. - 6
Test lock operation and adjust
Fully operate the lock several times to confirm smooth engagement and disengagement. Check for binding at any point in the travel path and recalibrate alignment as needed. Ensure weather seals remain intact.
Tip: Lubricate moving parts lightly if you notice sticking after several uses.
Got Questions?
What is the best type of lock for a standard wooden garage door?
For wooden doors, a mechanical lock with a reinforced strike plate and sturdy mounting screws is generally reliable. If you want remote access, consider a smart lock that integrates with your opener, but ensure it’s rated for exterior use and weather resistance.
For wooden doors, start with a solid mechanical lock and reinforced strike plate. If you need smart features, choose a weather-rated option compatible with exterior doors.
Can I install a lock on a steel garage door?
Yes. Steel doors require hardware designed for metal, with corrosion-resistant finishes and proper anchoring to the frame. Ensure the strike plate aligns with the door frame and use appropriate screws meant for metal.
Yes, steel doors can have a lock installed with metal-friendly hardware and proper anchoring.
Do I need to disable power to the opener before installation?
If you’re not modifying the opener’s wiring, you typically do not need to power down the system. If you’re wiring a smart lock, follow the manufacturer’s safety guidelines. When in doubt, unplug the opener before opening the panel.
Usually you don’t have to power down the opener, but always follow the lock’s instructions for any wiring work.
How long does installation take for a DIYer?
Most DIYers complete a garage door lock installation in 60 to 90 minutes, depending on door material and whether you’re upgrading the strike plate. Rushing can lead to misalignment or loose screws.
Most people spend about an hour to an hour and a half on this, depending on the door and hardware.
What maintenance does a garage door lock require?
Inspect monthly for looseness or misalignment, clean debris, and lubricate moving parts every few months. Replace worn screws or plates and test the lock operation after weather changes.
Keep it clean, check alignment, and lubricate moving parts every few months.
Is a smart lock worth it for a garage door?
Smart locks offer convenience and logging of entries but require power and connectivity. They’re most valuable when paired with a reliable opener system and proper maintenance of the door hardware.
Smart locks add convenience and logs, but make sure you have reliable power and compatibility.
Watch Video
Quick Summary
- Choose a lock for garage door that matches door material and exposure.
- Follow the manufacturer’s installation template for precise mounting.
- Verify alignment and test the lock from inside and outside.
- Maintain the lock with periodic lubrication and inspection.