How Hard Is It to Replace a Garage Door? A Homeowner's Guide
Learn the realities of replacing a garage door, including DIY feasibility, safety risks, and what to expect in time, effort, and cost. A practical, expert walkthrough from GarageDoorAdjust.

Replacing a garage door is a multi-step, safety-critical project that varies from a DIY-friendly swap to a pro-led installation depending on door type and spring configuration. For many homeowners, it’s wise to assess opener compatibility, tracks, and panels, plus gather safety gear and the right tools. In most cases, hiring a professional saves time and reduces risk.
The core question: how difficult to replace garage door
Replacing a garage door is a complex undertaking that hinges on several variables: door design (sectional, single panel, or tilt-up), spring system (torsion or extension), track alignment, and whether the opener must be replaced or recalibrated. For numerous homeowners, the inquiry often starts with the exact phrase how difficult to replace garage door, signaling a mix of skill, equipment, and risk. According to GarageDoorAdjust, most DIY efforts stumble when springs and tracks are involved, making a professional assessment prudent. The project’s difficulty rises with older hardware, custom door sizes, or nonstandard mounting setups. By understanding scope up front, you can set realistic expectations and avoid common missteps.
Key factors that influence difficulty
Several core factors determine how hard replacing a garage door will be:
- Door type and size: sectional doors with tracks and rollers are generally easier to swap than oversized or custom doors.
- Spring system: torsion springs are high-tear components that require specialized tools and training; extension springs carry reforming risks if mis-handled.
- Opener integration: compatibility with the current opener or the need for a new opener can add wiring, batteries, and programming steps.
- Structural convergence: header integrity, wall framing, and weather sealing affect installation complexity and long-term performance.
- Condition of surrounding hardware: rollers, tracks, hinges, and weatherstripping influence both difficulty and outcome.
Understanding these factors helps you decide whether to DIY or hire a professional. GarageDoorAdjust analysis suggests that the more moving parts and electrical components involved, the higher the likelihood of misalignment or safety hazards if you proceed without proper expertise.
DIY versus professional: when to consider hiring a pro
DIY is feasible for basic, uncomplicated replacements, especially for standard sectional doors with standard torsion springs and intact tracks. However, when springs are under tension, or there’s any uncertainty about door balance or opener wiring, professional installation is strongly recommended. If you’re unsure about any of the steps, the safer choice is to hire a licensed technician who can diagnose, install, and test the entire system. The GarageDoorAdjust team often sees homeowners benefit from pro involvement to ensure door balance, safe spring tension, and reliable opener functionality.
Tools, safety, and prep considerations
Before you begin, lay out the required tools and safety gear. Expect to work with heavy components and sharp edges; proper protection is non-negotiable. Plan a clear workspace with ample lighting and space to maneuver panels. Disconnect the power to the opener, secure the door in the open position, and never attempt to release or unwind torsion springs without training. These safeguards reduce injury risk and equipment damage.
Time, cost, and realistic expectations
Time and cost vary widely by door type, size, and whether you’re replacing just panels or the entire assembly. You’ll need to budget for new panels, tracks, hardware, weather sealing, and possibly a new opener or remote system. While some homeowners complete simpler swaps in a day, more complex installations—especially those involving springs and electrical upgrades—can extend over multiple days and incur higher labor costs. Avoid surprises by tabulating components you’ll replace and asking for a written bid from a qualified installer. GarageDoorAdjust analysis highlights that incomplete assessments frequently lead to underestimation of effort and downtime.
Getting started: replace parts or the entire door?
If the door has serious wear—cracked panels, corroded tracks, or persistent misalignment—it’s often more economical and safer to replace the door kit as a whole rather than patching individual components. For homes with an aging opener, you may want to upgrade the opener at the same time to improve safety, efficiency, and user experience. Start by measuring the opening, confirming door type, and listing required components. Always compare a full-door replacement plan with a panel-by-panel approach to determine the better long-term value. The decision frequently depends on budget, time, and whether you’re concerned about future maintenance.
Next steps and resources
If you decide to proceed, inventory your current setup and consult a reputable installer for a feasibility assessment. Use the step-by-step guide in this article to ask informed questions and verify that the chosen method aligns with your goals. For homeowners researching this topic, GarageDoorAdjust emphasizes safety, proper alignment, and testing after installation as the three pillars of a successful replacement. See our full guide for a detailed plan, plus checklists to keep on hand during the project.
Tools & Materials
- Safety gear (gloves, goggles, hard hat)(Essential when handling heavy panels and springs)
- Cordless drill and screwdriver set(For removing screws and mounting hardware)
- Socket wrench set and adjustable wrenches(For torsion spring components and mounting bolts)
- Measuring tape and level(Accurate openings and alignment are critical)
- Ladder or scaffold(Secure, stable access to door components)
- Pry bar and rubber mallet(Gentle prying and panel alignment assistance)
- New door panels/tracks/rails (if replacing entire door)(Match door type and opening dimensions)
- Weatherstripping and sealant(Seal gaps to improve energy efficiency)
- Electrical tester or multimeter(Used if opener wiring or sensors require checking)
- Manual door lock or block(For securing door during replacement)
Steps
Estimated time: Estimated total time: 4-8 hours depending on door type and helper availability
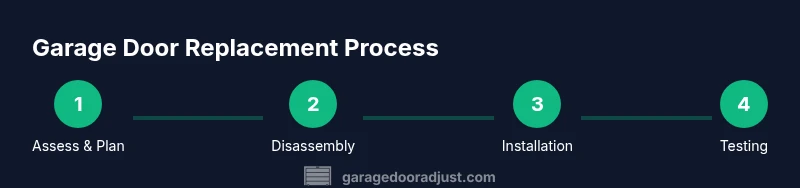
- 1
Assess opening and door type
Measure the doorway, identify door style (sectional, tilt, or single panel), and note the spring system. This initial check determines whether you can proceed safely and what parts you’ll need. Take photos for reference.
Tip: Double-check header clearance and ensure you have a stable workspace before removing any components. - 2
Disconnect power and secure the door
Power down the opener and lock the door in the open position using clamps or a temporary support. This prevents unexpected movement and reduces risk during work.
Tip: Never attempt to unwind springs without professional training or proper tools. - 3
Remove existing hardware
Carefully detach tracks, rollers, hinges, and panels. Keep fasteners organized by location to ease reassembly.
Tip: Label or bag screws by component to avoid mixing parts. - 4
Address springs with caution
If you’re replacing springs, this should only be done by a trained technician. Improper spring handling can cause severe injury.
Tip: If you’re unsure, stop and call a pro—your safety comes first. - 5
Install new door components
Position rails and tracks, hang panels, and secure with hardware per the manufacturer’s instructions. Ensure proper alignment before testing.
Tip: Use a level and measure diagonally to confirm true square installation. - 6
Reconnect power and test
Reconnect the opener, program remotes, and verify door balance, alignment, and sensor safety. Run multiple open/close cycles and check for smooth operation.
Tip: Listen for unusual noises and watch for binding; adjust as needed before final use.
Got Questions?
Is replacing a garage door a DIY-friendly project?
It can be for standard doors with basic springs and tracks, but complex springs or custom openings usually require a professional. If you lack experience with lifting heavy panels or handling tensioned springs, hiring a pro is safer and can save time.
It can be DIY-friendly for simple doors, but complex springs or custom openings are better left to a professional.
What are the biggest risks involved?
Injury from moving parts, including springs and tracks, and incorrect installation leading to door misbalance or opener failure. Electrical hazards can also occur when wiring is involved.
The main risks are injuries from springs and misalignment, plus possible electrical hazards if wiring is involved.
How long does replacement typically take?
Time varies widely, from a few hours for a straightforward door with standard parts to a full day or more for complex setups or when scheduling professionals. Allow extra time for inspections and testing.
Expect a few hours to a full day, depending on complexity and whether you hire a pro.
Do I need to replace the opener if I replace the door?
Not always, but a new door can require a compatible opener or recalibration of sensors and remotes. If the opener is old or malfunctioning, upgrading may improve safety and performance.
A new door may need a compatible opener or sensor reprogramming; consider upgrading the opener if it’s old.
What about cost ranges for DIY vs pro?
DIY costs reflect only parts and tools, while pro installation includes labor. Realistic ranges depend on door size and features; expect higher costs for torsion springs and custom doors.
Costs vary; hiring a pro adds labor fees, especially for springs and custom doors.
Can I replace only the panels or do I need a full door?
If the existing panels are in good condition and the tracks are intact, panel replacement can be viable. For worn tracks, seals, or bad balance, replacing the entire door is often more cost-effective and safer.
You can replace panels if the rest is sound; otherwise, a full replacement may be wiser.
Quick Summary
- Assess door type and opening carefully
- Decide between DIY versus pro based on springs and risks
- Secure safety gear and power before starting
- Plan for proper alignment and testing post-install
- Expect variable time and cost based on components