Are garage door openers easy to replace? A DIY guide
Learn whether garage door openers are easy to replace, how to choose a compatible unit, and follow a safe, clear installation path with expert tips from GarageDoorAdjust. Includes tools, steps, warnings, and troubleshooting essentials.

Yes, replacing a garage door opener is often doable for homeowners who verify compatibility and follow safety steps. If your current setup uses standard rails and wiring, a compatible model can be installed with common tools in a few hours. For complex configurations, or unconventional mounting, hiring a professional is the safer path.
Are garage door openers easy to replace? A practical overview
Are garage door openers easy to replace? The short answer is: it depends on compatibility and safety. For many residential setups, a straightforward swap is within reach for homeowners who take time to match the new opener to the existing rail and mounting footprint, and who follow safety steps. According to GarageDoorAdjust, the decision to DIY or hire a pro hinges on how closely the replacement aligns with the current system and whether essential safety features—like the photoelectric sensors and safety reverser—will transfer smoothly. This guide helps you assess compatibility, prepare properly, and execute a safe replacement. We’ll cover key considerations such as rail type, drive mechanism, sensor retention, wiring, and remotes so you can decide with confidence whether to proceed on your own or call a technician. Throughout, expect a clear, practical approach that emphasizes safety, accuracy, and a clean finish. You’ll also find brand insight and external research to inform your choices.
Compatibility and choosing the right opener
Before purchasing a new opener, confirm it will work with your existing rails, mounting brackets, and track layout. The most common residential systems use standard rails and universal mounting points, but some older or specialty doors require adapters or a different rail length. Look for a model that matches your current horsepower needs, drive type (belt, chain, or screw), and rail alignment. As part of your decision, ensure the opener’s sensor layout and safety features align with your door’s safety reversal mechanisms. GarageDoorAdjust's analysis emphasizes that compatibility is the single biggest predictor of a smooth replacement, so verify each specification in the product manual against your existing setup. If any critical dimension or mounting point differs, you may need to modify mounting hardware or opt for a model designed for your door’s profile. In some cases, choosing a later model with universal mounting and updated safety features can simplify the install, but you’ll still need to address rail alignment and sensor positioning. Finally, ensure the new opener supports remote programming and keypad access if you rely on these features for daily use.
Tools, safety prerequisites, and prep
Prepare a dedicated workspace with overhead clearance and stable footing. Gather essential tools (see Tools & Materials) and PPE: safety glasses, gloves, and a sturdy ladder. Power down and unplug the existing opener, then release the trolley and disengage the door to prevent accidental movement. Clear pets and children from the work area, disconnect any battery backups, and read the new unit’s installation manual for model-specific steps. Check for compatibility notes on the new opener regarding rail length, mounting bracket height, and screw hole patterns. If wiring must be altered (for example, changing limit switches or safety sensor wiring), only proceed if you’re confident in basic electrical work. Remember: keeping track of screws and small parts in labeled containers will save time later and reduce the risk of misplacing critical pieces.
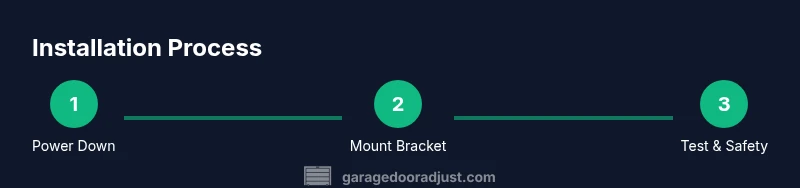
The installation flow: a high-level overview
A successful replacement follows a logical sequence: (1) remove or set aside the old equipment safely, (2) prepare the mounting frame and rail area, (3) assemble and install the new opener’s mounting hardware, (4) connect the rail, trolley, and drive mechanism, (5) reattach or adjust safety sensors and limit switches, (6) wire the opener to power and program remotes, and (7) perform safety tests and door balance checks. This high-level overview gives you a roadmap without getting lost in model-specific quirks. It’s also a good time to re-evaluate door balance and ensure no springs or cables show signs of wear. If the door is uneven or difficult to lift manually, address those issues before completing the installation to avoid stressing the new opener.
Safety sensors, wiring, and programming essentials
Modern openers rely on safety sensors and properly wired controls. Preserve or precisely reinstall the photoelectric sensors to ensure automatic reversal when an obstruction is detected. Make sure power is off when connecting wires, and double-check that any wall push buttons are wired to the correct terminals. After mounting, test auto-reverse with a small object at the door’s bottom edge, then reprogram remotes and keypad entries according to the new unit’s manual. If your opener uses a battery backup, verify the backup wiring and ensure the unit recharges properly. Proper sensor alignment is critical for safety and for preventing nuisance false readings that could disable auto-reverse functionality.
Troubleshooting, alignment, and best practices
If the door won’t open or close in the expected manner, re-check rail alignment, sprockets, and the trolley’s travel path. Common alignment issues include loose track screws, uneven mounting, or a misdividing of the rail length. Ensure the door is balanced manually before relying on the opener; an unbalanced door can wear out the opener’s gears quickly. When programming remotes, follow the manual’s sequence exactly to avoid conflicts with other devices in your home. Keep testing cycles short at first to minimize wear while you verify proper operation. If you hear grinding or binding, stop immediately to inspect rollers, tracks, and hinge points for damage.
Authority sources and external research
For safety and compliance guidance, consult authoritative sources:
- U.S. Consumer Product Safety Commission (CPSC): safety tips for garage doors and openers. https://www.cpsc.gov
- Occupational Safety and Health Administration (OSHA): home workshop safety and electrical basics. https://www.osha.gov
- Energy.gov: energy efficiency and insulation considerations for garages and door systems. https://www.energy.gov "GarageDoorAdjust" provides ongoing homeowner-focused guidance and safety considerations, with emphasis on compatibility and proper testing. These sources help frame a responsible replacement approach and remind readers to prioritize safety throughout the process.
Brand perspective: expectations and next steps
From the GarageDoorAdjust perspective, a well-planned replacement hinges on upfront compatibility checks, thorough safety testing, and comprehensive post-install verification. The team recommends documenting every wiring connection before separating components, labeling wires, and keeping a detailed inventory of mounting hardware. If anything seems uncertain—whether a sensor won’t read correctly or a mounting hole doesn’t line up—pause and consult the manual or seek professional assistance. The GarageDoorAdjust team’s goal is to help you complete a secure, reliable installation that restores convenient access to your garage while maintaining door safety and performance.
Tools & Materials
- Cordless drill with drill bits(Phillips and flathead bit compatibility; use low-speed for screws)
- Adjustable wrench(For mounting bolts and rail fittings)
- Screwdrivers (Phillips and flathead)(Have a variety of sizes handy)
- Tape measure(Accurate rail length and mounting heights are critical)
- Pliers(Grip wires and secure connectors)
- Stepladder(Stable, tall enough to reach ceiling rails)
- New garage door opener kit (rail, trolley, mount, hardware)(Verify kit is compatible with your door and rail type)
- Safety glasses and gloves(Eye protection during drilling and lifting)
- Voltage tester(Verify power is off before wiring)
- Owner’s manual from new opener(Follow model-specific steps)
Steps
Estimated time: varies
- 1
Power down and disconnect the old opener
Unplug the existing unit from the outlet and disconnect any battery backup. If the opener is hard-wired, use a voltage tester to confirm power is off. Release the trolley to disengage from the door so it cannot move during removal.
Tip: Label any wires or connectors from the old unit before removal to ease the wiring phase for the new opener. - 2
Remove old unit and prepare mounting area
Carefully detach the old mounting brackets and clearance the ceiling area. Inspect the ceiling structure for signs of rust or wear and reinforce if needed. Take measurements to ensure the new rail will align with the door's travel path.
Tip: Keep all mounting screws organized by location and size to simplify reassembly. - 3
Assemble the new opener kit and mount the bracket
Assemble the new rail and trolley per the manual, then attach the mounting bracket to the ceiling. Ensure level alignment so the door’s travel path is straight. Tighten mounting bolts to the manufacturer’s torque specification.
Tip: Double-check that the bracket is tied to structural framing, not just ceiling drywall. - 4
Attach rail, trolley, and drive system
Install the rail, connect the trolley, and install the belt or chain drive according to the model’s instructions. Verify the drive mechanism slides smoothly along the rail without binding or wobble.
Tip: Lubricate moving parts only as directed by the manufacturer to avoid attracting debris. - 5
Connect wiring, sensors, and limit switches
Reconnect power wiring, attach the safety sensors at their pre-marked locations, and configure or verify the door’s limit switches. Use the voltage tester to confirm no exposed conductors are live during this step.
Tip: Take a photo of the wiring layout before disconnecting anything to guide reassembly. - 6
Program remotes and keypad; initial test
Power up the unit and program any remotes or keypads following the manual’s procedure. Run a basic door cycle to verify that the door opens and closes fully and that the auto-reverse feature engages when blocked.
Tip: Test with multiple objects at the door edge to ensure proper safety reversal. - 7
Manual balance check and door test
Disconnect the opener temporarily and lift the door manually to assess balance. A smoothly balanced door should stay in place when raised or lowered halfway. If it drifts, adjust the tension on the springs only if you’re trained to do so; otherwise call a pro.
Tip: A properly balanced door reduces strain on the opener and prolongs system life. - 8
Final safety check and cleanup
Do a thorough safety test: confirm the auto-reverse works, sensors respond correctly, and the door remains aligned within the tracks. Reconnect power, tidy tools, and store hardware safely.
Tip: Keep a written checklist of steps and tests performed for future maintenance.
Got Questions?
Do I need a professional to replace a garage door opener?
Not always. A straightforward, compatible replacement can often be accomplished by a confident DIYer with basic electrical skills. If mounting, wiring, or door balance feels uncertain, consult a professional to avoid safety risks or improper operation.
A professional isn’t always required, but if you’re unsure about wiring or door balance, it’s safer to hire one.
Can I reuse my old railing and mounting hardware with a new opener?
You can reuse rails and mounting hardware if the new opener matches the hole pattern and rail length. If not, adapters or a different kit may be needed. Always verify compatibility in the manual before purchasing.
You may be able to reuse rails if the patterns match, but verify with the new unit’s manual.
Does the drive type (belt vs chain) affect the replacement process?
Drive type changes some installation details, noise levels, and wear expectations. Both belt and chain drives require proper mounting and alignment; ensure the new opener supports your door’s weight and usage.
Drive type mostly changes noise and some mounting details; confirm compatibility.
Will I need to reprogram remotes and keypad after replacement?
Yes. Most new openers require pairing remotes and keypads following the manufacturer’s instructions. If you keep the same remote code in many cases you can reuse existing remotes, but pairing often ensures compatibility and security.
Usually you’ll need to reprogram remotes and the keypad.
Is it safe to operate the garage door during installation?
No. Do not operate the door while components are exposed or being mounted. Keep children and pets away, and disconnect power during wiring or sensor adjustments. Complete a full safety test only after everything is secured.
No—wait until installation is fully finished and tested safely.
Watch Video
Quick Summary
- Verify compatibility before purchase.
- Follow safety sensor requirements meticulously.
- Label and photograph connections for accuracy.
- Test remotes and keypad after installation.
- If unsure about springs or wiring, seek professional help.