How to Replace Garage Door Opener: A Homeowner’s Step-by-Step Guide
Learn how to safely replace your garage door opener with a practical, step-by-step guide from GarageDoorAdjust. Plan, install, wire, and test for reliable operation.

Ready to upgrade your garage setup? This guide explains how to replace garage door opener safely, with a clear, step-by-step plan. According to GarageDoorAdjust, with the right tools and careful measurements, most homeowners can complete the replacement in a few hours. You’ll learn what parts to buy, how to remove the old unit, wire the new opener, and test for safe operation. Let’s begin.
Why replace the garage door opener now
There are several reasons homeowners choose to replace a garage door opener. An older unit may have unreliable safety sensors, weak remotes, noisy operation, or limited compatibility with smart home features. Replacing can improve security, reliability, and convenience, and reduce daily maintenance. According to GarageDoorAdjust, newer openers often deliver smoother operation and better energy efficiency. When planning, consider horsepower, rail compatibility, mounting space, and whether you want belt-drive, chain-drive, or screw-drive mechanisms. The decision should balance current budget with expected lifespan and safety improvements.
A modern opener also taps into home automation trends, enabling remote control, scheduling, and mobile access. If you notice jerky starts, frequent sensor false trips, or the opener struggling to complete a cycle, that’s a strong indicator that replacement is worth evaluating now. This project can be tackled by a confident DIYer, but ensure you’re up to speed on wiring safety, lifting forces, and alignment requirements.
From a homeowner’s perspective, the upgrade pays off in daily convenience and long-term safety. A well-chosen opener reduces manual lifting, lowers noise complaints, and provides more reliable reversal sensing, which is essential for family safety around garage doors.
note”:null},
Tools & Materials
- Cordless drill(Variety with bits for wood and metal, 18V or higher recommended)
- Phillips and flat-head screwdrivers(Medium and small sizes for mounting hardware)
- Wire strippers and needle-nose pliers(For disconnecting and routing wires safely)
- Voltage tester(Check for power at the outlet and control wiring before touching any wires)
- Measuring tape(Accurate rail and track measurements, minimum 16 ft if replacing long rails)
- Step ladder or lift(Sturdy, rated for your ceiling height; have a helper for heavy parts)
- Socket set and adjustable wrench(Secure mounting brackets and hardware)
- Electrical tape and wire nuts(Secure wire connections and insulation)
- New garage door opener kit(Includes rail kit, trolley, rail brackets, safety sensors, and remotes)
- Level(Ensure opener and track are perfectly horizontal for smooth operation)
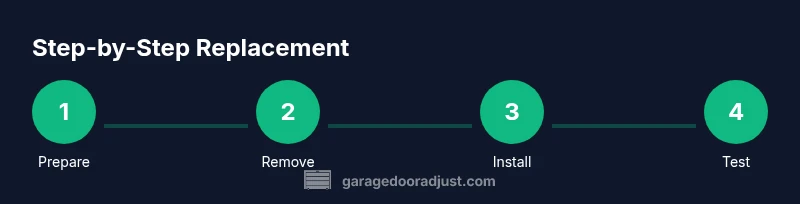
Steps
Estimated time: 2-5 hours
- 1
Prepare and power down
Unplug the old opener and use a voltage tester to confirm zero power at the unit. Clear the workspace and remove any loose items from the ceiling area. This prevents accidental shocks and gives you space to work safely as you plan the removal.
Tip: Double-check the power at the outlet and at the unit before touching wiring to avoid shock. - 2
Detach and remove the old opener
Support the opener as you loosen mounting brackets and disconnect from the ceiling track. Carefully lower the unit while keeping the balance of the door in mind to avoid bending tracks or stressing cables.
Tip: Have a helper hold the unit while you remove fasteners to prevent sudden drops. - 3
Mount the new ceiling bracket and rail
Mark the ceiling, install the new bracket, and attach the rail per the manufacturer’s instructions. Use a level to ensure the bracket and rail are perfectly straight to prevent binding during operation.
Tip: Firmly anchor brackets into joists; loose mounts cause noise and misalignment. - 4
Install the opener body and mount
Lift the opener body into place and secure it with the provided bolts. Align the trolley with the track, ensuring smooth travel without binding or rubbing against the rails.
Tip: Avoid overtightening; snug is usually enough to prevent movement while allowing adjustments. - 5
Connect wiring and sensors
Route and connect power, limit switches, and safety sensors according to the manual. Verify that the safety sensors face the door and are aligned for proper reversal testing.
Tip: Use a wire stripper to trim wires neatly; label connections to ease future maintenance. - 6
Program remotes and test operation
Pair remotes, set up any smart features, and perform a full test cycle: open, stop mid-way, close, and ensure auto-reverse works. Correct any misalignment or sensor glitches before final use.
Tip: Keep a clear area and stand to the side during tests to avoid injury from moving parts.
Got Questions?
Do I need a professional to replace my garage door opener?
Not always. If you’re comfortable with basic electrical work and mechanical assembly, a DIY replacement is possible. However, handling door balance springs and wiring involves safety risks, so consider a pro if you’re unsure.
Replacing a garage door opener can be a DIY project for many homeowners, but if you’re unsure about wiring or springs, hire a professional.
What size opener should I choose for a typical residential door?
Most residential doors perform well with 1/2 to 1-1/2 HP openers. Belt-drive models are quieter for living spaces, while chain drives are usually more economical. Check door weight and height to determine the best fit.
For most homes, a 1/2 to 1-1/2 HP opener is standard; choose based on door weight and noise preference.
Will replacing the opener improve safety?
Yes. New safety sensors, auto-reverse, and updated circuitry reduce the risk of injuries and property damage by ensuring the door reverses on obstruction.
New safety features make a big difference in preventing injuries and damage.
Can I reuse the existing rail and tracks with a new opener?
Often yes if the rail length and mounting pattern match the new unit. If not, you’ll need a compatible rail kit, which adds to the project cost and time.
Rails can sometimes be reused if they fit the new opener; otherwise, you may need a compatible kit.
How long does installation usually take?
Most installations take between 2 and 5 hours depending on your setup, tools, and whether any retrofits are required.
Most people finish in a few hours, depending on setup and compatibility.
Do remotes and smart features require programming?
Yes. You’ll need to pair remotes and configure any smart home features or voice assistant integrations.
You’ll pair remotes and set up smart features after the basics are done.
Watch Video
Quick Summary
- Plan fit and compatibility before purchasing.
- Power off and test sensors after installation.
- Follow the opener’s alignment and safety instructions.
- Program remotes and verify reversal for safety.
- Consult a professional if you encounter springs or cables issues.