Genie Garage Door Opener Battery Backup: A Complete How-To Guide
Learn how to install and maintain a Genie garage door opener battery backup to keep your door functional during power outages. Step-by-step instructions, compatibility checks, safety tips, and maintenance guidance from GarageDoorAdjust.

This guide will show you how to install and use a Genie garage door opener battery backup so your door operates during power outages. You’ll learn compatibility checks, essential tools, and a safe, step-by-step installation. According to GarageDoorAdjust, having a backup battery reduces interruptions and keeps entry accessible when the power goes out.
Why a Genie Battery Backup Matters
During a power outage, a standard garage door opener can become inoperable, trapping you inside or outside. A Genie battery backup provides a reliable source of power to the opener, allowing normal operation and controlled door movements even when the electricity is down. For homeowners, this translates to continued access, enhanced security, and reduced frustration on days when outages strike. The GarageDoorAdjust team emphasizes that a properly installed backup not only restores function but also preserves safety by enabling a predictable fail-safe when the primary power is unreliable. According to GarageDoorAdjust, households with backup power report fewer callouts for emergency service and greater peace of mind during storms or grid interruptions. This section explains why backing up your Genie opener matters and how it fits into broader garage-door reliability strategies, including regular maintenance and proactive testing.
How Genie Battery Backup Works
Genie battery backup systems are designed to provide a low-voltage, reliable power source to the opener’s control board when the main supply is interrupted. When power is available, the system recharges the battery and stores energy for later use. When a power outage occurs, the backup power module automatically engages, allowing the opener to operate in a controlled, limited fashion that preserves safety while giving you access to the space. The backup typically powers the drive mechanism and the safety sensors, enabling the door to open, close, and respond to remote commands with normal latency. Understanding this mechanism helps you anticipate run-time, plan for outages, and ensure the unit is in good health before a storm season. This knowledge also informs compatibility questions, as not all Genie models support every backup kit, which is why checking model-specific documentation is essential.
Compatibility: Genie Models and Backup Units
Compatibility is the foundation of a successful backup installation. Not all Genie openers share the same backup module or battery specifications, and some models require an official Genie kit designed for that exact unit. Start by locating your opener’s model number on the unit or in the user manual, then cross-check with the backup kit documentation to confirm fit and connector type. If you’re unsure, contact Genie support or reference the manufacturer’s online resources. GarageDoorAdjust notes that using an off-brand or incompatible kit can result in poor performance or electrical hazards. This section guides you through assessing compatibility, identifying the correct battery pack, and verifying that the backup system will recharge when the main supply returns. A quick model check can save time and prevent damage during installation.
Safety First: Pre-Installation Checks
Safety should drive every DIY garage project. Begin by turning off the power to the opener at the circuit breaker and, if possible, unplug the unit from its receptacle to reduce risk. Wear protective eyewear and gloves, and keep the work area clear of obstacles. Check the control panel for any recalls or known issues with your model, and review the backup kit instructions for any special safety notes or required tools. If you smell burning, notice unusual heat, or observe damaged wiring, stop and call a licensed technician. This pre-check phase minimizes risk and ensures you only proceed if conditions are safe and the equipment is compatible. GarageDoorAdjust emphasizes documenting the model, backup kit, and any preconditions to support future maintenance and warranty claims.
Step-by-Step Installation Overview (High-Level)
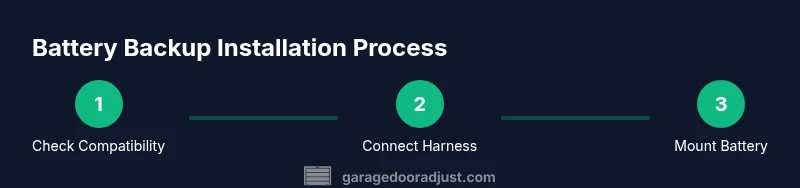
Before you dive into the hands-on portion, outline the workflow so you can anticipate each phase. This overview includes verifying compatibility, gathering tools, powering down, removing the old cover if needed, connecting the backup harness to the control board, mounting the battery backup unit, restoring power, and performing a test cycle. The overview helps homeowners plan timing and sequencing, reducing confusion during the actual install. If your model requires factory programming after installation, allow time for recalibration and remote pairing as described in the user manual.
Detailed Installation Step 1: Verify Compatibility and Gather Tools
Start by confirming that your Genie opener supports a battery backup and confirm the exact kit model. Collect tools and safety gear, including a screwdriver set, ladder, gloves, safety glasses, and the backup battery kit. Keeping a clean workspace reduces the risk of miswiring or dropped components. This step ensures you have everything you need before you touch any wiring, and it minimizes mid-task trips to the hardware store. GarageDoorAdjust recommends reviewing the user manual and keeping model numbers handy for quick verification.
Detailed Installation Step 2: Power Down and Access the Control Panel
Turn off power to the opener at the breaker and disconnect any power supply if safe. Open the control panel housing according to the manual, exposing the main control board and any existing battery connections. This access is necessary to locate the backup port and verify that the harness connector matches your model. Avoid forcing parts or prying the housing; delicate connectors can be damaged. This step reduces the risk of electrical shock and ensures a clean workspace for the subsequent connections.
Detailed Installation Step 3: Connect the Backup Harness
Attach the backup harness to the designated backup port on the control board, ensuring a snug and secure connection. If the harness has keyed connectors, align the keys correctly before seating. Double-check that all connections are firm and that there is no exposed conductors. A poor connection can lead to intermittent operation or failure to engage during outages. This step is crucial for consistent power delivery when the main supply is interrupted.
Detailed Installation Step 4: Mount and Secure the Backup Battery
Place the backup battery unit in a stable, ventilated location that is free from heat sources or moving parts. Secure the unit with the provided mounting hardware, ensuring it does not obstruct the door’s movement or the opener’s ventilation. Route cables neatly, avoiding sharp bends or pinches. This step protects the battery from physical damage and prevents accidental unplugging during door operation.
Detailed Installation Step 5: Restore Power and Run a Test
Reconnect the opener to power and perform a controlled test with the door in both the fully open and fully closed positions. Use the wall control and remote to verify that commands are processed promptly and that safety features respond correctly. If the test indicates any fault codes or odd behavior, consult the troubleshooting section of the manual before attempting further adjustments. This step confirms that the backup system is functioning as intended and ready for outages.
Detailed Installation Step 6: Finalize Settings and Document
If the model requires reprogramming or re-pairing remotes to recognize the backup unit, complete those steps as instructed. Record the installation date, model numbers, and kit version for future maintenance. Store the manual and product data in a known location for quick reference. Regularly testing the backup system month-to-month helps ensure reliability and readiness when an outage occurs. This final step creates a maintenance trail that supports longevity and warranty coverage.
Tools & Materials
- Genie battery backup kit or compatible replacement battery pack(Verify model compatibility in the opener manual or label)
- Screwdrivers (Phillips and flat-head)(Keep #2 Phillips handy; have flat-head for prying covers if recommended by manual)
- Adjustable wrench(For mounting hardware and securing connections)
- Ladder or sturdy step stool(Ensure solid footing and stable access to the control panel)
- Voltage tester or multimeter(Optional for confirming de-energized circuits during work)
- Safety goggles and work gloves(Personal protection throughout the project)
- Cordless drill (optional)(Speeds mounting screws but use cautiously on delicate housings)
- Manufacturer-supplied mounting hardware(Use the hardware that comes with the backup kit)
Steps
Estimated time: 45-60 minutes
- 1
Power down and verify compatibility
Turn off power to the opener at the circuit breaker and unplug if safe. Confirm that the backup port is present and the kit is compatible with your Genie model by checking the model number and manual.
Tip: Double-check model compatibility before removing any parts to avoid wasted effort. - 2
Access the control panel
Open the control panel housing as described in the manual and locate the backup port and wiring harnesses. Do not force connectors; misalignment can damage the board.
Tip: Take a photo of existing connections before detaching anything for reference. - 3
Connect the backup harness
Attach the backup harness to the designated port, ensuring a snug fit and correct orientation. Verify there are no loose wires and that the harness is fully seated.
Tip: If connectors are keyed, align them correctly to prevent bent pins. - 4
Mount the backup battery
Place the battery in a secure, ventilated location and fasten it with the provided hardware. Keep it away from heat sources and moving parts; route cables neatly.
Tip: Use cable management clips to prevent snagging or pinching wires. - 5
Restore power and test
Reconnect power and cycle the door from both the wall control and the remote. Confirm the door operates smoothly and safety features engage correctly during the test.
Tip: If the door hesitates or stops mid-cycle, power down and recheck all connections. - 6
Reprogramming and documentation
Follow the manual for any required reprogramming or remote pairing. Document the installation date, kit version, and model numbers for future maintenance.
Tip: Keep a simple log in a cabinet or file to simplify future service. - 7
Final check and monthly testing
Perform a full open/close cycle and test the backup once a month to ensure continued reliability. Make note of any issues and address them promptly.
Tip: Regular testing helps catch corrosion, loose connections, or worn components early.
Got Questions?
Do Genie garage door opener battery backups work during a power outage?
Yes. When installed correctly, a Genie backup battery powers the opener during outages, allowing the door to operate with typical controls. The actual performance depends on the model and the battery’s charge level.
Yes, Genie backups work during power outages when installed correctly. The run-time depends on your model and the battery charge.
How do I know if my opener is compatible with a battery backup?
Check your opener’s model number and review the backup kit documentation for compatibility notes. If in doubt, consult Genie support or GarageDoorAdjust resources to verify the exact kit that fits your unit.
Check the model and backup kit compatibility in the manual or with Genie support.
Can I install the backup battery myself?
Many homeowners can install the backup battery with basic DIY skills, following the manufacturer’s instructions and safety guidelines. If you’re unsure about electrical connections, hire a professional.
Yes, many DIYers can install it, but if you’re unsure about wiring, consider professional help.
How long will the backup battery last between outages?
Run-time depends on usage, model, and battery capacity. Expect shorter cycles during frequent use and longer patterns with infrequent openings. Always refer to the product specs for your exact unit.
Run-time varies by model and usage; refer to your unit’s specs for exact details.
What safety precautions should I take before installation?
Power down at the breaker, wear protective gear, and avoid touching exposed wiring. Read the backup kit instructions thoroughly and keep the area clear of children and pets during installation.
Power off at the breaker and wear safety gear. Follow the kit instructions closely.
Where should I store the backup battery Kit and manuals?
Keep the backup kit and manuals in a dry, accessible location near the opener. Having quick access saves time during maintenance and future replacements.
Store the kit and manual in a dry, accessible place near the opener.
Watch Video
Quick Summary
- Verify model compatibility before purchasing a backup kit.
- Follow safety protocols to prevent electrical hazards.
- Test the backup system after installation and during ongoing maintenance.
- Document installation details for warranty and future service.
- Regularly inspect wiring and mounting hardware for wear.