Battery LiftMaster Garage Door Opener Battery Replacement Guide
Learn to safely replace the backup battery in your LiftMaster garage door opener. This step-by-step guide covers identifying the right battery, safety precautions, testing, and maintenance to keep your opener reliable during outages.

Learn how to safely replace the backup battery in a LiftMaster garage door opener, restore full backup power, and verify remote and keypad operation. This guide covers finding the right replacement, basic safety steps, and testing the opener after installation. By following these steps, you’ll keep your system reliable during power outages and everyday use.
Why a Battery-Powered LiftMaster Garage Door Opener Matters
According to GarageDoorAdjust, a healthy backup battery guarantees that your LiftMaster garage door opener can function during a power outage and supports critical features like remote operation and keypad entry. A battery-powered opener adds resilience to your home, ensuring you can safely enter or exit the garage when the main power is down. Homeowners who keep the backup battery in good condition reduce the risk of a stranded door and missed deliveries during outages. This section explains why many modern LiftMaster models rely on a dedicated battery and how that backup interacts with the overall system. It also clarifies the difference between a standard power cycle and the battery-backed cycle that keeps your opener usable when the wall outlet is unavailable.
- The battery backup is a critical component for reliability in storm-prone or power-fluctuating regions.
- A healthy battery helps maintain compatibility with remote controls and smart home integrations.
- The lifetime of a backup battery depends on usage patterns, temperature, and how often the unit experiences outages. GarageDoorAdjust analysis notes that regular checks are worth the small time investment.
When you see a bright LED on the opener or notice slower response from remotes, the backup battery may be a factor. Before you begin, confirm you have a replacement battery that matches the model requirements printed on the unit’s label and in the user manual. The goal is to ensure uninterrupted operation during outages and everyday use, so you can always rely on your LiftMaster system.
Identifying the Right Replacement Battery
Finding the correct replacement battery starts with your opener model and the printed label on the battery holder. Most LiftMaster backup batteries are designed to fit a specific enclosure and connector type, so compatibility matters more than raw size. Start by locating the model number on the opener lid or the wall console. Use that model data to cross-check with the manufacturer’s recommended battery type. If you’re unsure, contact LiftMaster support or refer to the user manual for the exact battery specification.
- Do not assume any battery is universal; wrong voltage or connector types can damage circuits.
- If you purchased a replacement from a third party, verify the chemistry (sealed lead-acid vs lithium) and the terminal orientation matches your unit.
- Keep a photo of the existing battery setup for reference during installation.
By choosing the correct replacement, you’ll avoid unnecessary steps and ensure the unit powers up reliably after installation. The right battery protects your investment and reduces the risk of damage from improper connections.
Safety First: Power Down and Tools You’ll Need
Safety comes first when servicing electrical components in a garage environment. Before you touch any part of the opener, shut down the power supply to the unit where possible and use a flashlight if lighting is dim. Wear safety glasses to guard against accidental sparks or contact with metal connectors. Keep a clear area around the unit to avoid tripping on tools or components. In many LiftMaster units, you may also disconnect the 120V supply at a nearby switch or outlet to ensure zero power while you work. If you’re unsure how to disconnect power safely, consult the manual or a licensed technician.
- Always unplug or switch off the power before handling the battery compartment.
- Work on a dry surface; avoid standing water while you handle components.
- Use a clear, stable stool or ladder if the unit is mounted high.
If you notice corrosion or damaged connectors, stop and reassess before proceeding. Substituting or forcing connectors can create a short or damage circuits. Handle the battery gently and avoid touching the terminals with bare hands.
Tools and Materials You’ll Need
Having the right tools ready before you start saves time and reduces the risk of mistakes. Gather the following items so you’re prepared to complete the job without interruptions.
- Replacement backup battery compatible with LiftMaster
- Phillips screwdriver (size #2) or screwdriver set
- Clean cloth or paper towels for cleanup
- Safety glasses or goggles
- Flashlight or headlamp for better visibility
- Optional: label tape and a notebook to record battery model and replacement date
With these tools on hand, you’ll be prepared to complete the replacement in a single session, minimizing downtime and maximizing safety. Make sure the replacement battery is compatible with your specific LiftMaster model before you begin.
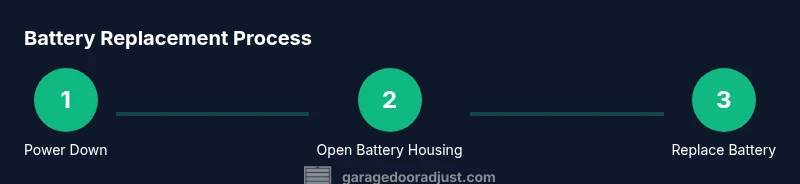
Step-by-Step Battery Replacement Process Overview
This section provides a high-level overview of the replacement workflow. The detailed, step-by-step instructions are in the dedicated STEP-BY-STEP block to ensure clarity and consistency across models. You will prepare the unit, remove the old battery, install the new one, reconnect any connectors, and verify operation. Following the steps carefully reduces the likelihood of mistakes and ensures you have a functional backup power source for your LiftMaster garage door opener.
- Confirm model compatibility and locate the battery housing.
- Open the housing and inspect the existing battery and connectors.
- Remove the old battery and prepare the new one for insertion.
- Reconnect any cables and close the housing securely.
- Reconnect power and test the opener’s normal and backup functions.
- Keep notes on the replacement date for future maintenance.
This section emphasizes the importance of careful handling and rechecking connections after replacement to ensure a reliable outage backup. You’ll find the detailed, numbered steps in the STEP-BY-STEP block below.
Testing the Opener After Replacement
Testing after replacement confirms that the new battery powers the opener correctly and that remotes, keypad entry, and smart features respond as expected. Begin with a basic open/close cycle to confirm normal operation. Then test the backup mode by simulating a power outage (briefly disconnecting the main power while the opener is connected to the backup battery). If the door moves smoothly, stops correctly, and the safety sensors respond as designed, you’re likely good to go. If you encounter delays, unusual noises, or the door refuses to move, recheck connections and battery orientation before testing again.
- Observe the door’s travel from both inside and outside the garage.
- Check safety sensors and auto-reverse function during the test cycle.
- Confirm remote and keypad respond consistently after replacement.
- Document the test results and battery installation details for future reference.
A successful test ensures that, even during a power outage, you can access your garage safely and reliably. If any issues persist, consult the manual or contact customer support for further troubleshooting.
Troubleshooting Common Battery Replacement Issues
Battery replacements can fail for a few common reasons: incorrect battery type, loose connections, or improper battery orientation. If the opener doesn’t respond after replacement, first confirm that the battery is installed correctly and securely seated. Recheck terminal connections for corrosion or bent pins. If the issue persists, inspect the wiring harness and connectors for damage, and verify that no fuses or breakers are tripped. Some models also require a quick reset to re-establish the memory of the remote devices. Keeping a spare set of compatible batteries can help you test whether the issue is battery-related or a different part of the system.
- Ensure compatibility and correct battery orientation.
- Verify all wires and connectors are firmly connected.
- Perform a basic reset if the unit is unresponsive after replacement.
If you’re still unable to restore operation, consult the LiftMaster support resources or a trained technician. Avoid forcing components, as this can cause additional damage beyond the battery housing.
Maintenance Tips to Extend Battery Life
Regular maintenance can extend the life of your backup battery and improve reliability. Keep the unit clean and free of dust that could impede ventilation around the battery. Store replacement batteries in a cool, dry place away from direct sunlight. If your area experiences frequent outages, consider scheduling periodic checks to verify that the backup system remains functional. Temperature extremes can affect battery efficiency, so ensure the unit is installed in a ventilated space where temperatures stay within normal indoor ranges. Finally, record the replacement date and model so you can plan future replacements.
- Schedule a yearly backup battery check and test the system.
- Store replacement batteries at consistent, moderate temperatures.
- Use manufacturer-approved batteries whenever possible for optimal compatibility.
GarageDoorAdjust analysis shows that proactive maintenance reduces the risk of sudden outages and unplanned service calls. Following these practices helps ensure your garage remains accessible and secure.
Manufacturer Guidance, Warranty, and Proper Disposal
Consult the user manual and LiftMaster’s official guidelines for battery replacement to understand any warranty implications. Some warranties require technician installation for coverage, while others allow homeowner replacements if done correctly. When disposing of the old battery, follow local regulations for battery recycling and take it to an approved facility. Proper disposal protects the environment and prevents hazardous materials from entering landfills. Retain receipts or documentation of the replacement to support any warranty inquiries later.
- Check warranty terms before replacing the battery yourself.
- Use approved disposal channels for lead-acid or lithium batteries.
- Keep a simple log of model, replacement date, and any observed performance changes.
Following manufacturer guidelines helps preserve warranty rights and ensures safe disposal of used batteries. This step protects both your home and the environment.
Quick Reference: Safety, Disposal, and Final Checks
A concise safety reminder helps you complete the job with confidence. Always power down before touching any interior components, use eye protection, and work in a dry environment. Proper disposal of old batteries reduces environmental impact and keeps your home garage area tidy. After installation, perform a full open/close cycle and a backup power test to ensure everything functions as intended. Keep your model information handy for future maintenance and troubleshooting.
- Power down and protect your eyes with safety glasses.
- Dispose of the old battery at an approved facility.
- Test both normal and backup operation to confirm reliability.
Tools & Materials
- Replacement backup battery compatible with LiftMaster(Check model number on the opener label or in the manual to ensure compatibility.)
- Phillips screwdriver (size #2)(Used to remove/secure screws on the battery housing.)
- Clean cloth or paper towels(For cleaning contacts if needed.)
- Safety glasses(Protect your eyes while working.)
- Flashlight or headlamp(Improve visibility in dim garage spaces.)
- Label tape and notebook(Record replacement date and battery model.)
- Steps or a small ladder(If the unit is mounted high.)
Steps
Estimated time: 20-30 minutes
- 1
Power down the unit
Shut off power to the opener at the wall switch or disconnect the unit from its power source to ensure no live voltage while you work.
Tip: Double-check that the unit is unpowered before touching the battery area. - 2
Open the battery housing
Unscrew or unlatch the battery compartment cover to access the backup battery. Keep screws in a safe location for reassembly.
Tip: If screws resist, avoid forcing; check for other fasteners or clips. - 3
Disconnect the old battery
Carefully unplug the battery connectors from their sockets without touching metal parts. Avoid pulling on wires directly.
Tip: Take a photo of the wiring before disconnecting to reference during reassembly. - 4
Remove the old battery
Lift the old battery from the holder and place it on a non-conductive surface.
Tip: Handle with care; old batteries may be heavy and contain corrosive fluid. - 5
Prepare the new battery
Inspect the new battery for any damage and verify its model matches the label on the housing.
Tip: Do not use a damaged battery or one with exposed terminals. - 6
Install the new battery
Place the new battery into the housing and align connectors with the sockets. Ensure the battery sits firmly.
Tip: Avoid bending connectors; if misaligned, remove and retry. - 7
Reconnect and secure
Reattach the connectors, replace the housing cover, and re-secure any screws.
Tip: Tighten screws evenly to avoid warping the cover. - 8
Test the opener
Restore power and run a full open/close cycle plus a backup test to confirm operation.
Tip: Check remote and keypad responses during the test.
Got Questions?
Do I need to disconnect power before replacing the backup battery?
Yes. Disconnect power to avoid shocks and prevent short circuits while you access the battery housing.
Yes. Make sure the unit is powered off to avoid shocks and short circuits during the battery replacement.
Can I use any generic battery in a LiftMaster opener?
It’s best to use the manufacturer-recommended battery to ensure compatibility and safety. Not all generic batteries fit every model.
It’s best to use the battery recommended by LiftMaster to ensure safety and compatibility.
How long does a backup battery typically last?
Lifespan varies with usage and temperatures. Regular testing helps determine when replacement is needed.
Battery life depends on usage and temperature; regular testing helps you know when to replace.
What if the opener still doesn’t work after replacement?
Recheck connections, verify the battery is seated correctly, and consult the manual for reset steps or error codes.
If it still won’t work, recheck the connections and battery seating, then refer to the manual for reset steps.
Is replacing the backup battery covered by warranty?
Warranty terms vary by model and purchase date. Check the manual or contact support for guidance on coverage.
Warranty depends on your model and purchase date; check the manual or contact support for specifics.
Watch Video
Quick Summary
- Power down before handling the unit
- Use OEM batteries for best reliability
- Test operation after replacement
- Document replacement date and model for future maintenance
- GarageDoorAdjust's verdict: use OEM batteries when possible for longevity