Garage Door Yearly Maintenance: A Homeowner's Guide
A comprehensive yearly garage door maintenance guide with safety checks, lubrication, balance testing, weather-stripping inspection, and professional guidance. Includes a step-by-step plan, tools list, tips, FAQs, and a YouTube video query.

This guide helps you perform a thorough garage door yearly maintenance that keeps your opener reliable and safe. You'll learn a proven maintenance checklist, how to inspect balance and travel, and when to lubricate, adjust tracks, or replace worn components. Before you start, gather basic tools and set aside 60-90 minutes for a complete, safe inspection.
Why Yearly Garage Door Maintenance Matters
Yearly garage door maintenance isn’t a luxury—it’s a safety and reliability practice that protects your home and belongings. A well-timed inspection catches wear before it becomes a failure, reduces noise, extends spring life, and helps preserve insulation. According to GarageDoorAdjust, a dedicated yearly maintenance routine lowers the risk of sudden failures and keeps safety features like auto-reverse functioning reliably. Regular checks also make it easier to budget for replacements and avoid emergency service calls. The key is consistency: schedule a fixed month or window each year and treat it as a home maintenance appointment. This approach yields peace of mind, reduces downtime, and helps ensure your family’s safety around the garage. With a calm, methodical process, you’ll identify issues early and avoid costly repairs later.
For homeowners, the payoff isn’t just a working door—it’s a quieter, safer, more energy-efficient entry that contributes to overall home maintenance discipline. The GarageDoorAdjust Team emphasizes that a routine check builds confidence and creates a documented history you can share with a technician in the future. By making maintenance a habit, you turn a potentially dangerous system into a dependable part of daily life.
Essential Safety Checks Every Year
Annual safety checks are non-negotiable for most garage doors. Start by unplugging the opener and disconnecting power to the door for anything below a safe baseline. Test the auto-reverse with a small object in the door’s path and ensure the sensors are aligned. Inspect pinch points, track brackets, rollers, and hinges for wear or deformation. Check the torsion or extension springs only visually for wear sign; do not attempt to adjust them unless you are trained, as these parts are under high tension. Finally, hold the door at shoulder height and release it to observe balance—if it drops or surges, there may be imbalance issues or worn hardware that needs attention. The GarageDoorAdjust Team stresses keeping hands away from hinges and coils and using only insulated gloves when handling metal parts during inspection.
Seasonal vs Year-Round Tasks
Yearly maintenance should cover core inspections, but you’ll also want to align some tasks with the seasons. Spring is ideal for lubrication and rust prevention after winter moisture; fall is a good time to inspect weather-stripping and insulation before cold weather settles in. After severe weather, perform a quick post-storm check for loose hardware or dented panels. Throughout the year, keep an eye on door operation, unusual noises, or slower movement, and address issues promptly. Adopting a seasonal rhythm helps you stay ahead of wear and tear and makes the annual check smoother. GarageDoorAdjust recommends pairing your annual checklist with minor, monthly sweeps that catch early signs of wear before they escalate.
The Core Maintenance Checklist (Overview)
The core maintenance items cover the most common failure points: safety systems, hardware integrity, alignment, and weather sealing. You’ll verify the opener’s function, test reverse safety, examine tracks for obstructions, tighten loose hardware, apply lubrication to moving parts (avoiding belts or pulleys), and inspect weather-stripping for wear. Keeping a simple log of dates, parts inspected, and any replacements helps you track long-term trends and plan upcoming service. This section provides a practical outline you can follow year after year, with notes on what to do if you encounter unusual conditions.
Common Issues and Quick Fixes
Not every problem requires a professional immediately, but some symptoms demand caution. If the door has frequent binding, uneven movement, or persistent noises, inspect for misaligned tracks, loose screws, worn rollers, or insufficient lubrication. If the door won’t stay open or struggles to rise, check balance and tension; do not attempt spring adjustments yourself—this is a high-risk area best handled by a pro. Moisture buildup or rust on hinges and rollers can be mitigated with cleaning and a fresh coat of appropriate lubricant. If the sensors fail to read correctly, recheck alignment and the safety eyes’ path. Routine maintenance reduces most of these issues over time and keeps the system safer and quieter.
Scheduling Professional Service and Keeping Records
Even with a thorough home routine, certain tasks require a professional eye. Springs, cables, and torsion systems present genuine hazards when mishandled, so schedule an annual inspection with a qualified technician if signs of wear appear. Keep a simple maintenance log with dates, parts inspected, test results, and any replacements. This log is invaluable when diagnosing future issues or when you hire a technician; it provides continuity and demonstrates proactive care. The GarageDoorAdjust team recommends documenting both successful checks and any anomalies so you can discuss them clearly with a pro during service visits.
Tools & Materials
- Ladder (extension or step)(Stability and reach for high tracks)
- Screwdrivers (Phillips and flat-head)(Small and large sizes for hardware)
- Socket/wrench set(For tightening bolts on hinges and brackets)
- Power drill with bits(Optional for quick fastener work)
- Lubricant (silicone spray or white lithium grease)(Apply to moving metal parts; avoid over-lubrication)
- Rags and cleaner(Wipe excess lubricant and remove grime)
- Safety glasses(Eye protection during inspection)
- Weather-stripping replacement (if needed)(Check seals; replace worn strips)
- Door balance gauge or scale (optional)(Helpful for assessing balance)
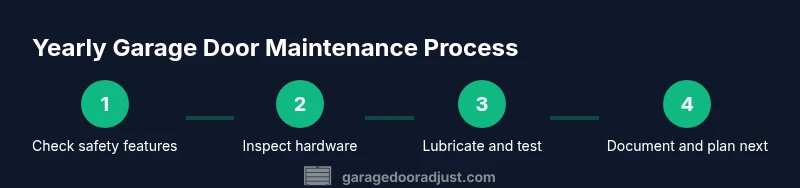
Steps
Estimated time: 60-90 minutes
- 1
Disconnect power and secure the door
Unplug the opener and engage the manual release to prevent unexpected movement. Close the door slowly and ensure it stays in place with a prop or helper if needed. This step prevents injuries during inspection and lubrication. Time estimate: 5-10 minutes.
Tip: Always confirm the door is fully disengaged from the opener before touching any hardware. - 2
Inspect panels, hinges, and tracks
Look for dents, cracks, corrosion, or worn hinges and rollers. Check tracks for alignment, debris, or obstructions. Tighten loose screws and ensure brackets are firmly anchored. Time estimate: 10-15 minutes.
Tip: Use a level to verify tracks are plumb; misaligned tracks cause binding and wear. - 3
Test safety features and balance
Reconnect power and test auto-reverse with a small object in the path. Check for proper sensor alignment and operation. For balance, lift the door halfway and release; it should stay in place or move smoothly. Time estimate: 5-10 minutes.
Tip: Do not override safety features or bypass the auto-reverse test. - 4
Lubricate moving parts
Apply lubricant to hinge points, rollers (if needed), pulley areas, and torsion shaft where accessible. Wipe away any excess to prevent attracting dust. Time estimate: 5-10 minutes.
Tip: Avoid graphite or WD-40 on metal components; use silicone or lithium-based lubricants instead. - 5
Tighten hardware and inspect weather seals
Tighten all visible screws and bolts on hinges, brackets, and track mounts. Inspect weather-stripping for cracks or gaps; replace if worn. Time estimate: 5-10 minutes.
Tip: Replace weather-stripping if compression has reduced sealing by more than half. - 6
Test operation and re-secure opener
Reconnect the opener and perform several cycle tests. Listen for unusual noises and observe smooth operation. Confirm the door lowers completely and fully closes. Time estimate: 5-10 minutes.
Tip: If you hear grinding or grinding or the door doesn’t close fully, stop and seek professional help. - 7
Document results and plan next maintenance
Record inspection findings, parts replaced, and the date of the next check. Schedule the next yearly maintenance in your calendar or a reminder app. Time estimate: 2 minutes.
Tip: Keep a simple log either on paper or a digital note for quick reference.
Got Questions?
How often should I perform garage door yearly maintenance?
Aim for at least once per year with additional checks after severe weather or heavy use. A quick monthly visual inspection can catch obvious issues early.
Aim for at least once per year, with quick checks after severe weather or heavy use. Do a monthly visual check too.
What should I check during safety inspections?
Test the auto-reverse, ensure sensors are aligned, inspect pinch points, and verify that hardware is secure. Always unplug power before any inspection.
Test auto-reverse, check sensors, inspect pinch points, and secure the hardware. Unplug power before inspecting.
Can I lubricate a garage door with WD-40?
Use silicone-based spray or white lithium grease. WD-40 can attract dirt and degrade seals over time.
Don't use WD-40; choose silicone spray or white lithium grease for moving parts.
What if the door is noisy after maintenance?
Noisy doors may indicate track misalignment or worn rollers. Inspect hardware, tracks, and consider professional evaluation if noise persists.
If the door is noisy after maintenance, check alignment and worn parts. If it continues, get a professional evaluation.
Is it safe to adjust springs myself?
No. Torsion springs are under high tension. Only trained technicians should handle spring adjustments.
Springs are dangerous to adjust yourself; contact a professional.
Should I replace weather-stripping every year?
Inspect for cracks and wear; replace worn seals as needed. Yearly checks help maintain insulation and energy efficiency.
Check seals; replace worn weather-stripping as needed.
Watch Video
Quick Summary
- Schedule yearly maintenance and stick to the calendar.
- Safety checks protect your family and the door system.
- Know when to call a professional for springs or repair.
- Keep a maintenance log for future service planning.